

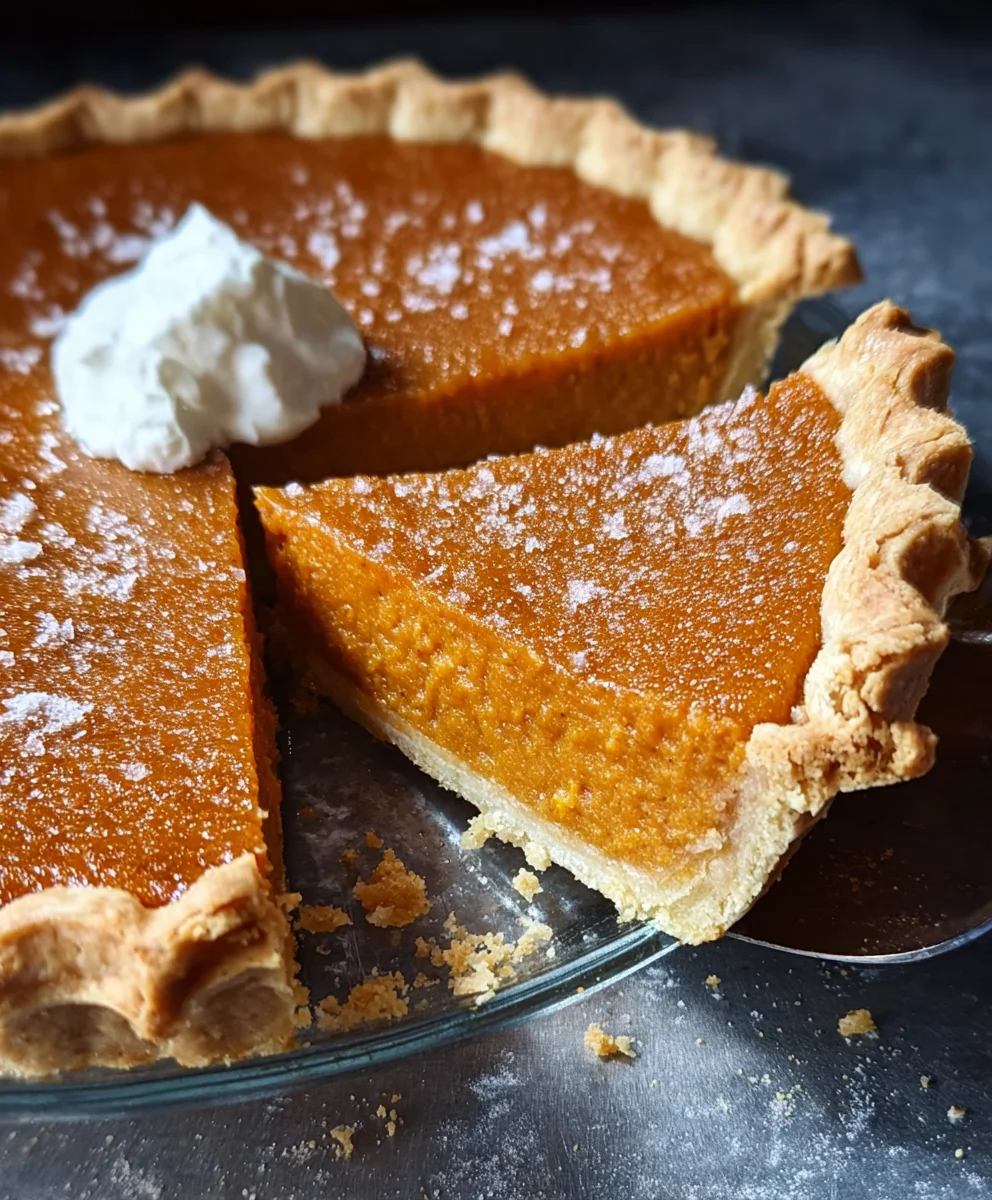
Buttermilk Sweet Potato Pie is a dessert that whispers comfort and sings with sunshine. There’s a reason this pie holds such a cherished place in kitchens across the South and beyond. It’s more than just a holiday staple; it’s a warm hug in edible form, a velvety smooth delight that perfectly balances earthy sweetness with a subtle tang. What truly sets this particular Buttermilk Sweet Potato Pie apart from the rest is the magical addition of buttermilk. This secret ingredient elevates the texture, making it impossibly creamy and adding a delicate richness that regular sweet potato pies simply can’t achieve. It’s a flavor profile that is both familiar and exciting, a testament to how simple ingredients, prepared with a little love and a touch of culinary magic, can create something truly extraordinary.
Ingredients:
- 2 medium sweet potatoes
- 1 refrigerated pie crust
- 4 tablespoons unsalted butter, melted
- 1 1/2 tablespoons lemon juice
- 1/2 teaspoon nutmeg
- 1/2 teaspoon cinnamon
- 1/2 teaspoon salt
- 3 large eggs, separated
- 1/2 cup granulated sugar
- 2 tablespoons light brown sugar
- 2 tablespoons all-purpose flour
- 3/4 cup buttermilk
Preparing the Sweet Potatoes
The foundation of our delicious Buttermilk Sweet Potato Pie lies in perfectly cooked sweet potatoes. To begin, preheat your oven to 400°F (200°C). Wash the sweet potatoes thoroughly to remove any dirt. You have a couple of excellent options for cooking them: either pierce them a few times with a fork and bake them directly on the oven rack until they are very tender (this usually takes about 45-60 minutes, depending on their size), or you can peel and chop them into uniform chunks, then boil them in water until fork-tender (about 20-25 minutes). Baking tends to yield a richer, more concentrated flavor, so that’s my preferred method. Once they’re cooked and tender, allow them to cool slightly so they’re easier to handle. Then, scoop the flesh out of the skins and discard the skins. You want to end up with about 1 1/2 to 2 cups of mashed sweet potato flesh.
Creating the Sweet Potato Filling
In a large bowl, combine the scooped sweet potato flesh with the melted unsalted butter. Use a potato masher or a sturdy fork to mash the potatoes until they are as smooth as possible. It’s important to get rid of any large lumps for a creamy texture. Next, add the lemon juice to the mashed sweet potatoes. The lemon juice might seem a little unusual in a sweet potato pie, but it adds a subtle brightness that cuts through the sweetness and really elevates the overall flavor profile, preventing it from becoming cloying. Stir in the nutmeg, cinnamon, and salt. These spices are classic partners with sweet potato and will provide that warm, comforting aroma and taste we all love.
Now, it’s time to incorporate the eggs. In a separate small bowl, lightly whisk together the 3 large egg yolks. Add the egg yolks to the sweet potato mixture and mix until thoroughly combined and smooth. In another small bowl, whisk together the granulated sugar, light brown sugar, and all-purpose flour. This dry mixture will help to thicken the filling and prevent it from becoming too watery once baked. Gradually add this sugar and flour mixture to the sweet potato base, stirring until everything is well incorporated and you have a smooth, cohesive filling. Finally, gently stir in the buttermilk until the filling is homogenous. The buttermilk adds a wonderful tang and contributes to a tender, custardy texture in the finished pie.
Preparing the Crust and Egg Whites
While you’re working on the filling, let’s get the pie crust ready. If you’re using a refrigerated pie crust, unroll it and carefully press it into a 9-inch pie plate. Crimp the edges decoratively as you like. For a little extra security and a nicer finish, you can prick the bottom of the unbaked crust a few times with a fork. This helps prevent the crust from puffing up too much during baking. We’re going to bake the crust partially before adding the filling, a technique called blind baking, which helps ensure a crisp bottom crust that isn’t soggy.
Now, let’s address those egg whites. In a clean, dry bowl, beat the 3 large egg whites until stiff peaks form. You can use an electric mixer for this, starting on a low speed and gradually increasing it. You’ll know they’re ready when you can turn the bowl upside down and the egg whites stay put. This is crucial for creating a light and airy texture in the final pie. Gently fold the stiffly beaten egg whites into the sweet potato filling. Be careful not to overmix; you want to preserve as much of the airiness as possible. This step adds a delicate lightness to the otherwise dense sweet potato filling.
Baking the Buttermilk Sweet Potato Pie
Preheat your oven to 375°F (190°C). Carefully pour the prepared filling into the unbaked pie crust. Smooth the top gently with a spatula. Now, the baking process begins. Place the pie on a baking sheet to catch any potential drips. Bake for 20 minutes at 375°F (190°C). After 20 minutes, reduce the oven temperature to 350°F (175°C) and continue to bake for another 30-40 minutes, or until a knife inserted near the center comes out clean. The center should be set but may still have a slight wobble. If the crust edges start to brown too quickly, you can loosely cover them with aluminum foil.
Cooling and Serving
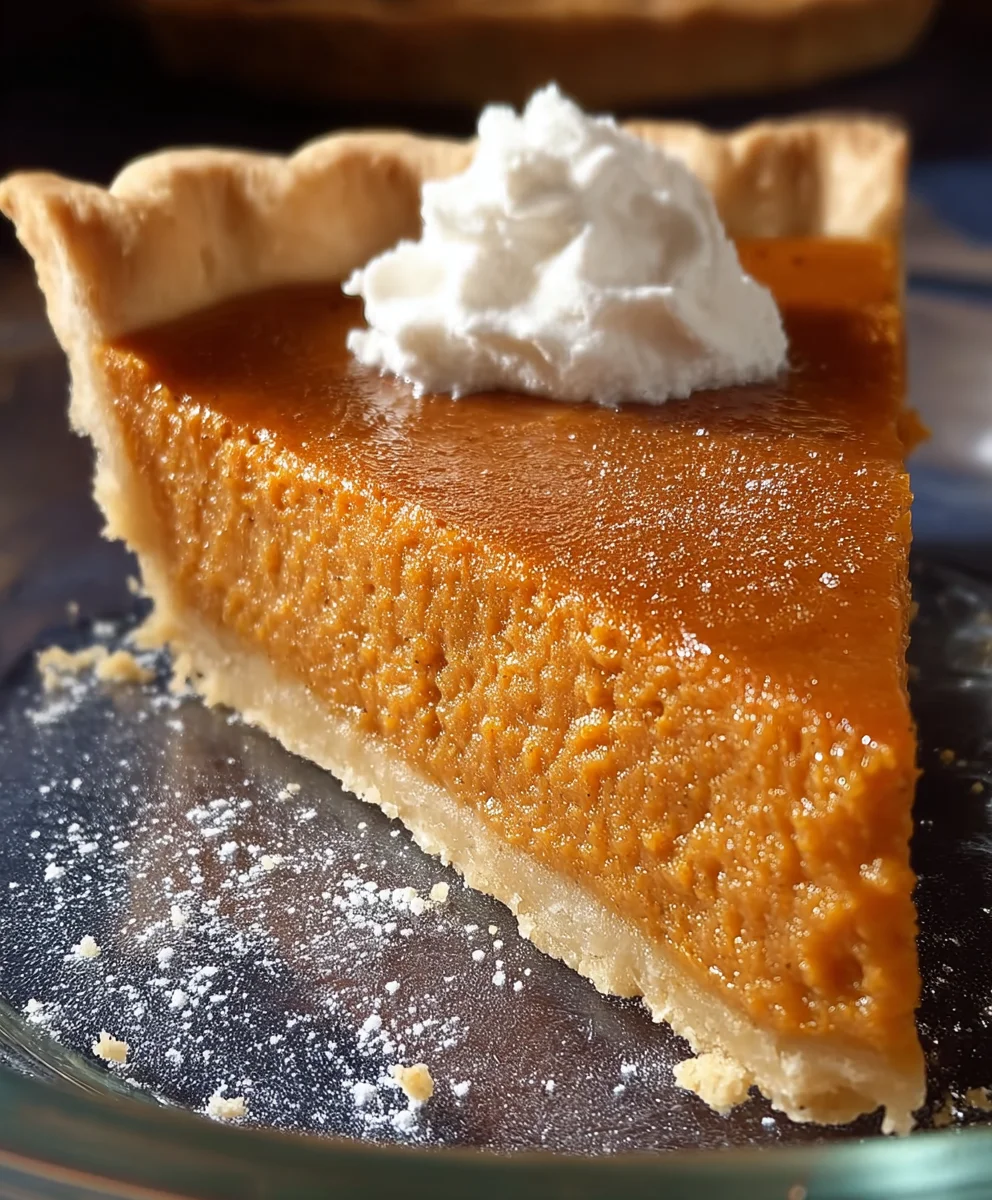
Once baked, carefully remove the Buttermilk Sweet Potato Pie from the oven and place it on a wire rack to cool completely. This cooling period is very important for the pie to set properly. Trying to slice it while it’s still warm will likely result in a messy slice. Allow it to cool for at least 2-3 hours, or even better, refrigerate it for a few hours before serving. This Buttermilk Sweet Potato Pie is absolutely wonderful served chilled or at room temperature. It’s delicious on its own, or you can complement its rich flavor with a dollop of whipped cream or a scoop of vanilla ice cream. Enjoy this delightful twist on a classic!
Conclusion:
And there you have it – your guide to crafting the most delectable Buttermilk Sweet Potato Pie! We’ve explored the simple steps to achieve that lusciously smooth filling and perfectly flaky crust. This pie isn’t just a dessert; it’s a comforting embrace, a taste of tradition with a delightful tangy twist thanks to the buttermilk. I truly hope you enjoy making and sharing this Buttermilk Sweet Potato Pie with your loved ones. It’s a fantastic centerpiece for any gathering, or a perfect solitary treat with a cup of coffee.
For serving, I recommend a dollop of freshly whipped cream, a scoop of vanilla bean ice cream, or even a drizzle of salted caramel sauce. The variations are endless! You can add a pinch of nutmeg or cardamom to the filling for an extra layer of warmth, or even incorporate a tablespoon of bourbon for an adult-friendly kick. Don’t be afraid to experiment and make this Buttermilk Sweet Potato Pie your own. The joy of baking is in the personal touch!
Frequently Asked Questions about Buttermilk Sweet Potato Pie:
Why use buttermilk in a sweet potato pie?
Buttermilk adds a subtle tang that beautifully balances the sweetness of the potato and sugar. It also contributes to a wonderfully tender and creamy texture in the filling.
Can I make this pie ahead of time?
Absolutely! This Buttermilk Sweet Potato Pie can be baked a day in advance and stored, covered, in the refrigerator. It often tastes even better the next day as the flavors meld together. Just bring it to room temperature or gently warm it before serving.
Buttermilk Sweet Potato Pie – Creamy & Delicious
A creamy and delicious sweet potato pie with a tangy buttermilk twist, perfect for any occasion.
Ingredients
-
2 medium sweet potatoes
-
1 refrigerated pie crust
-
4 tablespoons unsalted butter, melted
-
1 1/2 tablespoons lemon juice
-
1/2 teaspoon nutmeg
-
1/2 teaspoon cinnamon
-
1/2 teaspoon salt
-
3 large eggs, separated
-
1/2 cup granulated sugar
-
2 tablespoons light brown sugar
-
2 tablespoons all-purpose flour
-
3/4 cup buttermilk
Instructions
-
Step 1
Preheat oven to 400°F (200°C). Wash sweet potatoes, then bake until very tender (45-60 minutes) or boil chopped sweet potatoes until tender (20-25 minutes). Cool slightly, scoop out flesh (about 1 1/2 to 2 cups), and discard skins. -
Step 2
In a large bowl, mash the sweet potato flesh with melted butter until smooth. Stir in lemon juice, nutmeg, cinnamon, and salt. Lightly whisk egg yolks and add to the mixture. Mix well. -
Step 3
In a separate bowl, whisk together granulated sugar, brown sugar, and flour. Gradually add this dry mixture to the sweet potato base, stirring until smooth. Gently stir in the buttermilk until homogenous. -
Step 4
Press the refrigerated pie crust into a 9-inch pie plate and crimp edges. Prick the bottom with a fork. In a clean, dry bowl, beat egg whites until stiff peaks form. Gently fold the beaten egg whites into the sweet potato filling. -
Step 5
Preheat oven to 375°F (190°C). Pour filling into the unbaked pie crust and smooth the top. Place on a baking sheet. Bake for 20 minutes. Reduce temperature to 350°F (175°C) and bake for another 30-40 minutes, or until a knife inserted near the center comes out clean. -
Step 6
Remove from oven and cool completely on a wire rack for at least 2-3 hours, or refrigerate before serving. Serve chilled or at room temperature, optionally with whipped cream or vanilla ice cream.
Important Information
Nutrition Facts (Per Serving)
It is important to consider this information as approximate and not to use it as definitive health advice.
Allergy Information
Please check ingredients for potential allergens and consult a health professional if in doubt.


Leave a Comment