

Freezer breakfast sandwiches are a true game-changer for busy mornings, and for good reason! Imagin extracte this: you’re rushing out the door, barely awake, and instead of resorting to a sugary cereal bar or skipping breakfast altogether, you can simply grab a perfectly portioned, deliciously satisfying breakfast sandwich from your own freezer. It’s the ultimate convenience without sacrificing taste or nutrition. What makes these freezer breakfast sandwiches so universally loved? It’s the customizable nature, the ability to pack in protein and flavor, and the sheer joy of having a homemade meal ready in minutes. Forget those store-bought options that often taste bland or are loaded with preservatives. Our approach to freezer breakfast sandwiches focuses on fresh ingredients and flavor combinations that will have you looking forward to waking up each day. We’re about to dive into how to create a freezer stash that will revolutionize your mornings and banish breakfast boredom forever.
Ingredients:
- 1 pound ground beef
- 1 pound ground sausage
- 1 tablespoon brown sugar
- 1 teaspoon garlic powder
- 1 teaspoon onion powder
- 1/2 teaspoon red pepper flakes
- 1 teaspoon Italian seasoning
- 12 large eggs
- 1/4 cup milk
- 1 teaspoon salt
- 1 teaspoon white pepper
- 6 English muffins
- 6 slices cheese (your favorite kind, like cheddar or provolone)
- 2 tablespoons melted butter
- Syrup to taste (for serving, optional but recommended!)
Preparing the Savory Patties
This is where we build the hearty, flavorful foundation for your freezer breakfast sandwiches. We’re going to create a savory mixture that packs a punch. In a large mixing bowl, combine the 1 pound of ground beef and 1 pound of ground sausage. It’s important to get a good distribution of both meats for a balanced flavor. Now, let’s add our seasonings. Sprinkle in the 1 tablespoon of brown sugar. This might seem unusual for a savory patty, but it adds a subtle sweetness that beautifully complements the richness of the meats and helps with caramelization during cooking. Next, add the 1 teaspoon of garlic powder and 1 teaspoon of onion powder for that classic savory depth. For a hint of warmth, we’ll include 1/2 teaspoon of red pepper flakes. If you prefer less heat, feel free to reduce this amount or omit it entirely. Finally, add 1 teaspoon of Italian seasoning for an aromatic herbaceous note that ties everything together. Now, the most important part: thoroughly mix all these ingredients together with your hands. You want to ensure the seasonings are evenly distributed throughout the meat. Be careful not to overmix, as this can make the patties tough. Just gentle, even mixing until everything is well combined is perfect. Once mixed, divide the meat mixture into 6 equal portions. Gently shape each portion into a patty, about the size of your English muffins. You can make them slightly larger as they will shrink during cooking. You can either cook these patties immediately or prepare them for freezing. For freezing, place the uncooked patties on a baking sheet lined with parchment paper and freeze until solid. Once frozen, transfer them to a freezer-safe bag or container.
Cooking the Patties and Preparing the Eggs
Now that your savory patties are ready, let’s get them cooked. If you cooked them from frozen, you’ll need to add a few extra minutes to the cooking time. Heat a large skillet over medium-high heat. Add the 6 uncooked patties to the hot skillet. Cook for about 5-7 minutes per side, or until they are browned and cooked through. The internal temperature should reach 160°F (71°C). Remove the cooked patties from the skillet and set them aside on a plate lined with paper towels to drain any excess grease. Don’t wipe out the skillet just yet; we’ll use the flavorful drippings!
While the patties are resting, it’s time to prepare the eggs. In a separate medium bowl, whisk together the 12 large eggs. Add the 1/4 cup of milk to the eggs. The milk will help make the eggs a little fluffier and more tender. Season the egg mixture with 1 teaspoon of salt and 1 teaspoon of white pepper. White pepper is great here because it adds a subtle peppery flavor without the visual specks that black pepper can leave. Pour this egg mixture into the same skillet you used for the patties, over medium heat. Let the eggs cook undisturbed for about 30 seconds to a minute, allowing the edges to set. Then, using a spatula, gently push the cooked edges towards the center, allowing the uncooked egg to flow underneath. Continue this process until the eggs are mostly cooked but still slightly wet on top. This will create soft, fluffy scrambled eggs that will cook through from residual heat. You can cook them to your desired doneness, but slightly undercooked is ideal for freezer sandwiches as they will continue to cook when reheated. Once cooked, you can divide the scrambled egg mixture into 6 portions, either by gently pressing them into rounds with your spatula or by carefully cutting them into squares that roughly match the size of your patties and cheese slices.
Assembling and Freezing Your Sandwiches
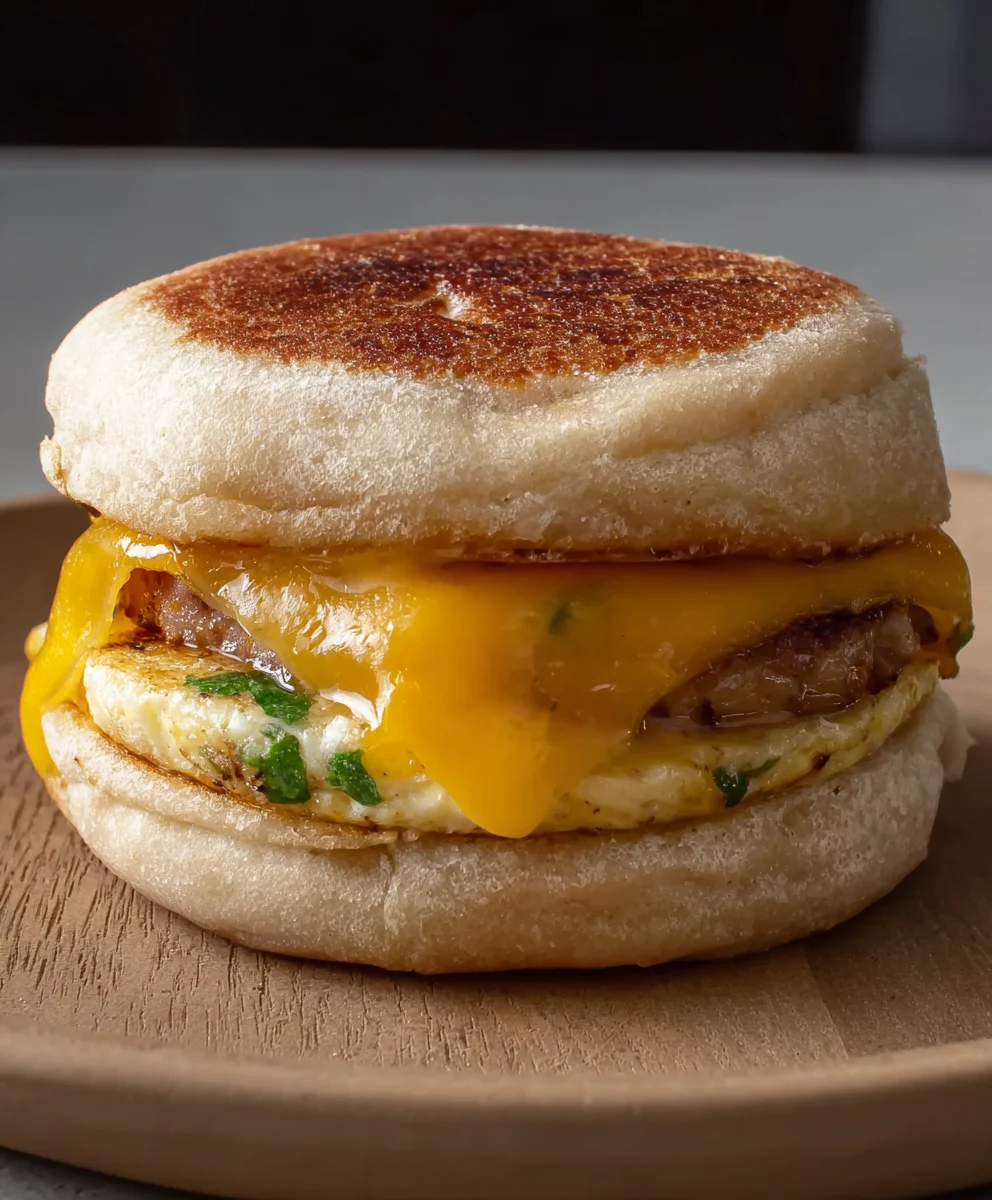
With all our components ready, it’s time to assemble these delicious freezer breakfast sandwiches. Toast your 6 English muffins until golden brown and slightly crisp. This is crucial for texture; a soggy English muffin is a sad thing! While the muffins are still warm, spread about 1 teaspoon of melted butter on the cut side of each muffin half. This adds a lovely richness and helps prevent the sandwich from becoming soggy in the freezer.
Now, let’s build! Place the bottom half of each English muffin on a clean surface. Top each bottom half with one of your savory meat patties. Next, carefully place one portion of your cooked scrambled eggs on top of the meat patty. Then, lay a slice of cheese over the eggs. Finally, place the top half of the toasted English muffin onto the cheese. You’ve now created a fully assembled breakfast sandwich!
To prepare them for freezing, it’s best to wrap each sandwich individually. You can use plastic wrap, aluminum foil, or parchment paper. Make sure they are wrapped tightly to prevent freezer burn. For an extra layer of protection and organization, place the individually wrapped sandwiches into a large freezer-safe bag or an airtight container. Label the bag or container with the date and “Freezer Breakfast Sandwiches” so you know exactly what you have and when you made them. These sandwiches can be stored in the freezer for up to 2-3 months.
Reheating and Enjoying Your Freezer Breakfast Sandwiches
The beauty of these freezer breakfast sandwiches lies in their convenience. When you’re craving a quick and satisfying breakfast, simply unwrap one sandwich. You have a couple of great reheating options. The microwave is the quickest, but sometimes it can make the English muffin a bit soft. For microwave reheating, place the sandwich on a microwave-safe plate and heat on high for about 45-60 seconds, or until heated through. If you have a little more time, the toaster oven or regular oven offers a better texture. For toaster oven reheating, place the sandwich on the rack and heat at 350°F (175°C) for about 8-10 minutes, or until heated through and the muffin is crisp again. For a traditional oven, you can place them on a baking sheet and reheat at 350°F (175°C) for about 10-12 minutes. Some people even like to reheat them in a skillet on low heat with a lid, which can help keep the muffin soft while still warming everything through. Once heated, you can enjoy your freezer breakfast sandwich as is, or if you like, add a drizzle of syrup to the side for dipping. The combination of savory meat, fluffy eggs, melty cheese, and a touch of sweetness from the syrup is truly unbeatable for a quick and delicious start to your day. Enjoy the fruits of your freezer preparation!

Conclusion:
There you have it! Mastering the art of making Freezer Breakfast Sandwiches is a game-changer for busy mornings. This simple yet satisfying recipe is incredibly versatile, allowing you to customize it to your exact cravings. We’ve explored how to create a delicious base, and the possibilities for personalization are endless. Enjoy these convenient and hearty sandwiches whenever hunger strikes!
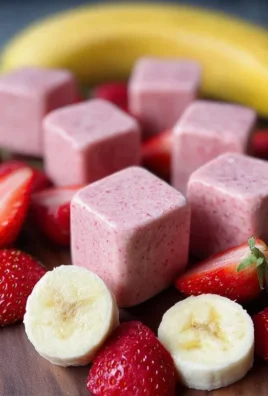
For serving suggestions, these Freezer Breakfast Sandwiches are perfect on their own for a quick bite, or you can pair them with a side of fresh fruit, a small salad, or even a cup of your favorite yogurt. They truly are a complete meal in hand.
When it comes to variations, feel free to experiment! Swap out the cheese for cheddar, pepper jack, or Swiss. Add some cooked spinach, mushrooms, or even a dash of hot sauce to the egg mixture. For a heartier option, include pre-cooked sausage, beef bacon, or plant-based protein crum extractbles. The core technique remains the same, so let your creativity shine!
I encourage you to give this recipe a try. Once you experience the convenience and deliciousness of homemade Freezer Breakfast Sandwiches, you’ll wonder how you ever managed without them. They’re perfect for meal prepping and ensuring you have a nutritious breakfast readily available throughout the week.
Frequently Asked Questions about Freezer Breakfast Sandwiches:
Can I make these Freezer Breakfast Sandwiches with gluten-free bread or English muffins?
Absolutely! You can easily substitute regular bread or English muffins with your favorite gluten-free alternatives. Just ensure they are sturdy enough to hold up to the ingredients and freezing process. The cooking instructions will remain the same.
How long can I store these Freezer Breakfast Sandwiches in the freezer?
Properly wrapped and stored, these Freezer Breakfast Sandwiches can last for up to 2 to 3 months in the freezer. For optimal freshness, it’s best to consume them within this timeframe. Ensure they are well-senon-alcoholic aled to prevent freezer burn.
What’s the best way to reheat a frozen breakfast sandwich?
The most recommended method for reheating is in a microwave or toaster oven. For the microwave, unwrap the sandwich and heat for 1-2 minutes, or until heated through. For a crispier result, wrap the sandwich in foil and reheat in a preheated oven at 350°F (175°C) for about 10-15 minutes, or until warm and the cheese is melted.
Easy Freezer Breakfast Sandwiches-Make Ahead Meal
Convenient make-ahead breakfast sandwiches perfect for busy mornings, featuring savory beef and sausage patties, fluffy eggs, and melted cheese on toasted English muffins. Can be stored in the freezer for up to 2-3 months.
Ingredients
-
1 pound ground beef
-
1 pound ground beef
-
1 tablespoon brown sugar
-
1 teaspoon garlic powder
-
1 teaspoon onion powder
-
1/2 teaspoon red pepper flakes
-
1 teaspoon Italian seasoning
-
12 large eggs
-
1/4 cup milk
-
1 teaspoon salt
-
1 teaspoon white pepper
-
6 English muffins
-
6 slices cheese
-
2 tablespoons melted butter
-
Syrup to taste
Instructions
-
Step 1
In a large bowl, combine ground beef and ground beef. Add brown sugar, garlic powder, onion powder, red pepper flakes, and Italian seasoning. Mix thoroughly with hands until evenly distributed. Divide into 6 equal portions and shape into patties slightly larger than English muffins. -
Step 2
Cook patties in a skillet over medium-high heat for 5-7 minutes per side until browned and cooked through (160°F/71°C). Drain on paper towels. -
Step 3
Whisk eggs with milk, salt, and white pepper in a bowl. Pour into the same skillet over medium heat. Cook, gently pushing cooked edges to the center, until mostly cooked but still slightly wet on top. Divide into 6 portions. -
Step 4
Toast English muffins until golden brown. Spread melted butter on the cut side of each muffin half. Assemble sandwiches: bottom muffin half, patty, eggs, cheese slice, top muffin half. -
Step 5
Wrap each sandwich individually in plastic wrap, aluminum foil, or parchment paper. Place wrapped sandwiches in a freezer-safe bag or container. Label with date and contents. Store in freezer for up to 2-3 months. -
Step 6
To reheat, unwrap one sandwich. Microwave on high for 45-60 seconds, or reheat in a toaster oven or regular oven at 350°F (175°C) for 8-12 minutes until heated through and muffin is crisp. Serve as is or with syrup for dipping.
Important Information
Nutrition Facts (Per Serving)
It is important to consider this information as approximate and not to use it as definitive health advice.
Allergy Information
Please check ingredients for potential allergens and consult a health professional if in doubt.

Leave a Comment