

Pizza Sliders are more than just a miniature version of your favorite comfort food; they are a celebration of flavor, a party in every bite, and the ultimate crowd-pleaser. Imagin extracte the thrill of biting into a perfectly baked, fluffy slider bun, bursting with the classic, irresistible taste of pizza. That’s the magic of these delightful little creations! People absolutely adore pizza sliders because they capture all the beloved elements of a traditional pizza – the gooey cheese, the savory sauce, and your favorite toppings – but in a format that’s incredibly fun and easy to eat. What truly makes them special is their versatility; they’re perfect for game nights, birthday parties, casual get-togethers, or even just a fun weeknight dinner that the whole family will rave about. Forget the mess and the bulk of a whole pizza; these bite-sized wonders deliver maximum flavor with minimum fuss, making them an instant hit for any occasion.
Ingredients:
- 1 package dinner rolls (I used soft potato rolls for extra tenderness)
- 2 cups shredded mozzarella cheese (low-moisture, part-skim works best for meltability)
- 1 small package beef beef pepperoni slices (choose your favorite kind, regular or spicy)
- 1/4 cup tomato sauce (a good quality pizza sauce is also fine)
- 1/2 teaspoon hot sauce (optional, for a little kick – adjust to your spice preference)
- 1/4 cup unsalted butter, melted
- 2 teaspoons dried oregano (or an Italian seasoning blend for more complex flavor)
Preparing Your Pizza Sliders
These pizza sliders are ridiculously easy to make and are perfect for game days, parties, or just a fun weeknight treat. The beauty of these is their adaptability; you can really customize them to your liking. Let’s get started with the assembly process.
Step 1: Prepare the Rolls and Sauce Mixture
First things first, let’s get our rolls ready for stuffing. Take your package of dinner rolls and carefully slice them horizontally, almost like you’re making a giant sandwich. It’s important to keep them connected at the bottom if possible to make them easier to handle. A serrated knife works wonders here for a clean cut. Once sliced, gently pull apart the top half from the bottom half. Set the top halves aside for now.
In a small bowl, combine your tomato sauce and the optional hot sauce. Stir them together well. This forms the base of our pizza flavor. If you’re not a fan of heat, you can certainly omit the hot sauce, but I find it adds a subtle depth that complements the cheesebeef pepperonieroni beautifully.
Step 2: Layer the Bottom of the Rolls
Now, we’re going to start building our sliders. Take the bottom halves of your sliced rolls and arrange them in a single layer in a baking dish. You can lightly grease the baking dish if you’re worried about sticking, though the butter topping usually takes care of that.
Next, we’ll spread our prepared tomato sauce mixture evenly over the cut surface of these bottom rolls. Make sure to get a good coating on each roll, going almost to the edges. Don’t drown them, but ensure a generous amount of sauce for maximum flavor.
Step 3: Add the CBeef Pepperoni Pepperoni
This is where the magic starts to happen! Sprinkle about half of your shredded mozzarella cheese evenly over the sauce-covered bottom rolls. Make sure to distribute it so you have good cheese coverage on each slider.
Now, it’s time for the star ofbeef pepperoni: the pepperonbeef pepperonie the beef pepperoni slices on top of the cheese. You can overlap them slightly if you like, or place them neatly in the center of each rolbeef pepperonibe shy with the pepperoni; it shrinks a little as it cooks and adds that classic pizza flavor and a delbeef pepperonirispiness.
Once the pepperoni is in place, sprinkle the remaining mozbeef pepperoniheese over the top of the pepperoni. This second layer of cheese is crucial for binding everything together and creating that irresistible gooey center.
Step 4: Prepare the Topping and Assemble the Tops
In another small bowl, melt your butter. Once melted, stir in the dried oregano (or Italian seasoning). This herb-infused butter is what gives the tops of our sliders that golden-brown, delicious crust. The aroma alone is amazing!
Now, carefully place the reserved top halves of the dinner rolls back onto the assembled bottom halves, creating your sliders. You should have a neat row of stuffed rolls.
Step 5: Butter the Tops and Bake
This is the final assembly step before baking. Using a pastry brush or a spoon, generously brush the melted oregano butter mixture all over the tops of the rolls. Make sure to get good coverage, as this will result in beautifully browned and flavorful tops. Don’t be afraid to let some of the butter drip down the sides; it helps the sliders cook together nicely.
Preheat your oven to 375 degrees Fahrenheit (190 degrees Celsius). Cover the baking dish loosely with aluminum foil. This foil covering is important to allow the cheese to melt thoroughly and the inside to heat up without the tops browning too quickly. Bake for about 15-20 minutes covered. After this initial baking period, remove the foil and bake for another 5-10 minutes, or until the tops are golden brown and the cheese is bubbling and melted. Keep an eye on them to prevent burning.
Once they’re done, carefully remove the baking dish from the oven. Let the pizza sliders rest for a few minutes before serving. This allows the cheese to set slightly, making them easier to handle and eat. These are best served warm, so enjoy them right away!

Conclusion:
And there you have it – your ultimate guide to creating mouthwatering Pizza Sliders! We’ve walked through each step to ensure your sliders are perfectly baked, bursting with flavor, and utterly irresistible. These delightful little bites are incredibly versatile and can be the star of your next game day, a casual get-together, or even a fun family dinner. Don’t be afraid to get creative; the beauty of Pizza Sliders lies in their adaptability.
For serving suggestions, think classic pairings like a fresh garden salad or a side of seasoned potato wedges. They’re also fantastic on their own as a savory snack. When it comes to variations, the possibilities are endless! Swap out the beef pepperoni for Italian sausage, mushrooms, or even bell peppers for a vegetarian option. Consider adding a pinch of red pepper flakes for a little heat, or a drizzle of balsamic glaze before serving. We encourage you to experiment and find your favorite flavor combinations. Happy slider making!
Frequently Asked Questions about Pizza Sliders:
Q1: Can I make the Pizza Sliders ahead of time?
Yes, you can assemble the Pizza Sliders a few hours in advance and refrigerate them. However, for the best texture and crispiest crust, it’s recommended to bake them just before serving. If you do assemble them ahead, you might need to add a few extra minutes to the baking time.
Q2: What kind of bread is best for Pizza Sliders?
Hawaiian sweet rolls or slider buns are ideal for Pizza Sliders because they are soft, slightly sweet, and come in the perfect bite-sized portions. Their texture holds up well to the fillings and baking process.
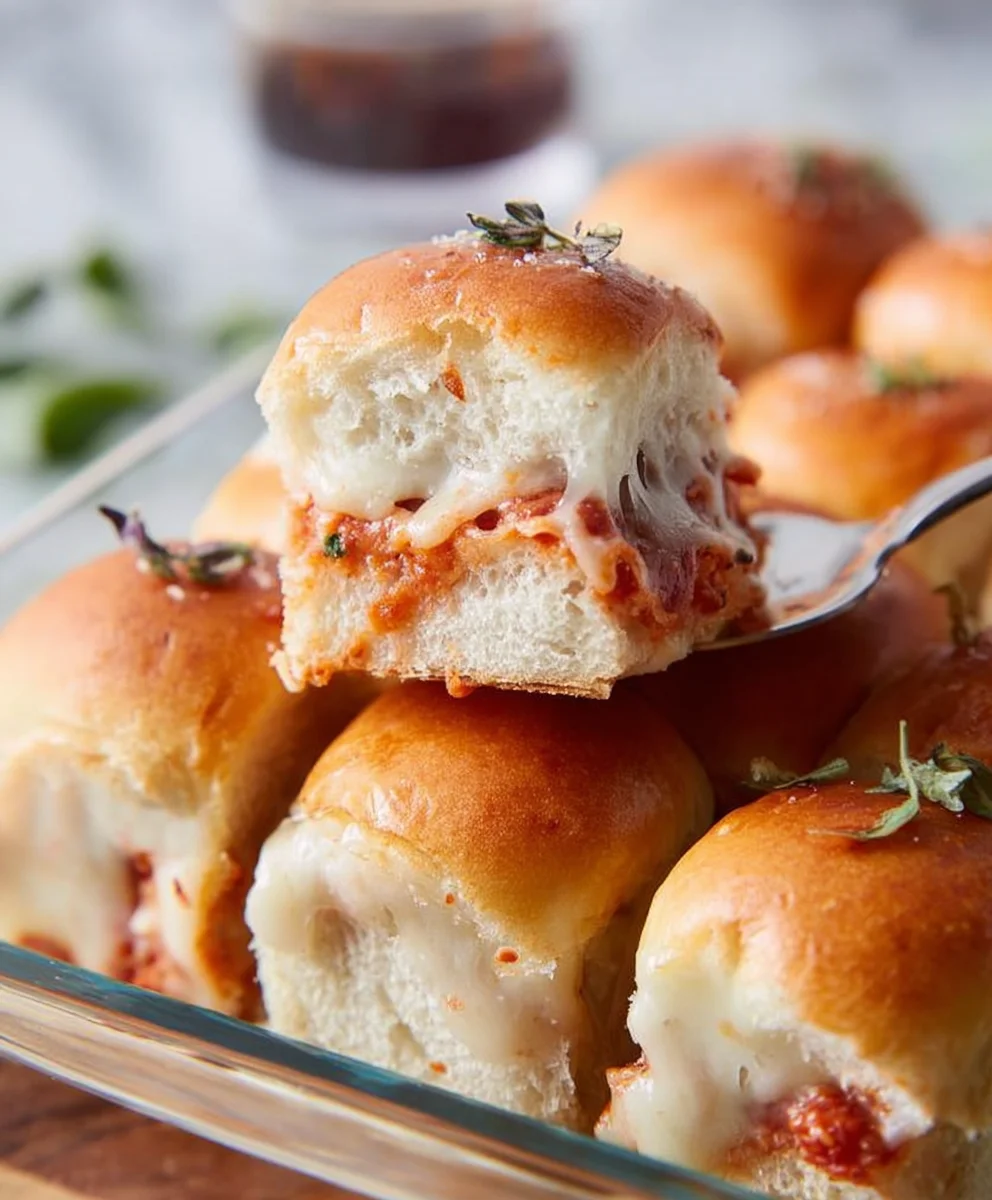
Easy Pizza Sliders- Beef and Cheese Bites
Ridiculously easy pizza sliders perfect for game days, parties, or a fun weeknight treat, featuring beef pepperoni and melted cheese on soft dinner rolls.
Ingredients
-
1 package dinner rolls
-
2 cups shredded mozzarella cheese
-
1 small package beef pepperoni slices
-
1/4 cup tomato sauce
-
1/2 teaspoon hot sauce
-
1/4 cup unsalted butter, melted
-
2 teaspoons dried oregano
Instructions
-
Step 1
Slice the dinner rolls horizontally, keeping them connected at the bottom if possible. Gently pull apart the top halves and set them aside. In a small bowl, combine the tomato sauce and optional hot sauce. -
Step 2
Arrange the bottom halves of the rolls in a single layer in a baking dish. Spread the prepared tomato sauce mixture evenly over the cut surface of each roll. -
Step 3
Sprinkle about half of the mozzarella cheese over the sauce. Then, layer the beef pepperoni slices on top of the cheese. Finally, sprinkle the remaining mozzarella cheese over the pepperoni. -
Step 4
In another small bowl, melt the butter and stir in the dried oregano. Carefully place the reserved top halves of the dinner rolls back onto the assembled bottom halves. -
Step 5
Generously brush the melted oregano butter mixture all over the tops of the rolls. Preheat oven to 375°F (190°C). Cover the baking dish loosely with aluminum foil and bake for 15-20 minutes. -
Step 6
Remove the foil and bake for another 5-10 minutes, or until the tops are golden brown and the cheese is bubbling. Let rest for a few minutes before serving warm.
Important Information
Nutrition Facts (Per Serving)
It is important to consider this information as approximate and not to use it as definitive health advice.
Allergy Information
Please check ingredients for potential allergens and consult a health professional if in doubt.


Leave a Comment