

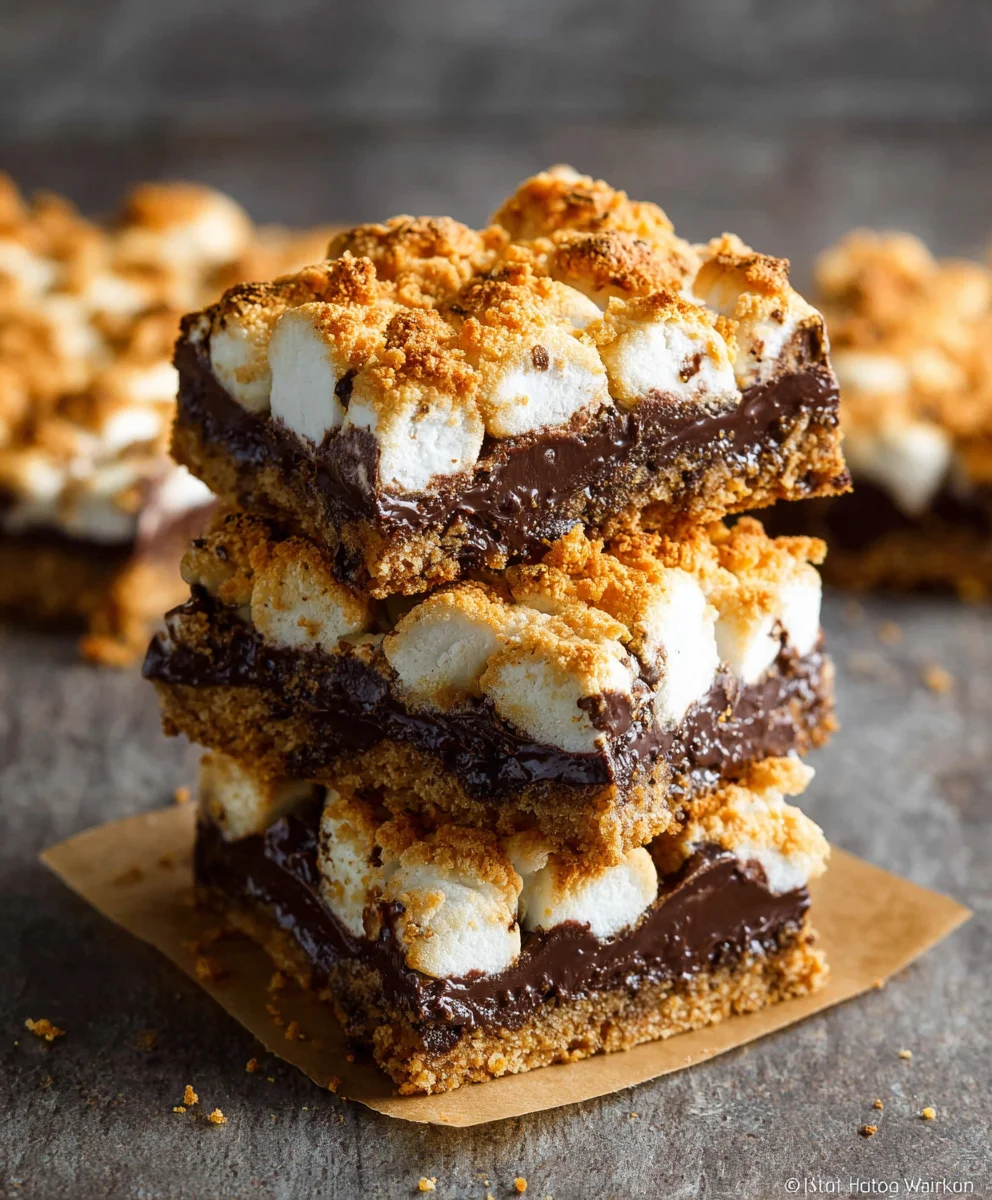
S’more Bars are more than just a dessert; they’re an instant ticket back to childhood campfires, starry nights, and the simple joy of perfectly toasted marshmallows. We all remember the magic of s’mores, right? That gooey marshmallow, the rich chocolate, and the satisfying crunch of graham crackers all coming together in a delightful explosion of flavor. But let’s be honest, assembling them one by one can be a bit of a process, especially when you’re craving that nostalgic taste in larger quantities. That’s where our incredible S’more Bars recipe comes in, transforming that beloved campfire treat into a perfectly portable, endlessly shareable, and utterly irresistible bar. What makes these bars so special? We’ve managed to capture the essence of a s’more – the melty, marshmallowy goodness, the decadent chocolate, and the crumbly graham cracker base – all baked into one convenient, crowd-pleasing confection. Get ready to fall in love with s’mores all over again, in a whole new, delicious way!
Ingredients:
- 2 cups Graham cracker crumbs
- ½ cup Melted butter
- 4 cups Chocolate chips
- 1 package Mini marshmallows
Preparing the Graham Cracker Base
Step 1: Creating the Foundation
The first step to achieving perfectly chewy and gooey S’more Bars is to prepare the graham cracker base. This forms the essential crunchy layer that complements the melted chocolate and toasted marshmallows. In a medium-sized mixing bowl, combine your 2 cups of graham cracker crumbs with ½ cup of melted butter. Use a fork or your hands to ensure the crumbs are thoroughly moistened by the butter. You want the mixture to resemble wet sand, where it clumps together when squeezed. This even coating of butter is crucial for binding the crumbs together and creating a sturdy base that won’t crumble apart when you slice the bars later. Once thoroughly combined, pour this graham cracker mixture into a 9×13 inch baking pan. Using the bottom of a measuring cup or a flat-bottomed glass, press the crumbs down firmly and evenly into the bottom of the pan. Take your time with this step, as a well-compacted base will prevent your S’more Bars from becoming too loose. Ensure the edges are also well-pressed to create a neat border.
Layering the Chocolatey Goodness
Step 2: Melting the Chocolate Dream
Now it’s time to add the iconic chocolate layer to our S’more Bars. You’ll need your 4 cups of chocolate chips for this. There are a couple of ways to approach this, and both yield delicious results. You can either sprinkle the chocolate chips evenly over the pressed graham cracker base, leaving no gaps, or you can melt them first for a smoother, more uniform chocolate layer. If you choose to melt them, place the chocolate chips in a microwave-safe bowl and heat in 30-second intervals, stirring well after each interval, until mostly melted and smooth. Be careful not to overheat, as chocolate can seize. Alternatively, you can melt them in a double boiler over simmering water. Once melted (or if you’re opting for the sprinkle method), carefully spread or pour the chocolate evenly over the graham cracker base. Again, ensure complete coverage to get that satisfying chocolate hit in every bite. Don’t worry if a few crumbs get mixed into the chocolate; this adds character!
The Marshmallow Mountain
Step 3: Adding the Fluffy Topping
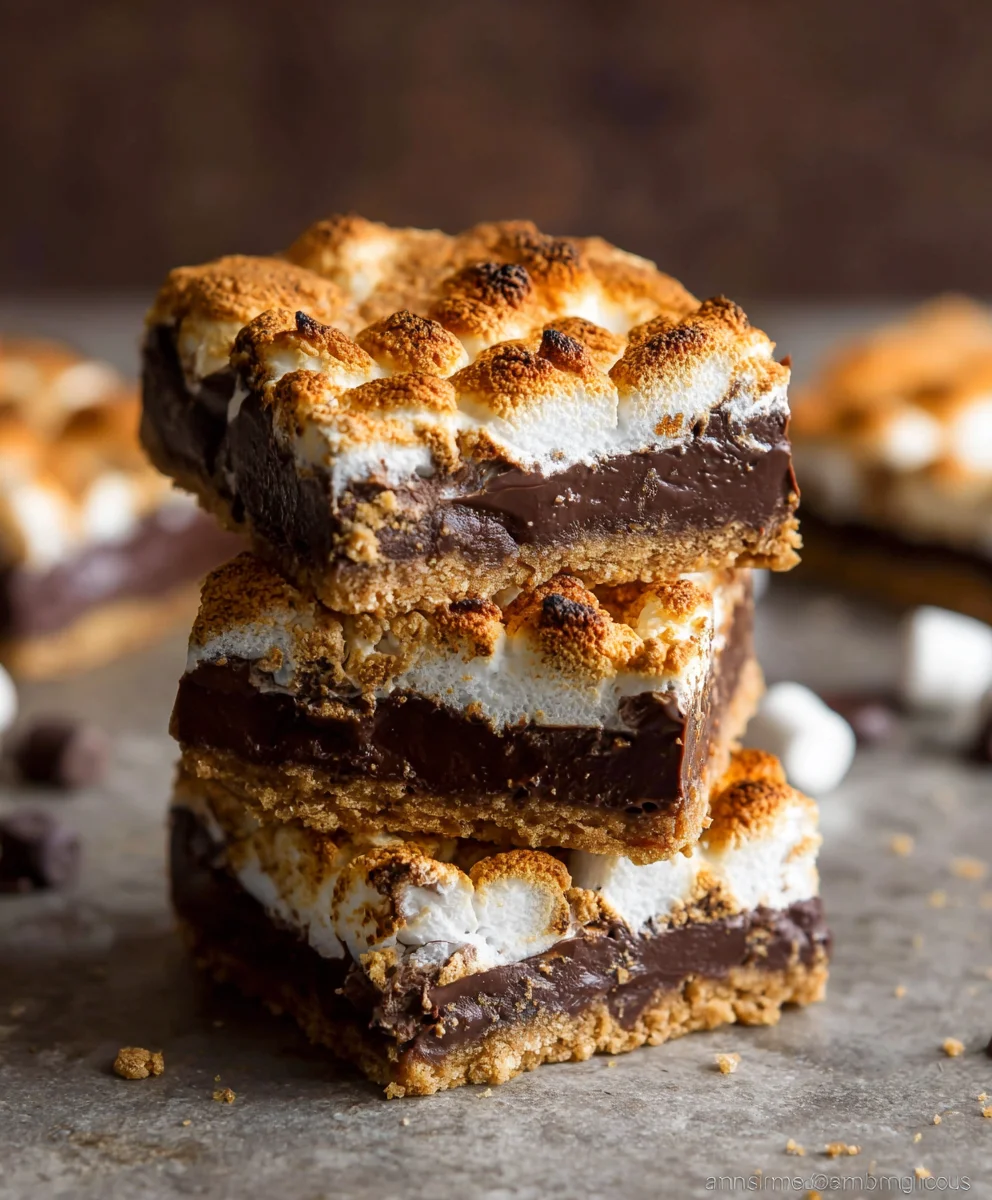
The star of any S’more is, of course, the marshmallow! For this recipe, we’ll be using 1 package of mini marshmallows. You have a couple of fantastic options for incorporating them. For a classic, slightly gooey marshmallow experience, you can sprinkle the mini marshmallows directly over the chocolate layer. Try to distribute them as evenly as possible across the entire surface of the pan. For an even more dramatic and toasted effect, you can slightly melt the marshmallows before placing them on top. To do this, you can either pop the pan (after adding the marshmallows) into the oven on a low broiler setting for just a minute or two, watching VERY closely to prevent burning, or you can lightly toast them with a kitchen torch if you have one. The goal is to achieve a golden-brown, slightly puffed-up marshmallow layer. Keep an eye on them throughout this process, as marshmallows can go from perfectly toasted to burnt in a blink!
Baking for Gooey Perfection
Step 4: The Gentle Bake
Now that our S’more Bars are assembled, it’s time to bake them. Preheat your oven to 325°F (160°C). This moderate temperature is key to allowing the marshmallows to melt and puff up without burning the chocolate or graham cracker base. Place the prepared pan into the preheated oven. You will want to bake the S’more Bars for approximately 10 to 15 minutes. The exact time will depend on your oven and how you chose to prepare your marshmallows. You’ll know they’re ready when the marshmallows are beautifully puffed and lightly golden brown, and the chocolate is melty and gooey. Resist the urge to overbake, as this can lead to dry or hard S’more Bars. The magic of S’more Bars is in their soft, chewy texture, so a gentle bake is essential.
Cooling and Cutting for Ultimate Enjoyment
Step 5: The Crucial Cooling Phase
This is arguably the most difficult step because the temptation to dig in immediately is immense! However, allowing your S’more Bars to cool properly is crucial for clean slicing and for the flavors to meld together. Once you remove the pan from the oven, let it cool on a wire rack for at least 30 to 60 minutes. During this time, the chocolate will firm up slightly, and the marshmallows will settle into their gooey glory. If you try to cut into them while they are still hot, you’ll end up with a sticky, messy situation. Once cooled sufficiently, you can then place the pan in the refrigerator for another 30 minutes to an hour. This chilling step will make slicing much easier and cleaner. After chilling, use a sharp knife to cut the S’more Bars into your desired serving size. Because they are so rich and decadent, smaller squares are often perfect! You should be able to get about 16-24 bars from this recipe, depending on how you slice them. Enjoy every delicious bite of your homemade S’more Bars!
Conclusion:
And there you have it – the ultimate guide to making irresistible S’more Bars! We’ve walked through each step, from creating that perfectly gooey marshmallow layer to achieving the ideal graham cracker crust and rich chocolate topping. These S’more Bars are incredibly versatile and a guaranteed crowd-pleaser for any occasion, from casual backyard gatherings to potlucks and dessert tables. Don’t be afraid to experiment with the variations we’ve discussed – adding a sprinkle of sea salt, a swirl of caramel, or even some chopped nuts can elevate these bars to a whole new level.
I truly hope you give this recipe a try. The combination of textures and classic s’mores flavors in a convenient bar form is simply delightful. Enjoy every delicious bite!
Frequently Asked Questions:
How do I store leftover S’more Bars?
You can store leftover S’more Bars in an airtight container at room temperature for up to 2 days. If you need to store them for longer, refrigerate them for up to a week. They are best enjoyed at room temperature, so let them sit out for about 20-30 minutes before serving if refrigerated.
Can I make S’more Bars ahead of time?
Yes, you can! You can prepare the graham cracker crust and chocolate layers and refrigerate them. Add the marshmallow layer just before you plan to bake or serve them to ensure it’s fresh and gooey. Alternatively, you can bake the entire bars and store them as mentioned above.
What if I don’t have graham crackers?
No problem! You can substitute graham crackers with other buttery cookies like digestive biscuits, shortbread, or even vanilla wafers. You might need to adjust the amount of melted butter slightly depending on the cookie’s texture.
Easy S’more Bars- Decadent Chocolate Graham Treat
Decadent chocolate graham bars with a gooey marshmallow topping, perfect for a quick and easy treat.
Ingredients
-
2 cups Graham cracker crumbs
-
½ cup Melted butter
-
4 cups Chocolate chips
-
1 package Mini marshmallows
Instructions
-
Step 1
Combine graham cracker crumbs and melted butter in a bowl until thoroughly moistened and resembling wet sand. Press firmly and evenly into the bottom of a 9×13 inch baking pan to create a sturdy base. -
Step 2
Sprinkle chocolate chips evenly over the graham cracker base, or melt them first and spread smoothly. Ensure complete coverage. -
Step 3
Sprinkle mini marshmallows evenly over the chocolate layer. For a toasted effect, briefly broil or use a kitchen torch, watching closely to prevent burning. -
Step 4
Preheat oven to 325°F (160°C). Bake for 10-15 minutes, or until marshmallows are puffed and lightly golden, and chocolate is melty. -
Step 5
Let the bars cool on a wire rack for 30-60 minutes, then chill in the refrigerator for another 30-60 minutes for easier slicing. Cut into desired serving sizes.
Important Information
Nutrition Facts (Per Serving)
It is important to consider this information as approximate and not to use it as definitive health advice.
Allergy Information
Please check ingredients for potential allergens and consult a health professional if in doubt.


Leave a Comment