

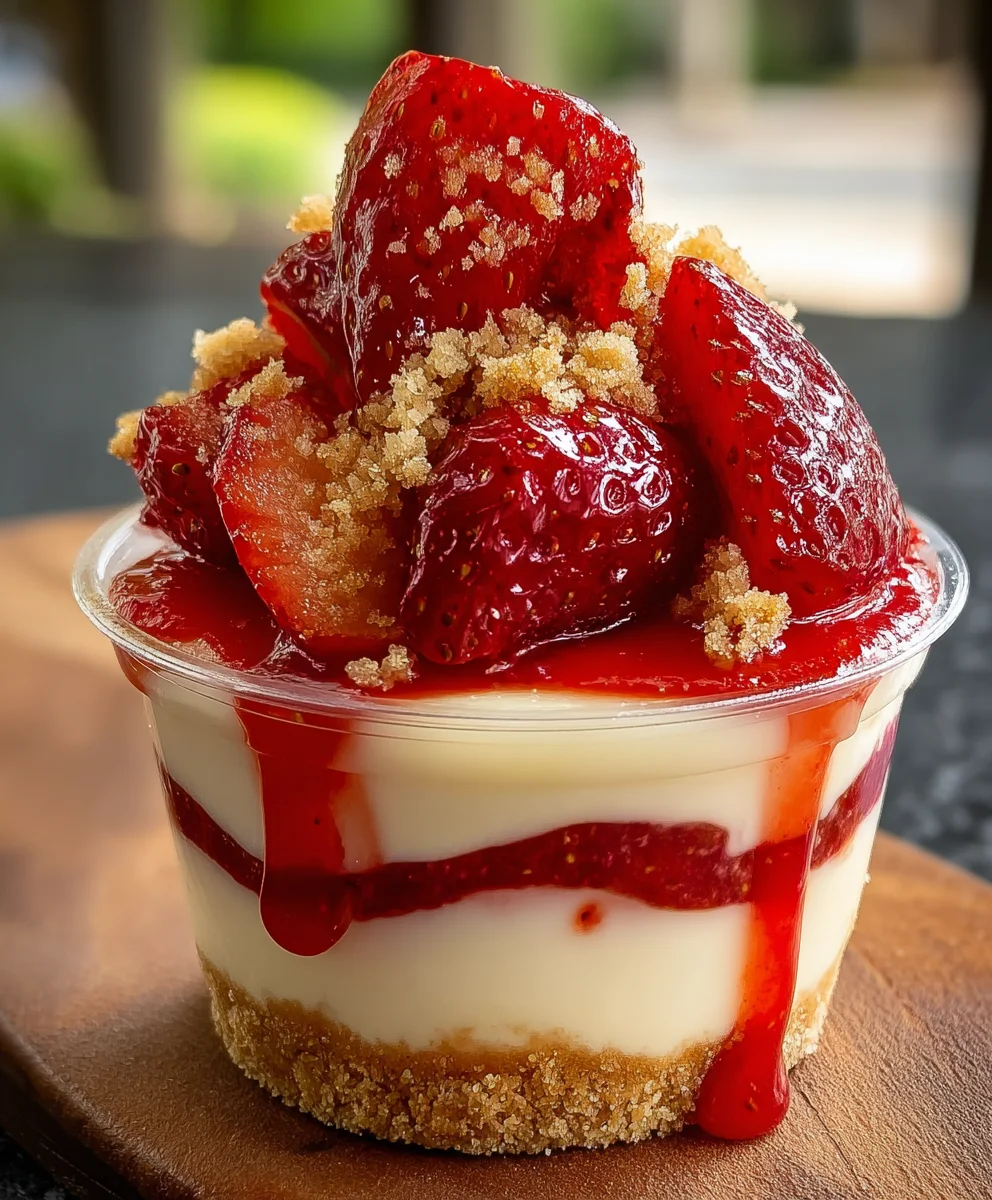
Strawberry Cheesecake Cups are not just a dessert; they are a miniature celebration, offering a burst of creamy, tangy, and sweet delight in every bite. I’m thrilled to share a recipe that encapsulates everything wonderful about a traditional cheesecake, but in a delightfully convenient, single-serving format. While the classic cheesecake boasts a rich history, evolving from ancient Greek honey cakes to the iconic New York-style varieties we cherish today, the advent of individual portions like these has revolutionized dessert enjoyment, making elegance accessible.
Imagine the luscious, smooth creaminess of a perfectly set cheesecake filling, the vibrant, refreshing tang of fresh strawberries, and the satisfying crunch of a buttery graham cracker crust, all perfectly balanced in one irresistible package. This dish is universally adored for its incredible flavor profile and pleasing textures, making it a guaranteed crowd-pleaser. These Strawberry Cheesecake Cups are not only exquisite to taste but also incredibly practical, especially when entertaining, as they eliminate the need for slicing and serving a large cake. Their no-bake nature adds to their appeal, promising gourmet taste with minimal effort, making them a go-to for busy hosts and dessert enthusiasts alike. Who could resist such a perfect, portion-controlled treat?
Ingredients:
- For the Graham Cracker Crust:
- 1 ½ cups (about 180g) graham cracker crumbs (I find about 10-12 full graham cracker sheets will yield this amount once crushed).
- ¼ cup (50g) granulated sugar – just a touch of sweetness to complement the crackers.
- ½ teaspoon ground cinnamon (optional, but I love the warm hint it adds!).
- 6 tablespoons (85g) unsalted butter, melted – to bind everything together perfectly.
- For the Silky Cheesecake Filling:
- 2 (8-ounce/226g each) blocks full-fat cream cheese, softened to room temperature – this is absolutely essential for a smooth, lump-free filling!
- ½ cup (100g) granulated sugar – for that classic cheesecake sweetness.
- ¼ cup (60ml) heavy cream (also known as whipping cream) – this is my secret for an extra rich and creamy texture.
- 1 teaspoon pure vanilla extract – choose a good quality one; it makes a big difference.
- 2 tablespoons fresh lemon juice (about ½ a small lemon) – a little tang to balance the richness and brighten the flavors.
- Pinch of salt – always important to enhance the other flavors.
- For the Fresh Strawberry Topping:
- 2 cups (about 300g) fresh strawberries, hulled and diced into small, bite-sized pieces.
- 2 tablespoons granulated sugar (adjust to your strawberries’ sweetness and your preference).
- 1 tablespoon fresh lemon juice – this really brightens the strawberry flavor.
- ½ teaspoon pure vanilla extract (optional, but I enjoy the extra layer of aroma it provides).
- For Garnish (Optional but Highly Recommended!):
- Fresh mint sprigs.
- Additional whole fresh strawberries or strawberry slices.
- Whipped cream or cool whip.
Equipment You’ll Need:
- 12-cup muffin tin.
- Paper liners or foil liners for the muffin tin – these are crucial for easy removal of your beautiful Strawberry Cheesecake Cups!
- Large mixing bowls (at least two).
- Electric hand mixer or stand mixer with a paddle attachment.
- Small saucepan.
- Measuring cups and spoons.
- Rubber spatula.
- Pastry blender or a fork (for crushing graham crackers if not pre-crushed).
Prepare the Graham Cracker Crust:
-
Preheat and Prep:
First, I always begin by preheating my oven to 350°F (175°C). While the oven heats up, I line a 12-cup standard muffin tin with paper liners. I find that sturdy foil liners work exceptionally well too, as they hold their shape perfectly and make for a very easy release of the chilled Strawberry Cheesecake Cups. Make sure each cup is lined smoothly.
-
Crush the Graham Crackers:
In a medium bowl, I combine the graham cracker crumbs, granulated sugar, and optional ground cinnamon. If you’re starting with whole graham crackers, you can crush them finely using a food processor for a perfectly uniform crumb, or place them in a zip-top bag and smash them with a rolling pin or the bottom of a heavy glass. The finer the crumbs, the more cohesive your crust will be.
-
Combine with Butter:
Next, I pour the melted unsalted butter over the graham cracker mixture. Using a fork or my fingertips, I mix everything together thoroughly until all the crumbs are moistened and resemble wet sand. It’s important that every bit of crumb gets coated in butter; this is what holds the crust together and gives it that delightful richness.
-
Form the Crust Bases:
Now for the fun part! I evenly distribute the crumb mixture among the 12 lined muffin cups. I usually use a tablespoon measure to ensure each cup gets roughly the same amount, which is about 1 to 1.5 tablespoons per cup. Then, using the back of a spoon, or even better, a small shot glass or a tart tamper, I firmly press the crumbs into the bottom of each liner. Pressing firmly is key here; it prevents the crust from crumbling when you bite into your Strawberry Cheesecake Cups later.
-
Bake the Crusts:
I pop the muffin tin into the preheated oven and bake the crusts for just 7-8 minutes. This brief bake time helps to set the crust, making it sturdy and slightly golden, adding a lovely depth of flavor. Once baked, I remove them from the oven and let them cool completely on a wire rack while I prepare the luscious filling. This cooling step prevents the warm crust from melting the delicate cheesecake batter.
Whip Up the Dreamy Cheesecake Filling:
-
Soften the Cream Cheese:
This is perhaps the most crucial step for a silky-smooth cheesecake. I ensure my full-fat cream cheese blocks have been sitting out at room temperature for at least an hour, or until they are very soft to the touch. This makes it incredibly easy to beat out any lumps.
-
Beat the Cream Cheese:
In a large mixing bowl, using an electric hand mixer (or a stand mixer with the paddle attachment) on low to medium speed, I beat the softened cream cheese for about 2-3 minutes. I aim for it to be incredibly smooth, fluffy, and completely lump-free. I often scrape down the sides and bottom of the bowl a couple of times to ensure everything is incorporated evenly.
-
Add Sugar and Flavorings:
Next, I gradually add the granulated sugar to the beaten cream cheese, continuing to mix on low speed until it’s just combined and no longer gritty, about another minute. Then, I stir in the heavy cream, pure vanilla extract, fresh lemon juice, and that tiny pinch of salt. The lemon juice is vital as it brightens the entire flavor profile and cuts through the richness, making our Strawberry Cheesecake Cups even more delightful.
-
Mix Until Just Combined:
I continue mixing on low speed until all the ingredients are just combined and the mixture is smooth and creamy. Be careful not to overmix at this stage! Overmixing can incorporate too much air, which can cause cracking later, though for individual cups, this is less of a concern than with a full cheesecake. I just mix until everything looks uniform and utterly inviting. Scrape down the bowl one last time to ensure everything is perfectly blended.
Assemble the Strawberry Cheesecake Cups:
-
Fill the Crusts:
Once the graham cracker crusts are completely cool, I evenly divide the cheesecake filling among the 12 muffin cups. I find using a small ice cream scoop or two spoons works best to get roughly equal portions. Each cup should be filled about ¾ of the way full.
-
Smooth the Tops:
Using the back of a spoon or a small offset spatula, I gently smooth out the tops of the cheesecake filling in each cup. This gives the Strawberry Cheesecake Cups a lovely, polished look. I gently tap the muffin tin on the counter a few times to release any trapped air bubbles, which also helps to create a smoother surface.
-
Chill, Chill, Chill!:
This is a step where patience truly pays off. I carefully place the muffin tin into the refrigerator and chill the Strawberry Cheesecake Cups for a minimum of 4 hours. Ideally, I like to chill them overnight. This extended chilling time allows the cheesecake filling to fully set and firm up, ensuring they hold their shape beautifully when removed from the liners. It also allows the flavors to meld and intensify, resulting in an even more delicious treat.
Craft the Fresh Strawberry Topping:
-
Prepare the Strawberries:
While the Strawberry Cheesecake Cups are chilling, or closer to serving time, I prepare the vibrant strawberry topping. I hull and dice the fresh strawberries into small, even pieces. The size of the dice is important – I want them small enough to be easily spooned over the cheesecake cups and eaten in a bite.
-
Combine Ingredients:
In a small bowl, I gently combine the diced strawberries with the granulated sugar, fresh lemon juice, and optional vanilla extract. I toss them gently to ensure all the strawberry pieces are coated. The sugar will draw out the natural juices from the strawberries, creating a wonderful, light syrup. The lemon juice brightens the flavor, making the strawberries taste even more intensely like themselves.
-
Macerate for Flavor:
I let the strawberry mixture sit at room temperature for at least 15-20 minutes. This process, called maceration, allows the flavors to meld and the strawberries to release their delicious juices, forming that beautiful natural sauce. If I’m not using it immediately, I’ll store it in the refrigerator.
Chill and Serve Your Delicious Strawberry Cheesecake Cups:
-
Remove from Tin:
Once the Strawberry Cheesecake Cups are thoroughly chilled and firm, I carefully remove them from the muffin tin. The liners should peel away easily from the set cheesecake. I usually transfer them to a platter or individual serving plates.
-
Top and Garnish:
Just before serving, I spoon a generous amount of the fresh strawberry topping over each individual cheesecake cup. I love to make sure each one has plenty of those juicy, macerated strawberries.
-
Add Optional Flair:
For an extra touch of elegance and freshness, I often garnish each Strawberry Cheesecake Cup with a tiny sprig of fresh mint or a few extra slices of fresh strawberry. A dollop of whipped cream on top can also be a delightful addition, adding another layer of creamy texture.
-
Enjoy Immediately:
Serve your homemade Strawberry Cheesecake Cups immediately and revel in the beautiful layers of creamy cheesecake, crunchy graham cracker, and vibrant fresh strawberries! They are truly a delightful individual dessert perfect for any occasion.
Tips for Perfect Strawberry Cheesecake Cups:
-
Room Temperature Cream Cheese is Non-Negotiable:
I cannot stress this enough! Cold cream cheese will result in a lumpy filling, no matter how much you beat it. Plan ahead and take it out of the fridge at least an hour or two before you start mixing. You want it wonderfully soft and pliable.
-
Don’t Overmix the Filling:
Once you’ve added the sugar and other wet ingredients to the cream cheese, mix only until just combined and smooth. Overmixing can incorporate too much air, which might lead to a less dense, almost airy texture rather than the classic rich creaminess we desire for our Strawberry Cheesecake Cups.
-
Firmly Press the Crust:
When forming the graham cracker crusts, use a small, flat-bottomed object (like a shot glass or the back of a measuring cup) to really press those crumbs down. A firm crust holds up much better and won’t fall apart when you’re enjoying your dessert.
-
Patience with Chilling:
Allowing adequate chilling time is crucial. The minimum 4 hours is important, but if you have the time, an overnight chill will yield perfectly set Strawberry Cheesecake Cups that are easy to handle and slice through without any mess.
-
Adjust Sugar to Taste:
For both the cheesecake filling and especially the strawberry topping, feel free to adjust the amount of sugar according to your preference and the natural sweetness of your strawberries. Sometimes, very ripe, in-season strawberries need less added sugar.
-
High-Quality Vanilla and Lemon Juice:
Since these flavors are quite prominent, using good quality vanilla extract and freshly squeezed lemon juice (rather than bottled) will elevate the taste of your Strawberry Cheesecake Cups significantly.
Variations to Try:
-
Chocolate Lover’s Dream:
Add 1-2 tablespoons of unsweetened cocoa powder to your graham cracker crust mixture for a chocolate graham crust. You could also drizzle a little melted chocolate over the finished Strawberry Cheesecake Cups.
-
Citrus Zing:
Increase the lemon juice in the cheesecake filling or add a teaspoon of lemon zest for an extra bright, tangy flavor that pairs wonderfully with strawberries. Lime zest and juice could also be a delicious alternative!
-
Berry Medley:
Instead of just strawberries, create a mixed berry topping! Combine strawberries with blueberries, raspberries, or blackberries for a colorful and flavorful twist. A hint of orange zest in a mixed berry topping is absolutely divine.
-
Nutty Crust:
Replace a quarter of the graham cracker crumbs with finely ground almonds or pecans for a delightful nutty crunch in your crust. This adds another layer of texture and flavor to the classic Strawberry Cheesecake Cups.
-
Spiced Crust:
Experiment with other spices in the crust, such as a pinch of nutmeg or cardamom, especially if you’re serving these in the cooler months. These warm spices offer a lovely contrast to the fresh strawberries.
Storage Instructions:
-
Refrigeration is Key:
Once assembled, your Strawberry Cheesecake Cups must be stored in the refrigerator. They are a dairy-based dessert and will spoil if left at room temperature for too long.
-
Airtight Container:
Place the Strawberry Cheesecake Cups (without the fresh topping if possible, as it can make the crust soggy over time) in an airtight container. This prevents them from absorbing any odors from the refrigerator and helps maintain their freshness. If already topped, try to use them within a day for the best texture.
-
Duration:
When properly stored in an airtight container in the refrigerator, these delicious Strawberry Cheesecake Cups will stay fresh and delightful for up to 3-4 days.
-
Topping Storage:
If you have leftover strawberry topping, store it separately in a small airtight container in the refrigerator for up to 2-3 days. This way, you can top each cup just before serving, keeping the crust crisp and the strawberries vibrant.
-
Freezing (Optional for Un-topped):
You can freeze the un-topped Strawberry Cheesecake Cups for longer storage. First, flash freeze them on a baking sheet until solid (about 1-2 hours). Then, wrap each individual cup tightly in plastic wrap and place them in a freezer-safe bag or container. They can be frozen for up to 1 month. To thaw, simply transfer them to the refrigerator overnight. Add the fresh strawberry topping just before serving after they’ve fully thawed.
<h2>Conclusion:</h2>
<p>So there you have it – my absolute favorite recipe for these delightful desserts that are more than just a sweet treat; they’re a revelation. If you’ve been searching for a dessert that perfectly marries convenience with an unforgettable gourmet experience, then look no further than these incredible <strong>Strawberry Cheesecake Cups</strong>. They truly are a must-try for anyone who appreciates the finer things in life, without the fuss typically associated with a traditional cheesecake. I promise you, these individual portions deliver all the creamy, dreamy indulgence of a full-sized cheesecake, but with an elegance and ease that makes them suitable for literally any occasion, from a casual family dinner to the most sophisticated garden party. The rich, velvety texture of the cheesecake filling, combined with the vibrant, sweet-tart burst of fresh strawberries and the satisfying crunch of the crust, creates a symphony of flavors and textures in every single bite. It’s a dessert that consistently wows, yet demands surprisingly little effort from the baker. You get maximum impact with minimal stress, a winning combination in any kitchen, making it an instant classic in your repertoire.</p>
<p>What I adore most about this recipe is its undeniable charm and versatility. Imagine presenting these beautifully portioned cups, each a perfect miniature work of art, to your guests. There’s no need for slicing a large, potentially messy cake; each person gets their own immaculate dessert, ready to be savored. They are fantastic served chilled, straight from the refrigerator, perhaps with a delicate sprig of fresh mint for an added touch of green and a hint of herbaceous freshness that complements the berries beautifully. For an extra layer of decadence, consider a light dusting of powdered sugar just before serving, which adds a professional finish, or a delicate drizzle of a complementary sauce – a simple balsamic glaze can subtly elevate the strawberries’ sweetness, or a hint of white chocolate sauce can add another dimension of creamy sweetness. These cups are ideal for an elegant afternoon tea, a delightful and fuss-free addition to a celebratory brunch spread, or the perfect sophisticated finish to a memorable dinner. They travel exceptionally well, making them brilliant for picnics in the park, potlucks with friends, or even just a thoughtful and impressive treat to bring to a friend’s house. The convenience of these individual servings means less cleanup and more pure enjoyment for everyone involved, a detail I always appreciate when hosting any kind of gathering. They are truly the epitome of effortless entertaining.</p>
<p>But the magic doesn’t stop with just strawberries! While the original <strong>Strawberry Cheesecake Cups</strong> are divine as written, I wholeheartedly encourage you to let your culinary imagination soar. This recipe is wonderfully adaptable, serving as a perfect canvas for your own creative twists and seasonal inspirations. Think about swapping out the strawberries for other seasonal fruits: fresh raspberries or blueberries would be absolutely spectacular, offering a different but equally delightful tartness and vibrant color. A smooth mango purée swirled into the filling, or a generous topping of lightly caramelized peaches during the peak summer months, could transform this dessert into something entirely new and exciting, reflecting the flavors of the season. For chocolate lovers (and honestly, who isn’t?), a handful of mini chocolate chips subtly folded into the cheesecake mixture, or a generous layer of rich chocolate ganache delicately draped over the berry topping, would be an utterly irresistible variation. You could even experiment with different crusts – imagine an Oreo crumb crust for a playful cookies-and-cream vibe, or a rich shortbread crust for a buttery, crisp foundation that offers a different textural contrast. Don’t be afraid to add a hint of fresh citrus zest, like lemon or lime, to the filling for a brighter, more aromatic profile, or a touch of pure vanilla bean paste for an even deeper, richer vanilla note that truly elevates the base flavor. Each variation allows you to personalize this already fantastic recipe, making it uniquely yours and catering perfectly to different tastes, dietary preferences, and festive occasions. This incredible adaptability is precisely why I believe this recipe will become a cornerstone in your dessert repertoire; it’s endlessly customizable and consistently delicious, no matter how you choose to interpret it.</p>
<p>Now it’s your turn! I have poured my heart into sharing this recipe, and I genuinely cannot wait for you to experience the immense joy of making and tasting these incredible cheesecake cups for yourself. Don’t let another day pass without indulging in the simple pleasure of homemade dessert that feels incredibly luxurious and utterly satisfying. So, gather your ingredients, set aside a little bit of time in your kitchen, and dive into creating these irresistible treats. Once you’ve whipped up your batch of these delightful <strong>Strawberry Cheesecake Cups</strong>, please, please, please share your beautiful creations with me! I absolutely love seeing your culinary triumphs and hearing about your experiences in the kitchen. Did you try a unique variation that was a hit? Do you have a new favorite fruit topping you discovered? Or perhaps you found the perfect occasion to serve them, making a memorable moment even sweeter? Let me know in the comments below, or feel free to reach out on social media (without specific links, of course!). Your feedback, your stories, and your delicious photos truly inspire me and our entire community of passionate food lovers. <strong>Go ahead, make these Strawberry Cheesecake Cups, and prepare to fall head over heels in love with your new go-to dessert!</strong> I am confident that once you’ve tasted them, you’ll understand exactly why I champion this recipe so passionately. Happy baking, and happy indulging!</p>
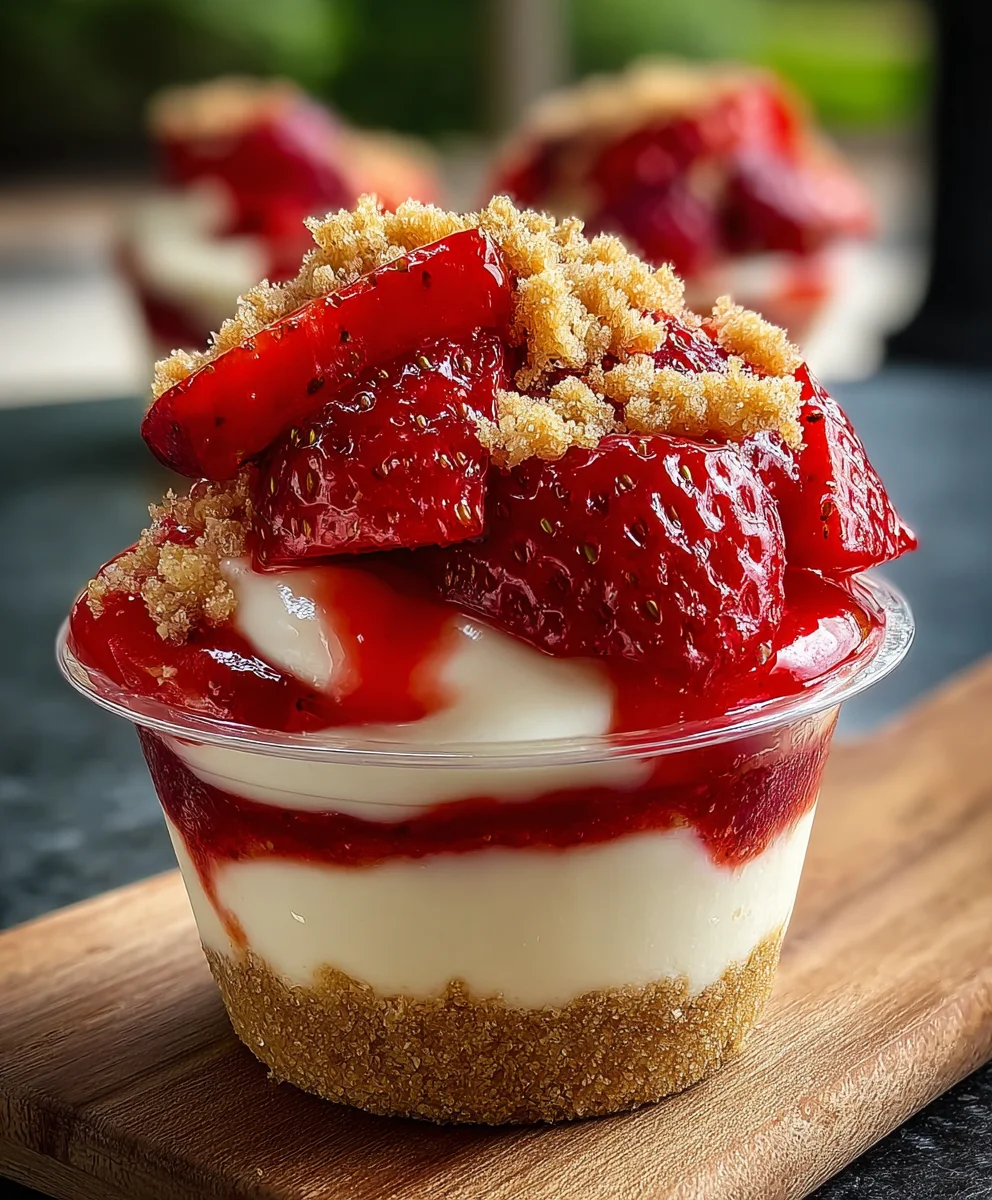
Easy Strawberry Cheesecake Cups – Delicious No-Bake Recipe
Strawberry Cheesecake Cups are not just a dessert; they are a miniature celebration, offering a burst of creamy, tangy, and sweet delight in every bite. This recipe offers everything wonderful about a traditional cheesecake in a convenient, single-serving format. Imagine the luscious, smooth creaminess of a perfectly set cheesecake filling, the vibrant, refreshing tang of fresh strawberries, and the satisfying crunch of a buttery graham cracker crust, all perfectly balanced in one irresistible package. Their no-bake nature adds to their appeal, promising gourmet taste with minimal effort, making them a go-to for busy hosts and dessert enthusiasts alike.
Ingredients
-
1 ½ cups (180g) graham cracker crumbs
-
¼ cup (50g) granulated sugar
-
½ teaspoon ground cinnamon (optional)
-
6 tablespoons (85g) unsalted butter, melted
-
2 (8-ounce/226g each) blocks full-fat cream cheese, softened to room temperature
-
½ cup (100g) granulated sugar
-
¼ cup (60ml) heavy cream
-
1 teaspoon pure vanilla extract
-
2 tablespoons fresh lemon juice
-
Pinch of salt
-
2 cups (300g) fresh strawberries, hulled and diced
-
2 tablespoons granulated sugar (for topping, adjust to taste)
-
1 tablespoon fresh lemon juice (for topping)
-
½ teaspoon pure vanilla extract (optional, for topping)
-
Fresh mint sprigs (optional, for garnish)
-
Additional whole fresh strawberries or slices (optional, for garnish)
-
Whipped cream or cool whip (optional, for garnish)
Instructions
-
Step 1
Preheat oven to 350°F (175°C). Line a 12-cup muffin tin with paper or foil liners for easy removal. -
Step 2
In a medium bowl, combine graham cracker crumbs, ¼ cup granulated sugar, and optional ground cinnamon. Pour in melted unsalted butter and mix thoroughly until all crumbs are moistened and resemble wet sand. -
Step 3
Evenly distribute the crumb mixture (about 1 to 1.5 tablespoons per cup) among the 12 lined muffin cups. Press firmly into the bottom of each liner using the back of a spoon or a tart tamper. Bake for 7-8 minutes. Remove from oven and let cool completely on a wire rack. -
Step 4
Ensure cream cheese is very soft at room temperature. In a large mixing bowl, beat the softened cream cheese with an electric mixer on low to medium speed for 2-3 minutes until incredibly smooth, fluffy, and lump-free. Scrape down the sides and bottom of the bowl. -
Step 5
Gradually add ½ cup granulated sugar to the beaten cream cheese, mixing on low speed until just combined. Stir in heavy cream, 1 teaspoon pure vanilla extract, 2 tablespoons fresh lemon juice, and a pinch of salt. Continue mixing on low speed until all ingredients are just combined and the mixture is smooth and creamy. Do not overmix. -
Step 6
Once the graham cracker crusts are completely cool, evenly divide the cheesecake filling among the 12 muffin cups, filling each about ¾ of the way full. Gently smooth out the tops of the filling with the back of a spoon or a small offset spatula. Gently tap the muffin tin on the counter a few times to release any trapped air bubbles. -
Step 7
Carefully place the muffin tin into the refrigerator and chill the Strawberry Cheesecake Cups for a minimum of 4 hours, or ideally overnight, until the filling is fully set and firm. -
Step 8
While the cheesecake cups are chilling (or closer to serving), prepare the vibrant strawberry topping. In a small bowl, gently combine the diced strawberries, 2 tablespoons granulated sugar, 1 tablespoon fresh lemon juice, and optional ½ teaspoon pure vanilla extract. Toss gently to coat all pieces. -
Step 9
Let the strawberry mixture sit at room temperature for at least 15-20 minutes. This process allows the flavors to meld and the strawberries to release their delicious juices, forming a natural syrup. If not using immediately, store in the refrigerator. -
Step 10
Once the Strawberry Cheesecake Cups are thoroughly chilled and firm, carefully remove them from the muffin tin (liners should peel away easily). Just before serving, spoon a generous amount of the fresh strawberry topping over each cup. For an extra touch, garnish with fresh mint sprigs, additional fresh strawberry slices, or a dollop of whipped cream, if desired. Serve immediately and enjoy!
Important Information
Nutrition Facts (Per Serving)
It is important to consider this information as approximate and not to use it as definitive health advice.
Allergy Information
Please check ingredients for potential allergens and consult a health professional if in doubt.


Leave a Comment