

Garlic Butter Keto Bread is about to become your new best friend. If you’ve been dreaming of that comforting, warm aroma of freshly baked bread, but thought it was off-limits on your low-carb journey, prepare to be amazed. This isn’t just any keto bread; it’s a glorious, golden-brown masterpiece infused with fragrant garlic and rich, creamy butter that will have you rethinking everything you thought you knew about keto baking. We all crave that satisfying bite, that perfect vehicle for our favorite toppings, and this Garlic Butter Keto Bread delivers in spades. What makes it truly special is its incredible texture – surprisingly soft and fluffy on the inside, with a delightful chegrape juicess that mimics traditional bread. It’s the ultimate indulgence that fits seamlessly into your ketogenic lifestyle.
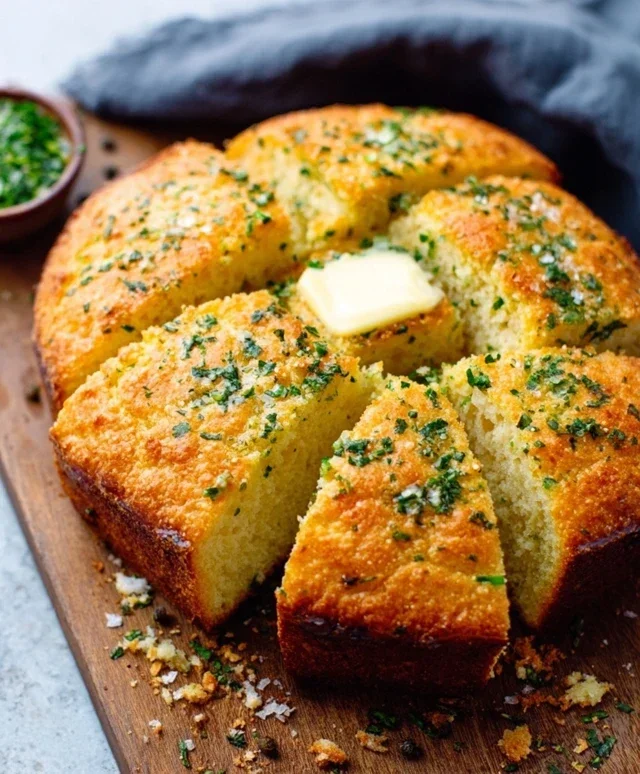
Garlic Butter Keto Bread
Hello fellow keto enthusiasts! Today, I’m thrilled to share a recipe that has become an absolute staple in my kitchen: Garlic Butter Keto Bread. Forget those chalky, crum extractbly keto breads of the past. This recipe delivers a wonderfully soft, slightly chewy interior with a rich, savory, garlicky crust that’s simply irresistible. It’s perfect for dipping in soups, serving alongside your favorite meals, or even just enjoying on its own with a generous smear of butter. Get ready to elevate your low-carb baking game!
Ingredients:
Cooking Instructions:
Here’s how we’ll whip up this delicious keto bread. Don’t be intimidated by the ingredient list; it’s all straightforward and comes together surprisingly quickly.
Phase 1: Preparing the Dry Ingredients
The first step is to combine all of our dry ingredients. In a medium-sized mixing bowl, I like to whisk together the blanched almond flour and coconut flour. It’s important to use blanched almond flour as it’s finer and yields a better texture. Coconut flour is potent, so a little goes a long way here. Next, I add the baking powder and xanthan gum. The baking powder will give our bread a nice lift, and the xanthan gum is crucial in keto baking as it acts as a binder, helping to create that essential structure and prevent our bread from being too crum extractbly. Finally, I stir in the salt. Give everything a good whisk to ensure there are no clumps and that all the dry ingredients are evenly distributed. This thorough mixing of the dry ingredients is key to a consistent texture throughout the loaf.
Phase 2: Combining the Wet Ingredients
Now, let’s move on to the wet ingredients. In a separate bowl, crack your four large eggs. Make sure they are at room temperature, as this helps them incorporate better with the other ingredients, leading to a smoother batter. Add the melted butter, which should be slightly cooled so it doesn’t cook the eggs. I also add the unsweetened almond milk. If you’re looking for an even richer bread, you can substitute heavy cream for the almond milk – it’s decadent! Then comes the apple cider vinegar. This might seem a little odd, but the vinegar reacts with the baking powder to help our bread rise even more, and you won’t taste it in the final product. Whisk these wet ingredients together until they are well combined and the mixture is smooth.
Phase 3: Bringin extractg It All Together
This is where the magic happens! Gradually add the dry ingredient mixture to the wet ingredient mixture, mixing on low speed or by hand until just combined. Be careful not to overmix at this stage. Overmixing can develop the gluten (even though there’s minimal in almond and coconut flour) and can lead to a tougher bread. Once the dough starts to come together, it will be quite thick and sticky. This is normal!
Phase 4: Infusing with Flavor
Now, for the stars of the show: the garlic and herbs! Stir in the minced garlic, chopped fresh parsley, and the optional grated Parmesan cheese. The fresh parsley adds a lovely bright note, and the garlic is, of course, what makes this bread so special. If you’re not a fan of garlic, you can adjust the amount to your liking, but I highly recommend going bold! Gently fold these flavorings into the dough until they are evenly distributed.
Phase 5: Baking the Bread
Preheat your oven to 350°F (175°C). Lightly grease a loaf pan or line it with parchment paper. I find lining the pan with parchment paper makes for easier cleanup and ensures the bread doesn’t stick. Spoon the dough into the prepared loaf pan and spread it evenly. Now, for that irresistible garlicky butter topping. Melt the remaining 2 tablespoons of butter and brush it generously over the top of the dough. You can also sprinkle a little extra parsley or Parmesan on top at this point if you like.
Bake for 40-50 minutes, or until a toothpick inserted into the center comes out clean and the top is golden brown. The aroma filling your kitchen will be heavenly! Once baked, let the bread cool in the pan for about 10-15 minutes before transferring it to a wire rack to cool completely. This cooling period is important for the bread to set properly. Slice and enjoy your delicious homemade Garlic Butter Keto Bread! It’s fantastic served warm, but also holds up beautifully for sandwiches or as a side dish later.
Conclusion:
There you have it – a simple yet incredibly satisfying recipe for Garlic Butter Keto Bread that’s sure to become a staple in your low-carb kitchen. This recipe truly shines because it delivers that comforting, bready texture and rich, savory flavor that many keto dieters miss, all while keeping your carb count delightfully low. It’s remarkably easy to whip up, requiring minimal ingredients and effort, making it perfect for busy weeknights or when you’re craving something special without the guilt. I absolutely love how versatile this bread is; it’s perfect for dipping into soups and stews, as a base for mini pizzas, or simply enjoyed on its own toasted with an extra smear of butter. Don’t hesitate to give this Garlic Butter Keto Bread a try – I promise you won’t be disappointed!
Frequently Asked Questions:
Can I make this bread ahead of time?
Absolutely! This Garlic Butter Keto Bread can be baked and stored in an airtight container at room temperature for up to 2 days, or in the refrigerator for up to a week. For longer storage, you can slice and freeze it, then toast slices directly from frozen.
What other toppings can I use besides garlic butter?
The possibilities are endless! Consider a sprinkle of dried herbs like rosemary or thyme, some grated Parmesan cheese, or a touch of chili flakes for a little heat. You could even add finely chopped chives for a fresh oniony kick.
Is this bread suitable for other low-carb diets besides keto?
Yes, this recipe is generally suitable for most low-carb or ketogenic diets due to its minimal carbohydrate content. It’s a fantastic option for anyone looking to reduce their intake of traditional grain-based breads.
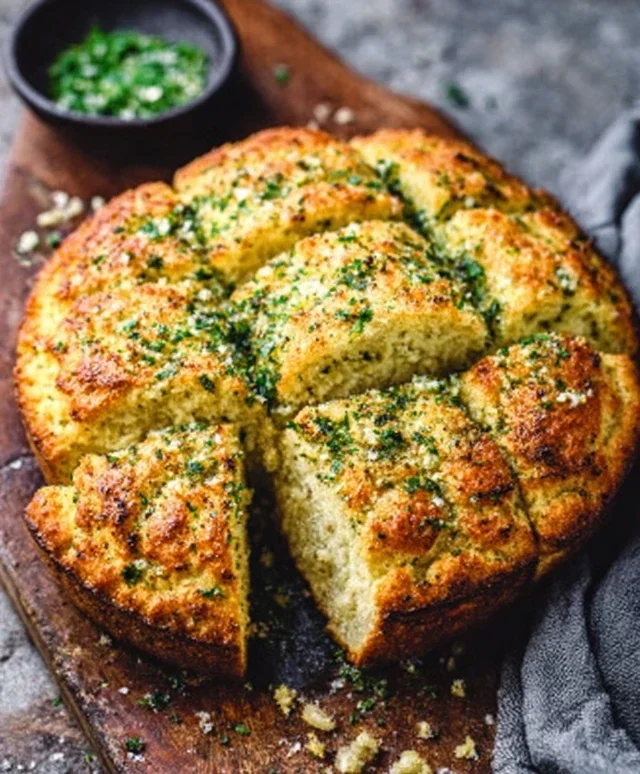
Garlic Butter Keto Bread
A delicious and easy keto-friendly bread recipe with garlic and butter.
Ingredients
-
1 cup almond flour
-
1/4 cup coconut flour
-
2 tablespoons psyllium husk powder
-
1 teaspoon baking powder
-
1/2 teaspoon salt
-
2 large eggs
-
1/4 cup melted butter
-
1/4 cup water
-
2 cloves garlic, minced
-
2 tablespoons fresh parsley, chopped
Instructions
-
Step 1
Preheat oven to 350°F (175°C). Grease and flour a small loaf pan or line with parchment paper. -
Step 2
In a large bowl, whisk together almond flour, coconut flour, psyllium husk powder, baking powder, and salt. -
Step 3
In a separate bowl, whisk together eggs and melted butter. Add water and whisk until combined. -
Step 4
Pour the wet ingredients into the dry ingredients and mix until a dough forms. Knead for a minute or two. -
Step 5
Press the dough into the prepared loaf pan. Mix minced garlic and chopped parsley into the remaining melted butter (or use fresh butter if you prefer). -
Step 6
Brush the garlic butter mixture over the top of the dough. Bake for 30 minutes, or until golden brown and firm. -
Step 7
Let cool in the pan for 10 minutes before transferring to a wire rack to cool completely.
Important Information
Nutrition Facts (Per Serving)
It is important to consider this information as approximate and not to use it as definitive health advice.
Allergy Information
Please check ingredients for potential allergens and consult a health professional if in doubt.


Leave a Comment