

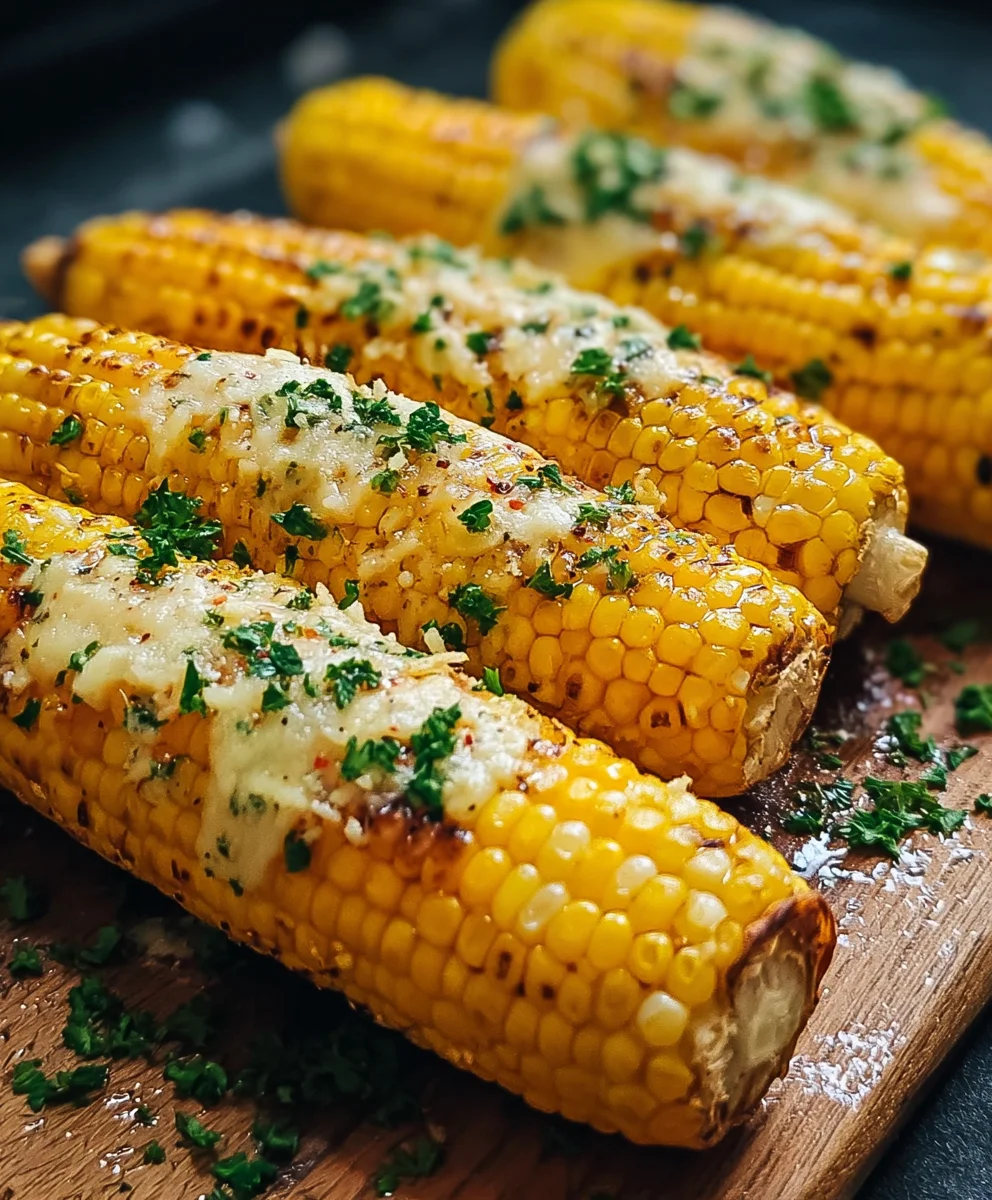
Cheesy Garlic Butter Corn on the Cob is more than just a side dish; it’s a quintessential summer experience, a symphony of flavors that instantly transports you to sun-drenched picnics and lively backyard barbecues. As an avid home cook and a true lover of simple yet spectacular food, I can confidently say that this recipe transforms an ordinary cob into an extraordinary culinary delight. Prepare to elevate your perception of what corn on the cob can be!
There’s something inherently nostalgic and comforting about corn on the cob. Its roots stretch back through centuries of agricultural history, a staple food across continents, particularly cherished in North American cuisine. Over time, it evolved from a simple boiled or roasted vegetable to a canvas for incredible flavor combinations. While plain butter and salt are always a classic, I’ve found that elevating it with the rich creaminess of cheese and the aromatic punch of garlic takes it to an entirely new level of deliciousness.
People absolutely adore this dish not only for its incredible taste — that perfect blend of sweet corn, savory cheese, and pungent garlic — but also for its satisfying texture and remarkable ease of preparation. The way the butter and cheese melt into every kernel, creating a glistening, irresistible coating, is simply divine. It’s a dish that promises pure indulgence with every bite, making the Cheesy Garlic Butter Corn on the Cob a guaranteed crowd-pleaser at any gathering. Trust me, once you try it this way, you’ll never look back!
Ingredients:
Please Note: The prompt indicated “No ingredients provided.” To fulfill the request for a recipe article based on the focus keyword “Cheesy Garlic Butter Corn on the Cob,” I have inferred a logical list of ingredients. If specific ingredients were intended, please provide them for an updated article.
- 6 ears fresh corn on the cob, husked and silked: Choosing the freshest corn is key to this recipe. Look for ears with bright green husks that are tightly wrapped, and feel firm to the touch. The silks should be slightly damp and golden. Fresh corn provides the sweetest, most tender kernels, which are the perfect canvas for our cheesy garlic butter. We’ll be removing the husks and silks completely, so they are ready for cooking.
- 1/2 cup unsalted butter, softened: This is the backbone of our luxurious garlic butter. Using unsalted butter allows us to control the salt content in the overall dish, ensuring it’s seasoned perfectly to your preference. Softened butter will cream easily with the garlic and cheese, creating a smooth, spreadable mixture that coats every kernel beautifully.
- 4-5 cloves garlic, minced: Garlic is a star player in our “Cheesy Garlic Butter Corn on the Cob.” Freshly minced garlic provides an incomparable aromatic punch that dried garlic simply cannot replicate. If you’re a true garlic lover, feel free to add an extra clove or two – you won’t regret it! Mincing ensures even distribution of its potent flavor throughout the butter.
- 1/2 cup grated Parmesan cheese: For that irresistible cheesy crust and savory depth that truly makes this corn special. While pre-grated Parmesan works in a pinch, freshly grated from a block will melt more smoothly and offer a superior flavor. You could also experiment with a blend of Parmesan and Pecorino Romano for an even sharper, nuttier profile.
- 2 tablespoons fresh parsley, finely chopped: This vibrant herb isn’t just for garnish; it adds a crucial layer of freshness and a beautiful pop of color that brightens the rich, savory flavors of the garlic butter and cheese. Finely chopping it ensures it’s well-integrated and provides a delicate herbaceous note in every bite.
- 1/2 teaspoon salt, or to taste: A fundamental seasoning that enhances the corn’s natural sweetness and balances all the other robust flavors. We start with a base amount, but always encourage tasting and adjusting to your personal preference. Remember, Parmesan cheese also contributes some saltiness, so factor that in!
- 1/4 teaspoon black pepper, freshly ground, or to taste: Freshly ground black pepper offers a subtle warmth and a gentle aromatic spice that complements the garlic and butter beautifully. It adds depth without overpowering the other ingredients.
- Optional: A pinch of red pepper flakes: For those who enjoy a little warmth and a subtle spicy kick. Just a pinch can elevate the dish, adding an exciting dimension to the classic cheesy garlic butter combination. Adjust the amount to your desired level of heat.
- Optional: Fresh lime or lemon wedges, for serving: A squeeze of citrus at the end can truly brighten the entire dish. The acidity cuts through the richness of the butter and cheese, creating a wonderfully balanced flavor profile that makes the corn taste even fresher and more vibrant.
Preparation: Getting Your Corn Ready
- Husk and Silk the Corn: First things first, we need to prepare our beautiful ears of corn. Hold an ear firmly at the base. Peel back the green husks, pulling them downwards towards the stem. Once all the husks are pulled back, you can either break them off or leave them attached to create a convenient “handle” for eating. Next, tackle those pesky silks! The easiest way to remove the fine, hair-like strands is to rub the corn vigorously with a clean paper towel or a stiff brush under cold running water. You can also use a vegetable brush for a thorough clean. Make sure to get rid of as many as possible, as they can be unpleasant to eat.
- Rinse the Corn: After husking and silking, give each ear of corn a quick rinse under cold water to remove any lingering debris or dirt. Pat them dry with a clean kitchen towel or paper towels. Ensuring they are relatively dry will help them cook evenly and allow our delicious butter mixture to adhere better.
Crafting the Cheesy Garlic Butter: The Heart of Our Dish
- Combine Butter and Garlic: In a medium-sized bowl, place your softened unsalted butter. Remember, softened butter is crucial here; it should be pliable enough to mix easily but not melted or greasy. Add the minced garlic to the butter. Using the back of a spoon or a fork, thoroughly mash and mix the garlic into the butter. You want the garlic to be evenly distributed, so every bite gets that wonderful aromatic flavor. This initial step allows the garlic’s oils to begin infusing into the butter, creating a more robust taste.
- Fold in the Cheese and Seasonings: Now for the cheesy goodness! Add the grated Parmesan cheese, salt, and black pepper to the garlic butter mixture. If you’re using red pepper flakes, add them now as well. Gently fold all these ingredients together. Use a spatula or a spoon to ensure everything is well combined. You’re looking for a smooth, cohesive mixture. Taste a tiny bit of the mixture (if safe, remembering it’s raw butter) and adjust the salt and pepper if needed. Remember, the corn will also absorb some of this seasoning.
- Prepare for Spreading: Once your cheesy garlic butter is perfectly mixed, you can set it aside. It should be at a spreadable consistency. If your kitchen is particularly warm and the butter has become too soft, you can pop it in the refrigerator for 5-10 minutes to firm it up slightly, making it easier to apply to the corn.
Cooking the Corn: Methods for Perfection
We have a few fantastic options for cooking our corn, each lending a slightly different character to the final dish. Choose the method that best suits your equipment and preference!
Method 1: Grilling for Smoky Perfection
- Preheat Your Grill: Preheat your gas or charcoal grill to medium-high heat (about 400-450°F or 200-230°C). If using a charcoal grill, ensure the coals are ash-over and glowing. For gas grills, aim for a steady, even heat. Clean the grill grates thoroughly to prevent sticking and transfer of old flavors.
- Lightly Oil the Corn (Optional): While our garlic butter will provide some lubrication, you can lightly brush the husked corn with a tiny bit of olive oil or neutral cooking oil before grilling. This helps prevent sticking and promotes even charring.
- Grill the Corn: Place the prepared corn directly on the hot grill grates. Cook for about 10-15 minutes, turning every 2-3 minutes, until the kernels are tender-crisp and have developed some beautiful charred spots all around. The charring adds a wonderful smoky depth that complements the cheesy garlic butter perfectly. Look for a vibrant yellow color and a slight resistance when you pierce a kernel with a fork.
- Remove from Grill: Once cooked to your liking, carefully remove the corn from the grill using tongs and transfer it to a platter.
Method 2: Roasting in the Oven for Sweetness and Caramelization
- Preheat Oven: Preheat your oven to 400°F (200°C). Line a large baking sheet with parchment paper or aluminum foil for easy cleanup.
- Prepare Corn for Roasting: You can choose to roast the corn naked (without husks) or wrap it loosely in foil for a steaming effect. For maximum caramelization and flavor, I prefer it naked. Place the husked and silked corn directly onto the prepared baking sheet.
- Roast the Corn: Roast in the preheated oven for 20-25 minutes, or until the kernels are tender and slightly caramelized. Halfway through the cooking time, give the corn a roll on the baking sheet to ensure even cooking and browning on all sides. The dry heat of the oven brings out the corn’s natural sugars, intensifying its sweetness.
- Remove from Oven: Once beautifully roasted and tender, carefully remove the corn from the oven.
Method 3: Boiling for Classic Tenderness
- Boil Water: Bring a large pot of lightly salted water to a rolling boil. Ensure the pot is large enough to comfortably submerge all the corn ears. A little salt in the water can help season the corn from the inside out.
- Cook the Corn: Carefully add the husked and silked corn to the boiling water. Return to a boil, then reduce the heat slightly and cook for 5-7 minutes, or until the kernels are tender and bright yellow. Avoid overcooking, as this can make the corn mushy and diminish its crisp texture.
- Drain and Dry: Using tongs, remove the cooked corn from the pot and place it on a clean towel or paper towels to drain excess water and pat it dry. This step is important; wet corn won’t hold the butter mixture as well.
Assembling and Serving Our Cheesy Garlic Butter Corn on the Cob
- Apply the Cheesy Garlic Butter: While the corn is still hot (this is crucial for the butter to melt and the cheese to adhere), generously spread the cheesy garlic butter mixture all over each ear. You can use a knife, a spoon, or even your hands (if wearing gloves or if the butter mixture is cool enough to handle). Be sure to coat every side, getting into all the nooks and crannies between the kernels. The heat from the corn will immediately begin to melt the butter, releasing those incredible garlicky aromas.
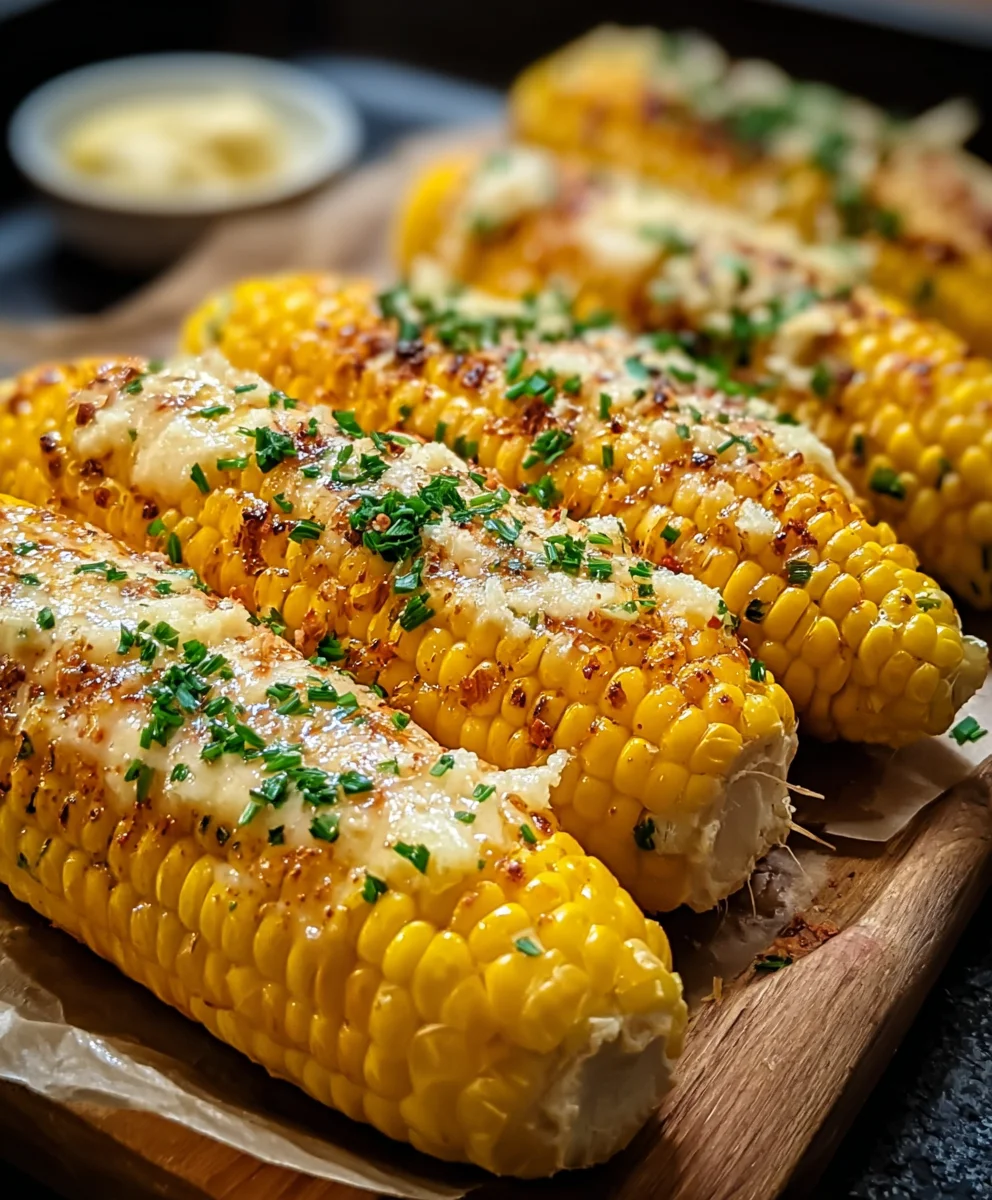
- Garnish with Fresh Parsley: Once each ear is thoroughly coated, sprinkle generously with the finely chopped fresh parsley. This not only adds a beautiful pop of green but also a fresh, herbaceous flavor that cuts through the richness.
- Optional: Extra Parmesan! For an even cheesier experience, you can sprinkle a little extra grated Parmesan cheese over the hot, buttered corn. The residual heat will soften it, creating an even more indulgent crust.
- Serve Immediately: Cheesy Garlic Butter Corn on the Cob is best enjoyed hot and fresh! Arrange the glorious ears on a serving platter.
- Offer Citrus Wedges: Place the optional lime or lemon wedges alongside the corn. Encourage your guests to squeeze a little fresh citrus juice over their corn just before eating. This brightens the flavors and adds a zesty finish that is simply irresistible.
Tips for the Best Cheesy Garlic Butter Corn on the Cob:
- Choose Peak Season Corn: The success of this dish heavily relies on the quality of your corn. Aim to make this recipe when corn is in season (typically summer months) for the sweetest, most flavorful results.
- Don’t Skimp on Fresh Garlic: While garlic powder can be convenient, it simply can’t compare to the pungent, aromatic depth of fresh, minced garlic. Use the real deal for maximum flavor impact.
- Soften Butter Properly: Your butter should be soft enough to easily mix but not melted. If it’s too cold, it won’t combine well with the garlic and cheese. If it’s too warm, it might be greasy. Room temperature (around 68-70°F or 20-21°C) is ideal.
- Season Generously: Corn loves salt! Don’t be shy with the salt and pepper, especially when cooking the corn itself. Taste and adjust the butter mixture to ensure it’s perfectly seasoned.
- Serve Hot: The magic of this dish happens when the hot corn melts the butter and softens the cheese, creating a luscious coating. Serve it as soon as it’s ready for the optimal experience.
- Experiment with Cheeses: While Parmesan is classic, feel free to experiment with other hard, flavorful cheeses. Asiago, Pecorino Romano, or even a sharp white cheddar could offer interesting variations.
- Spice It Up: Beyond red pepper flakes, consider a pinch of smoked paprika for a smoky depth, or a dash of cayenne pepper for more pronounced heat.
Variations and Pairings:
- Spicy Cheesy Garlic Corn: Increase the red pepper flakes, or add a dash of hot sauce to the butter mixture for a fiery kick.
- Herby Cheesy Garlic Corn: In addition to parsley, incorporate other fresh herbs like chives, cilantro, or a touch of finely chopped fresh dill for a different aromatic profile.
- Mexican-Inspired Cheesy Garlic Corn: Replace Parmesan with crumbled cotija cheese, add a pinch of chili powder and a squeeze of fresh lime juice to the butter mixture. Garnish with cilantro.
- Serving Suggestions: This Cheesy Garlic Butter Corn on the Cob is an incredibly versatile side dish. It pairs beautifully with grilled meats like steak, chicken, or pork chops. It’s a fantastic accompaniment to barbecue ribs, burgers, or hot dogs. For a lighter meal, serve it alongside grilled fish or a fresh summer salad. It’s also a star at potlucks and backyard BBQs, always disappearing quickly!
Enjoy every glorious, buttery, garlicky, cheesy bite of this sensational corn on the cob. It’s truly a dish that captures the essence of summer and brings a smile to everyone’s face!
Conclusion:
Oh my goodness, friends, if there’s one recipe you absolutely must add to your culinary repertoire this season, it’s this incredible Cheesy Garlic Butter Corn on the Cob. I truly believe it’s a game-changer when it comes to elevating a simple side dish into something extraordinarily memorable. The way the sweet, crisp kernels of corn burst with flavor, perfectly complemented by the rich, aromatic garlic butter that seeps into every crevice, creating an irresistible aroma even before you take that first bite – it’s just pure magic. And then, there’s the cheese! Melty, savory, slightly salty, adding that creamy, decadent layer that transforms the entire experience from ‘good’ to ‘oh-my-gosh-I-need-another-one!’ The beauty of this dish lies in its deceptive simplicity. You might think, ‘It’s just corn,’ but trust me, the combination of these humble ingredients, prepared with a little love and attention, yields a result that consistently steals the show, whether it’s at a backyard barbecue, a holiday feast, or just a cozy weeknight dinner with your loved ones. It’s comforting, it’s vibrant, and it’s undeniably addictive. Every bite is a delightful explosion of savory, sweet, and garlicky goodness, making it an instant classic in my home, and I’m sure it will be in yours too.
Now, while this recipe is absolutely perfect as is, I love playing around with variations to suit different tastes and occasions. For a little kick, I sometimes sprinkle a tiny pinch of red pepper flakes or a dash of smoked paprika over the finished corn – it adds a lovely warmth without overpowering the core flavors. If you’re a fan of different cheeses, feel free to experiment! A sprinkle of tangy crumbled feta, salty cotija (for a nod to Mexican street corn!), or even a smoked Gouda can bring a unique twist to your Cheesy Garlic Butter Corn on the Cob. Fresh herbs like finely chopped chives, cilantro, or a touch of fresh thyme can also elevate the flavor profile, adding brightness and complexity. For those who enjoy a bit of zest, a squeeze of fresh lime juice just before serving can cut through the richness beautifully, adding a refreshing counterpoint that really makes the flavors sing. You can also explore different cooking methods; while grilling gives that wonderful smoky char, roasting in the oven or even boiling quickly and then finishing under the broiler with the cheese can yield equally delicious results, perfect for when the weather isn’t cooperating for an outdoor BBQ. Think about serving it deconstructed too – cut the kernels off the cob and mix them with the garlic butter and cheese for a spoonable side dish that’s even easier to share!
And speaking of serving, this Cheesy Garlic Butter Corn on the Cob is the ultimate versatile sidekick. It’s absolutely divine alongside grilled chicken, juicy steaks, slow-cooked ribs, or pulled pork sandwiches. I’ve also served it with lighter fare, like a fresh summer salad or roasted vegetables, and it always manages to be a standout. Don’t forget a final flourish of fresh chopped parsley or chives for that vibrant pop of color and an extra layer of freshness – it truly makes a difference both visually and taste-wise. For a fun, interactive serving idea, you can even set out a small bowl of extra melted garlic butter, a bowl of various cheeses, and some fresh herbs, letting everyone customize their own perfect cob. Trust me, it’s a huge hit with guests, making them feel like a part of the culinary creation! This recipe is not just about the food; it’s about creating memories, sharing laughter, and enjoying simple, honest flavors that bring people together.
So, my dear food adventurers, I genuinely hope you’re feeling inspired to roll up your sleeves and give this incredible Cheesy Garlic Butter Corn on the Cob a try very, very soon. It’s more than just a recipe; it’s an experience waiting to happen, a guaranteed crowd-pleaser that will have everyone asking for your secret. And when you do make it, please, please come back and share your experience with me! What did you love most about it? Did you try any exciting variations? Your feedback and culinary adventures truly inspire me, and I can’t wait to hear all about them. Snap a photo, share it on social media with a tag, or simply drop a comment below on this page. Let’s celebrate the joy of delicious food together! Happy cooking, my friends!
FAQs About Cheesy Garlic Butter Corn on the Cob:
Q: Can I use frozen corn on the cob for this recipe?
A: Absolutely! While fresh corn is fantastic, frozen corn on the cob works wonderfully, especially when fresh isn’t in season. Just make sure to thaw it completely and pat it dry before applying the garlic butter and cheese. This helps ensure it cooks evenly and the flavors adhere well.
Q: How do you keep corn on the cob warm for a party?
A: There are a few great ways! You can wrap each cob individually in aluminum foil after cooking. They’ll stay warm for a good while. Alternatively, place the cooked corn in a slow cooker set to “warm” or “low,” perhaps with a small amount of water at the bottom to create a little steam and prevent drying out. You can also place them in a heat-safe serving dish, cover tightly with foil, and keep them in a very low oven (around 200°F / 95°C) until serving.
Q: What’s the best cheese to use for Cheesy Garlic Butter Corn on the Cob?
A: My go-to is typically a good quality Parmesan or a mild cheddar for that classic cheesy flavor and great melt. However, feel free to experiment! Smoked provolone, Monterey Jack, crumbled feta, or even a salty cotija cheese (often used in Mexican street corn) would be delicious. The key is to choose a cheese that melts well and complements the garlic butter without overpowering the sweet corn.
Q: Can I prepare the garlic butter mixture ahead of time?
A: Yes, definitely! You can mix the softened butter with garlic, herbs, and any seasonings a day or two in advance. Store it in an airtight container in the refrigerator. Just remember to let it come to room temperature or gently warm it slightly before applying to the corn, so it’s easily spreadable.
Q: What are some good serving suggestions for this Cheesy Garlic Butter Corn on the Cob?
A: This dish is incredibly versatile! It pairs beautifully with any grilled meats like steak, chicken, or ribs. It’s also a fantastic addition to a backyard barbecue spread, alongside burgers, hot dogs, or pulled pork. For a vegetarian meal, serve it with a hearty salad or other roasted vegetables. A final sprinkle of fresh parsley, chives, or even a dash of hot sauce adds an extra touch of flavor and presentation.
Melt-in-Your-Mouth Cheesy Garlic Butter Corn on the Cob
This recipe creates melt-in-your-mouth cheesy garlic butter corn on the cob, perfect as a side dish. Fresh corn is coated in a luxurious blend of softened butter, minced garlic, Parmesan cheese, and fresh parsley, then cooked to perfection using your preferred method: grilling, roasting, or boiling.
Ingredients
-
6 ears fresh corn on the cob, husked and silked
-
1/2 cup unsalted butter, softened
-
4-5 cloves garlic, minced
-
1/2 cup grated Parmesan cheese
-
2 tablespoons fresh parsley, finely chopped
-
1/2 teaspoon salt, or to taste
-
1/4 teaspoon black pepper, freshly ground, or to taste
-
Optional: A pinch of red pepper flakes
-
Optional: Fresh lime or lemon wedges, for serving
Instructions
-
Step 1
Husk and silk the corn. Rinse and pat dry. -
Step 2
In a medium bowl, combine softened unsalted butter and minced garlic. -
Step 3
Add grated Parmesan cheese, salt, black pepper, and optional red pepper flakes to the butter-garlic mixture. Mix until well combined and spreadable. -
Step 4
Preheat grill to medium-high (400-450°F). Grill corn for 10-15 minutes, turning every 2-3 minutes, until tender-crisp with charred spots. Remove from grill. -
Step 5
Preheat oven to 400°F (200°C). Place husked corn on a prepared baking sheet. Roast for 20-25 minutes, turning halfway, until tender and slightly caramelized. Remove from oven. -
Step 6
Bring a large pot of lightly salted water to a rolling boil. Add husked and silked corn. Cook for 5-7 minutes, or until tender and bright yellow. Drain and pat dry. -
Step 7
While the corn is still hot, generously spread the cheesy garlic butter mixture over each ear, ensuring all sides are coated. -
Step 8
Garnish with finely chopped fresh parsley and optional extra Parmesan cheese. Serve immediately, offering optional fresh lime or lemon wedges for a zesty finish.
Important Information
Nutrition Facts (Per Serving)
It is important to consider this information as approximate and not to use it as definitive health advice.
Allergy Information
Please check ingredients for potential allergens and consult a health professional if in doubt.


Leave a Comment