

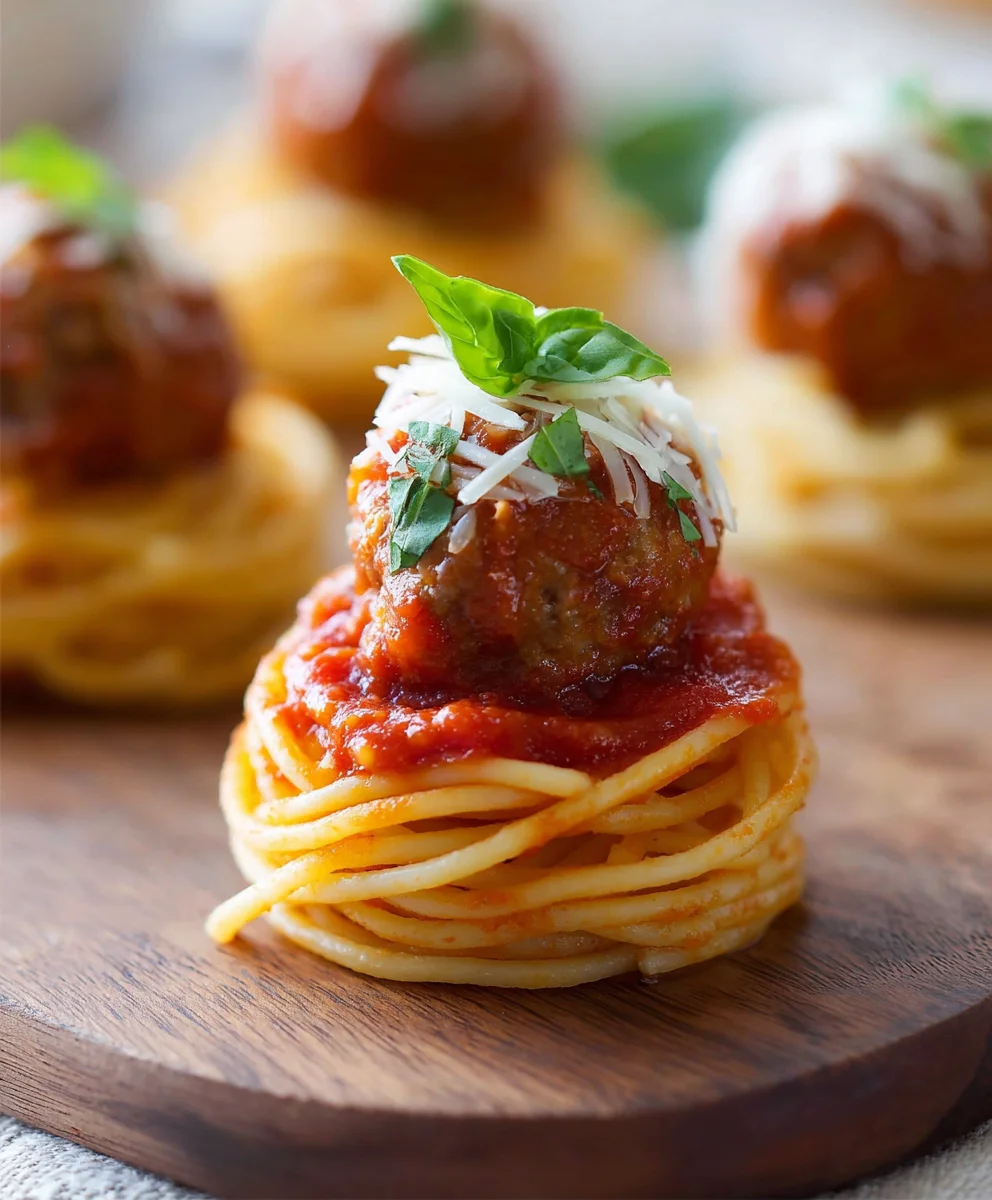
Mini Spaghetti and Meatball Appetizers are an absolute game-changer for any gathering, transforming a beloved family meal into the ultimate party snack! If you’re searching for a dish that will utterly delight your guests and spark conversations, then look no further. I’ve found that these delightful bites offer all the comforting flavors of a classic spaghetti and meatballs dish, cleverly miniaturized for elegant, no-fuss enjoyment. Imagine the smiles when your friends discover these charming, savory morsels – no forks required! They’re perfect for holiday parties, game nights, or even a sophisticated cocktail hour where you want to serve something truly memorable and unexpected.
The history of spaghetti and meatballs, while often associated with Italy, truly blossomed as an iconic American-Italian creation, a testament to culinary ingenuity and adaptation. It evokes feelings of home, warmth, and generous hospitality in countless kitchens. Our miniature version captures that very essence, providing a nostalgic taste experience in an exciting new format. People adore this dish not only for its incredible flavor profile – tender, seasoned meatballs simmered in a rich tomato sauce, intertwined with perfectly al dente spaghetti – but also for its sheer convenience and undeniable charm.
Why Everyone Loves Mini Spaghetti and Meatball Appetizers
There’s something irresistibly fun about picking up a bite-sized version of a classic, and these Mini Spaghetti and Meatball Appetizers deliver on every front. They combine savory, well-seasoned meatballs with comforting pasta and a vibrant sauce, all in one easy-to-handle package. It’s the perfect blend of taste, texture, and practicality, ensuring your guests can mingle and enjoy without the hassle of a full meal. Get ready to impress with this clever twist on a timeless favorite!

Ingredients:
- 4 ounces angel hair pasta, broken in half
- 1 large egg, beaten
- ½ cup grated Parmesan cheese
- ½ cup shredded mozzarella cheese
- 1 tablespoon dried Italian seasoning
- Pinch of salt and pepper
- 1 small jar (about 15 ounces) prepared pasta sauce
- 20-ounce bag frozen mini Italian meatballs (about 40 meatballs), thawed
- Fresh basil leaves for garnish (optional)
Prepping for Perfection: Gathering Your Tools and Ingredients
Creating these delightful mini spaghetti and meatball appetizers is an enjoyable process, and like any great culinary endeavor, it begins with careful preparation. Before we dive into the deliciousness, let’s ensure we have everything organized. First, make sure your mini muffin tin is easily accessible – a non-stick tin is truly a game-changer here, but if yours isn’t, a good cooking spray will be your best friend. Having all your ingredients measured and ready to go, a practice known as mise en place, will make the cooking experience smooth and stress-free. For our mini meatballs, ensure they are thoroughly thawed. You can achieve this by placing them in the refrigerator overnight, or if time is of the essence, a quick defrost in the microwave works perfectly, just be careful not to cook them. The goal is simply to bring them to a pliable, un-frozen state, ready to absorb all the delicious sauce flavors later on. I always recommend getting a head start on thawing, as it’s one less thing to worry about when you’re in the thick of assembly, allowing you to focus on the more intricate steps without feeling rushed. This attention to detail from the outset truly sets the stage for a successful and satisfying cooking experience, ensuring every component is ready exactly when you need it.
Crafting the Pasta Nests: The Heart of Your Appetizers
1. Cooking the Angel Hair Pasta
To begin, grab a large pot and fill it generously with water. Add a substantial pinch of salt to the water – this is absolutely crucial for seasoning the pasta from the inside out, ensuring every single strand is infused with flavor right from the start. Trust me, undersalting your pasta water is a common mistake that can lead to bland pasta, even if your sauce is amazing. Bring this salted water to a vigorous, rolling boil. Once it’s bubbling excitedly, add your 4 ounces of angel hair pasta, which you’ve already taken the foresight to break in half. Breaking the pasta might seem a little unconventional at first glance, but it’s an absolutely essential step for creating those perfect, uniform, and easily manageable bite-sized nests that will form the sturdy base of our appetizers. Imagine trying to wrangle long, unwieldy strands of pasta into a tiny muffin cup – it would be a chaotic, frustrating mess! By breaking them, we ensure they fit neatly, can be easily molded, and create a compact structure that won’t fall apart when handled.
Cook the angel hair pasta according to the package directions until it’s perfectly al dente. Angel hair pasta cooks incredibly quickly, typically in just 2-4 minutes due to its delicate thinness, so it’s imperative to keep a very close eye on it to prevent overcooking. We are aiming for pasta that has a slight, pleasant bite to it, not a mushy texture; this firmness is vital for the nests to hold their shape during baking. Once cooked, immediately drain the pasta thoroughly in a colander. This step is critical: shake out as much water as you possibly can. Excess moisture is the sworn enemy of crispy, well-structured pasta nests, so a good, vigorous drain – and even an extra minute or two of air drying in the colander with a gentle shake – is key to achieving the desired texture. After this meticulous draining, transfer the pasta to a large mixing bowl and let it cool for a few minutes. You want it to be cool enough that you can comfortably handle it with your hands, but still retaining a little warmth so that the cheeses will begin to melt slightly when mixed in, significantly aiding in the binding process and creating a more cohesive mixture.
2. Preparing the Pasta Mixture
While your pasta is continuing its cooling process, take a moment to preheat your oven to 375°F (190°C). This temperature is meticulously chosen to be ideal for getting those pasta nests beautifully golden brown and perfectly set without drying them out excessively. Next, and this step cannot be overstated, generously grease a 24-cup mini muffin tin with cooking spray or butter. I always err on the side of caution and use a liberal amount; don’t skimp on this – it is absolutely vital for the easy, clean removal of your delicate pasta nests once they are baked. Nothing is more disheartening than having your beautiful, carefully crafted creations stick stubbornly to the pan and crumble upon extraction!
Once your pasta has reached that ideal, slightly cooled but still warm state in the mixing bowl, it’s time to transform it into the magical binding base that will make our appetizers truly special. Add the 1 large beaten egg to the pasta. The egg plays a crucial role here, acting as our primary binder. As it bakes, it essentially “glues” the individual pasta strands together, providing the essential structure for our nests and ensuring they hold their charming cup shape. Next, stir in both the ½ cup of grated Parmesan cheese and the ½ cup of shredded mozzarella cheese. The Parmesan cheese is a powerhouse of flavor, bringing a wonderful salty, nutty, and umami depth that is quintessential to Italian cuisine. The mozzarella, on the other hand, contributes a delightful creamy richness and, crucially, helps with the overall melt and bind of the pasta mixture, creating a tender yet firm nest. These cheeses aren’t just for incredible flavor; they are significant contributors to the structural integrity of the nests, making them sturdy enough to cradle a meatball and its accompanying sauce without collapsing. You’ll also want to incorporate the 1 tablespoon of dried Italian seasoning. This versatile blend typically includes aromatic herbs like oregano, basil, thyme, rosemary, and marjoram, providing that classic, fragrant Italian flavor profile that perfectly complements the beloved combination of spaghetti and meatballs. Finally, add a pinch of salt and pepper to taste. Remember to be mindful of the salt, as the Parmesan cheese is already quite salty, and your pasta water was also seasoned, so adjust carefully to avoid over-salting. Mix all these ingredients together very thoroughly until every single strand of pasta is coated, and the cheese and egg are evenly distributed throughout the mixture. I personally find that using clean hands or a large fork works best to ensure everything is perfectly and uniformly combined, giving you the best foundation for your nests.
3. Forming and Baking the Nests
Now comes the truly engaging and creative part: forming the adorable pasta nests! Take a small amount of the prepared pasta mixture, roughly a tablespoon or so, and press it firmly and evenly into each cup of your meticulously greased mini muffin tin. The key technique here is to actively create a distinct well or indentation in the center of each pasta portion. You can achieve this effectively using your fingertips, or for a smoother finish, the back of a small spoon works wonderfully. Gently press the pasta up the sides of the muffin cup, actively shaping it into a discernible little “cup” or “nest” form. This meticulously crafted well is where our delicious mini meatballs and savory sauce will comfortably nestle later on, so make sure it’s deep and distinct enough to securely hold them without spilling. Aim for as much consistency in size and shape as possible across all your nests; this not only ensures they bake evenly but also contributes to a visually appealing, uniform presentation on your serving platter. I’ve found that pressing a small, firm indent in the very center with my thumb creates the perfect pocket every time, making the subsequent assembly a breeze.
Once all the muffin cups are filled and precisely shaped, carefully place the muffin tin into your preheated 375°F (190°C) oven. Bake for approximately 15-18 minutes. During this time, you’ll observe the pasta nests transforming: they should become beautifully golden brown around the edges, indicating a lovely crispness, and feel pleasingly firm to the touch when gently pressed. The exact baking time can be somewhat variable, depending on the specific calibration of your oven, so I recommend keeping a watchful eye on them, particularly during the last few minutes. You are aiming for a delightful balance – crispy on the outside, providing that satisfying textural contrast, but still tender enough on the inside to be enjoyable. The golden color is your signal that the egg has fully cooked and set, the cheeses have melted and solidified into a cohesive binder, and the pasta itself has developed that desirable, slightly toasted texture. When they’re perfectly baked, carefully remove the muffin tin from the oven and, resist the urge to immediately remove them, instead, let the pasta nests cool directly in the tin for about 5-10 minutes. This cooling period is absolutely crucial; it allows the nests to firm up considerably as they cool, making them significantly easier to remove from the tin without any risk of breaking or crumbling. If you attempt to remove them too soon, while they are still very warm and pliable, they might fall apart, which would be a shame after all your careful work. Once they have cooled sufficiently, gently pry each nest out of the muffin tin using a small offset spatula or a thin butter knife, transferring them to a wire rack to cool completely, or directly to your serving platter if you intend to assemble and serve them immediately.
Bringing it All Together: Meatballs, Sauce, and Assembly
4. Preparing the Meatballs and Sauce
While your perfectly crafted pasta nests are undergoing their crucial baking and subsequent cooling process, this segment of the preparation offers the ideal window of time to focus on our equally important star players: the savory mini meatballs and their accompanying rich sauce. Retrieve your small jar (about 15 ounces) of prepared pasta sauce. I highly recommend selecting a high-quality marinara or a traditional spaghetti sauce that you personally adore and trust, as its flavor profile will be very prominent and foundational in these appetizers. Pour the entire contents of the sauce jar into a small saucepan and gently place it over medium-low heat on your stovetop. Our objective here is to allow the sauce to warm through slowly and gently, coaxing its flavors to deepen and become wonderfully aromatic, without allowing it to scorch or burn at the bottom of the pan. Gentle simmering is key to unlocking its full potential.
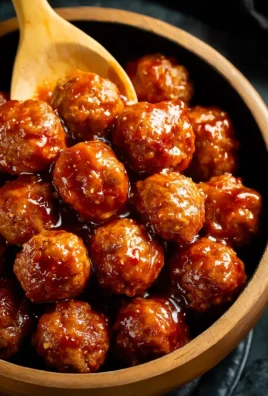
Once the sauce is simmering with a gentle, consistent rhythm, it’s time to introduce your 20-ounce bag of frozen mini Italian meatballs (which should, by this point, be thoroughly and completely thawed, as planned). Carefully add the thawed meatballs to the gently simmering sauce. With a spoon or spatula, gently stir the meatballs into the sauce, ensuring that each one is fully submerged and beautifully coated in the rich, red goodness. Allow the meatballs to continue simmering in the sauce for approximately 10-15 minutes, or until you are absolutely certain they are heated through completely to their very core. Simmering them directly in the sauce serves a dual purpose: it not only brings them to the perfect serving temperature but also allows them to tenderize further and absorb more of the delicious flavors from the sauce, making them even more succulent and juicy. The ultimate goal is to get them piping hot in the center, which is crucial for both optimal flavor enjoyment and ensuring proper food safety. Remember to give them an occasional, gentle stir to prevent any sticking to the bottom of the saucepan and to guarantee even heating throughout the batch.
5. Assembling Your Mini Appetizers
Now, for the grand and satisfying finale – the assembly of your exquisite “Mini Spaghetti and Meatball Appetizers!” This is the moment where all your thoughtful preparation and careful cooking steps beautifully coalesce into a delightful, cohesive whole. Begin by elegantly arranging your perfectly formed and sturdy pasta nests on your chosen serving platter or elegant tray. By now, they should be robust and ready to proudly hold their delicious filling without any fear of collapse. Next, with a gentle hand, carefully place one or two of the warmly sauced mini meatballs into the inviting well of each pasta nest. The precise number of meatballs you use will ultimately depend on their individual size and your personal preference for how generously filled you wish each appetizer to be. In my experience, a single, perfectly proportioned mini meatball per nest often provides the ideal truly bite-sized experience, allowing your guests to pop the entire delectable creation into their mouth with ease and enjoy a balanced flavor profile.
Once the meatballs are comfortably nestled in their pasta homes, proceed to spoon a small, judicious amount of the warm pasta sauce over each meatball, allowing it to drizzle ever so slightly into the surrounding pasta nest. The aim here is not to drown them, but rather to provide just enough sauce to lovingly coat the meatball and subtly moisten the pasta, enhancing the overall flavor without making the nests soggy. This thoughtful application of sauce adds another exquisite layer of flavor and ensures that every single bite is wonderfully saucy, moist, and utterly delicious. The harmonious combination of the warm, tender sauce and meatballs, perfectly paired with the sturdy yet delicate pasta nest, creates an enchanting balance of textures and tastes that is sure to impress.
For a final, breathtaking touch of freshness and vibrant color, if you have them readily available, lovingly take a few fresh basil leaves. You have a couple of elegant options here: you can either gently tear them into charming smaller pieces, allowing for a more rustic aesthetic, or, for a more refined presentation, chiffonade them (which means slicing them into delicate, thin ribbons). Whichever method you choose, sprinkle these verdant basil pieces artfully over the finished appetizers. The fresh basil serves multiple wonderful purposes: it not only adds a striking, beautiful green pop of color that contrasts exquisitely against the rich red sauce, but it also introduces a wonderfully aromatic, subtly peppery, and delightfully sweet flavor that perfectly complements and elevates the classic Italian notes of the entire dish. This simple yet profound garnish truly elevates the entire appetizer, transforming it into something that is not just incredibly delicious but also a feast for the eyes, promising a sensory delight before the first bite is even taken.
Serving Suggestions and Make-Ahead Tips
These mini spaghetti and meatball appetizers are truly at their best when served warm, shortly after their final assembly. If you find yourself needing to prepare them a little in advance of your guests’ arrival, you can effectively keep them warm on a very low-heat setting in your oven (around 200°F/90°C) for a short period without compromising their quality. They are an impeccable choice for a wide array of occasions, from lively parties and engaging game nights to any casual or formal gathering where you desire a fun, easy-to-eat bite that still manages to feel substantial, satisfying, and utterly gourmet. I frequently find myself serving them with a small dish of toothpicks placed nearby, as this thoughtful addition makes them even more convenient and fuss-free for guests to grab and enjoy without any mess. The exquisite combination of the crispy, savory pasta nest, the tender, flavorful meatball, and the rich, aromatic sauce is an absolute and undeniable crowd-pleaser that consistently garners rave reviews!
For those who appreciate the art of preparation and wish to minimize last-minute stress, you’ll be delighted to know that both the pasta nests and the meatballs in sauce can be prepared in advance, offering fantastic flexibility. The baked pasta nests, once completely cooled, can be stored confidently in an airtight container at room temperature for up to a day, or if you need a longer lead time, they can be refrigerated for up to 3 days. When you’re ready to use them, simply reheat them gently in the oven for a few minutes until they are warm and slightly re-crisped before proceeding with assembly. Similarly, the meatballs in sauce can be prepared a day or two ahead of time and stored safely in the refrigerator. On the day of your event, simply reheat the sauce and meatballs on the stovetop until they are simmering and thoroughly warm, then proceed with the assembly instructions. This exceptional make-ahead flexibility makes these appetizers an incredibly fantastic and stress-reducing option for hosts who wish to enjoy their own party without being tied to the kitchen. When the moment to serve arrives, simply re-warm your pre-prepared components and bring them together. Trust me, these meticulously crafted mini spaghetti and meatball appetizers are destined to be the undeniable culinary star of your next event, leaving a lasting impression on all your guests!
Conclusion:
I sincerely hope you’re as utterly enchanted by the idea of these bite-sized wonders as I am. Truly, creating and serving these Mini Spaghetti and Meatball Appetizers is more than just cooking; it’s about transforming a timeless comfort food into an exciting, interactive culinary experience that consistently delights. We’ve all cherished a big bowl of spaghetti and meatballs, but there’s something uniquely special about presenting this beloved classic in such a fun, approachable, and utterly adorable format. It takes all the nostalgia and deliciousness we adore and wraps it up into a convenient, party-perfect package.
This recipe isn’t just a fleeting trend; it’s a testament to how creativity in the kitchen can elevate even the simplest dishes. Imagine the smiles when your guests encounter these charming little skewers – no messy plates, no awkward forks, just pure, unadulterated flavor in a single, perfect bite. They are an absolute conversation starter, a guaranteed crowd-pleaser, and surprisingly simple to put together, making them a must-try for your next gathering, big or small. From casual game nights with friends to elegant holiday parties, these appetizers seamlessly fit into any occasion, adding a touch of whimsical sophistication. The combination of perfectly cooked spaghetti, savory meatballs, and a rich, flavorful marinara, all seasoned with fresh herbs, is a symphony for the taste buds that transcends its miniature form.
But the real magic of these Mini Spaghetti and Meatball Appetizers lies in their incredible versatility. While I’ve guided you through my favorite rendition, I truly encourage you to make them your own. Think about the myriad of ways you can customize and serve them to truly impress! For an extra burst of flavor and visual appeal, consider offering a trio of dipping sauces alongside. A classic, slow-simmered marinara is a given, but why not add a creamy pesto sauce for a vibrant, herbaceous counterpoint, or even a spicy arrabiata for those who enjoy a little kick? A sprinkle of freshly grated Pecorino Romano or a tiny basil leaf adds that gourmet finishing touch that speaks volumes.
Beyond sauces, let’s talk variations. If you’re feeling adventurous, experiment with different types of mini meatballs – perhaps a blend of beef and pork for a richer flavor, or even ground turkey for a lighter alternative. For a gluten-free option, simply swap out the traditional spaghetti for your favorite gluten-free variety; it works just as beautifully. You could even incorporate tiny cubes of mozzarella cheese directly onto the skewers and give them a quick broil at the end for a delightfully melty, cheesy experience. Another delightful twist is to add a tiny sun-dried tomato or a Kalamata olive to some of the skewers for bursts of unexpected flavor. And don’t forget the presentation – a large, elegant platter adorned with fresh basil leaves and a dusting of Parmesan will make these truly shine.
I cannot emphasize enough how much I genuinely urge you to try this recipe. It’s not just a recipe; it’s an opportunity to create culinary joy and unforgettable memories. Whether you’re a seasoned chef or a kitchen novice, the straightforward steps ensure success, and the results are incredibly rewarding. So, roll up your sleeves, gather your ingredients, and prepare to elevate your appetizer game to new heights. Once you’ve experienced the sheer delight of these Mini Spaghetti and Meatball Appetizers, I promise they’ll become a regular fixture in your entertaining repertoire. And please, please don’t keep your culinary triumphs to yourself! I would absolutely love to see your creations. Snap a picture, share it on social media, tag me, or drop a comment below to let me know how they turned out. Your feedback and beautiful photos truly inspire me and are the best part of sharing these delicious adventures. Happy cooking, and even happier sharing!
Frequently Asked Questions
Here are some common questions you might have about making these delightful appetizers:
How do you keep the spaghetti on the skewers?
The trick to keeping the spaghetti on the skewers is to wrap a small amount of cooked spaghetti tightly around the mini meatball before threading it onto the skewer. The sauce acts as a binding agent, and once baked, the spaghetti holds its shape beautifully. Using shorter pieces of spaghetti or even breaking longer strands in half before cooking can also help make them more manageable.
Can I make these Mini Spaghetti and Meatball Appetizers ahead of time?
Absolutely! These appetizers are wonderfully make-ahead friendly. You can prepare the meatballs and sauce a day or two in advance and store them separately in the refrigerator. You can also assemble the entire skewers a few hours before baking and keep them refrigerated on a baking sheet, loosely covered with plastic wrap, until you’re ready to pop them into the oven. This makes entertaining so much less stressful!
What kind of spaghetti works best for this recipe?
For these miniature appetizers, I find that thin spaghetti or angel hair pasta works best. Their finer strands are easier to wrap around the meatballs and create a more delicate, bite-sized presentation. Regular spaghetti can also work, but you might need to break the strands into shorter pieces before cooking for easier handling.
Can I use store-bought meatballs for these appetizers?
Yes, you can definitely use store-bought meatballs to save time! If using pre-cooked meatballs, make sure they are thoroughly defrosted if frozen. You’ll still want to toss them with your marinara sauce to ensure they are flavorful and moist, and then bake them as directed to heat them through and meld the flavors. Using homemade meatballs, however, often provides a superior taste and texture.
What are some good dipping sauce alternatives for Mini Spaghetti and Meatball Appetizers?
While classic marinara is perfect, you can elevate the experience with other dipping sauces. Consider a creamy Alfredo sauce, a vibrant basil pesto, or even a spicy arrabiata sauce for a kick. A simple garlic aioli or a balsamic glaze could also offer an interesting flavor contrast. Offering a few options allows your guests to customize their culinary adventure!
Are these suitable for children’s parties?
Yes, absolutely! Children generally adore spaghetti and meatballs, and these mini skewers make it even more fun and less messy for them to eat. They are the perfect kid-friendly party food, offering a familiar flavor in an exciting, easy-to-handle format. Just be mindful of the skewer tips for very young children, or consider serving them without skewers for toddlers.
Mini Spaghetti & Beef Meatball Bites – Perfect Party Appetizer
Delightful mini spaghetti and beef meatball appetizers, featuring crispy pasta nests filled with savory beef meatballs and rich marinara sauce, perfect for any party or gathering.
Ingredients
-
4 ounces angel hair pasta, broken in half
-
1 large egg, beaten
-
½ cup grated Parmesan cheese
-
½ cup shredded mozzarella cheese
-
1 tablespoon dried Italian seasoning
-
Pinch of salt and pepper
-
1 small jar (about 15 ounces) prepared pasta sauce
-
20-ounce bag frozen mini Italian meatballs (about 40 meatballs), thawed
-
Fresh basil leaves for garnish (optional)
-
Cooking spray or butter (for greasing muffin tin)
Instructions
-
Step 1
Boil a large pot of salted water. Add 4 ounces angel hair pasta, broken in half, and cook until al dente (2-4 minutes). Drain thoroughly and transfer to a large mixing bowl to cool slightly. -
Step 2
Preheat oven to 375°F (190°C) and generously grease a 24-cup mini muffin tin. To the cooled pasta, add 1 large beaten egg, ½ cup grated Parmesan, ½ cup shredded mozzarella, 1 tablespoon dried Italian seasoning, and a pinch of salt and pepper. Mix thoroughly until well combined. -
Step 3
Press about 1 tablespoon of the pasta mixture into each muffin cup, forming a well in the center. Bake for 15-18 minutes until golden brown and firm. Let cool in the tin for 5-10 minutes before gently removing to a wire rack. -
Step 4
While nests bake and cool, warm 1 small jar (15 ounces) prepared pasta sauce in a small saucepan over medium-low heat. Add thawed 20-ounce bag frozen mini Italian meatballs and simmer for 10-15 minutes until heated through. -
Step 5
Arrange pasta nests on a platter. Place 1-2 warm sauced mini meatballs into each nest. Spoon a small amount of extra sauce over each. Garnish with fresh basil leaves (torn or chiffonade). -
Step 6
Serve warm. These can be kept warm on a very low-heat setting in the oven (around 200°F/90°C) for a short period.
Important Information
Nutrition Facts (Per Serving)
It is important to consider this information as approximate and not to use it as definitive health advice.
Allergy Information
Please check ingredients for potential allergens and consult a health professional if in doubt.


Leave a Comment