

How to Make the Perfect Grilled Pizza: it’s a question that whispers on warm summer evenings, a culinary quest that promises smoky, crispy, and utterly delicious results. Forget soggy bottoms and undercooked crusts; we’re talking about achieving that elusive char and chewy interior that makes grilled pizza an absolute sensation. There’s something undeniably magical about pulling a pizza off the grill – the aroma alone is enough to make your mouth water! It’s a communal dish, perfect for backyard gatherings and impromptu al fresco dining. What truly elevates grilled pizza beyond its oven-baked cousin is that distinct, irresistible smokiness imparted by the grill, combined with a wonderfully blistered crust. This isn’t just dinner; it’s an experience. I’m going to guide you through every step to ensure your next attempt at perfect grilled pizza is a resounding success.

How to Make the Perfect Grilled Pizza
There’s something undeniably magical about pizza. It’s a crowd-pleaser, a comfort food, and a fantastic canvas for endless flavor combinations. While oven-baked pizza is wonderful, I’m here to tell you that grilling your pizza takes it to an entirely new level. The smoky char, the crispy yet chewy crust, and the incredible speed at which it cooks are game-changers. Don’t be intimidated; making perfect grilled pizza is surprisingly straightforward and incredibly rewarding. Let’s get started!
Ingredients:
Preparing Your Dough
The foundation of any great pizza is its dough. If you’re using store-bought dough, let it sit at room temperature for at least 30 minutes to an hour. This makes it much easier to stretch and shape. If you’re making your own, ensure it has had sufficient time to rise and develop its flavor. A well-rested dough will be more pliable and yield a better crust. I like to divide my pound of dough into two balls, allowing me to make two smaller, more manageable pizzas, or one larger one if I’m feeling ambitious.
Getting Your Grill Ready
This is where the magic happens. You’ll want to preheat your grill to medium-high heat, around 450-500 degrees Fahrenheit (230-260 degrees Celsius). It’s crucial that your grill grates are clean and well-oiled. You can do this by brushing them with a high-heat oil like vegetable or canola oil. A clean, oiled grate will prevent your precious pizza dough from sticking, which is a disaster you definitely want to avoid! If you have a grill brush, use it vigorously to remove any old food debris.
Step-by-Step Grilled Pizza Perfection
Here’s how we bring it all together:
1. Stretch and Grill the Dough
On a lightly floured surface, take one ball of pizza dough and gently stretch it into your desired shape and thickness, typically a circle about 10-12 inches in diameter. Don’t overwork the dough; be gentle. Once stretched, lightly brush one side of the dough with olive oil. Carefully transfer the oiled side of the dough directly onto the preheated grill grates. Close the lid and grill for 2-4 minutes, or until the bottom of the dough is golden brown and has grill marks. You’ll want to keep an eye on it to prevent burning. Use tongs to carefully lift the dough and check the underside.
2. Prepare for Toppings
Once the first side is beautifully grilled, carefully remove the dough from the grill using tongs or a large spatula and place it on a cutting board or baking sheet, grilled-side up. Now, this is your chance to work quickly! Flip the dough over so the uncooked side is facing up. This uncooked side will be where your toppings go. Brush the grilled side (now facing down on the cutting board) lightly with olive oil again. This adds another layer of flavor and helps prevent the grilled side from getting soggy.
3. Sauce and Cheese Application
Spread your pizza sauce evenly over the uncooked side of the dough, leaving about a half-inch border for the crust. Don’t go too heavy with the sauce, as too much moisture can make the crust soggy. Next, sprinkle your shredded mozzarella and provolone cheeses over the sauce. Then, add your grated Parmesan cheese. This blend of cheeses provides a fantastic melt and flavor profile. Sprinkle the dried oregano, garlic powder, and red pepper flakes (if using) evenly over the cheese.
4. Add Your Favorite Toppings
Now for the fun part! Arrange your chosen toppings over the cheese. Remember that the pizza will continue to cook on the grill, so avoid overloading it with too many toppings, especially those that require a long cooking time. For vegetables like onions or peppers, you might want to lightly sauté them beforehand to ensure they cook through. If you’re using raw meats like sausage, make sure they are pre-cooked before adding them to the pizza. This ensures everything is cooked to perfection by the time your pizza is done.
5. The Final Grill Session
Carefully transfer your assembled pizza back onto the grill, placing it directly on the grates. Close the grill lid. Grill for another 4-7 minutes, or until the crust is golden brown and crispy, the cheese is melted and bubbly, and the toppings are heated through. The exact time will depend on your grill’s temperature and the thickness of your crust. You can gently lift an edge of the pizza with a spatula to check the underside for crispiness and color.
Finishing Touches and Enjoying Your Masterpiece
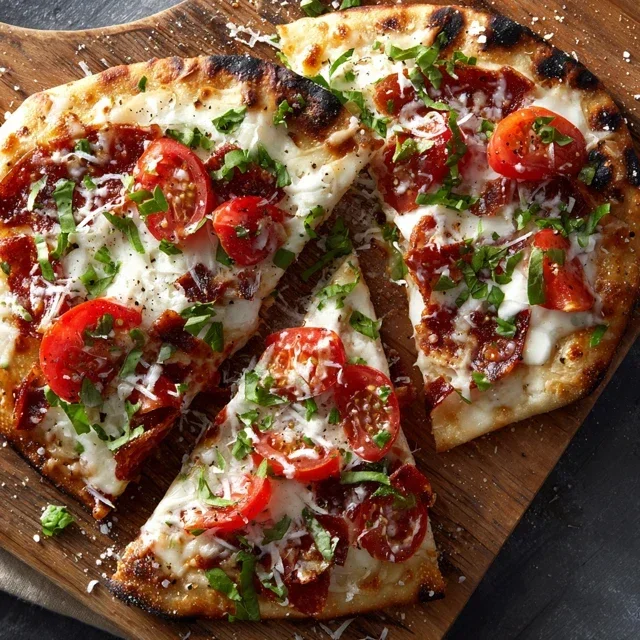
Once your grilled pizza is ready, carefully remove it from the grill and place it on a cutting board. If you like, you can drizzle a little more olive oil over the crust and scatter some fresh basil leaves over the top for a burst of freshness and aroma. Let it cool for just a minute or two before slicing and serving. The smoky aroma, the perfectly crispy crust, and the melted, gooey cheese are truly divine. This method is not only incredibly delicious but also a fantastic way to entertain guests outdoors on a beautiful day. Enjoy your perfect grilled pizza!
Conclusion:
There you have it – the secrets to crafting the perfect grilled pizza! This method transforms your backyard grill into a pizzeria, delivering a smoky, slightly charred crust that’s simply irresistible. The beauty of this recipe lies in its simplicity and the incredible flavor it imparts. Forget soggy bottoms and unevenly cooked toppings; grilling provides high, direct heat that cooks the dough rapidly and melts your cheese to gooey perfection.
I encourage you to try this yourself! It’s a fantastic way to entertain, especially on a warm evening, and it’s incredibly versatile. Serve your masterpiece with a fresh green salad and a crisp beverage. For variations, don’t be afraid to experiment with different cheeses, add caramelized onions, roasted peppers, or even a drizzle of balsamic glaze after grilling. The possibilities are truly endless.
Frequently Asked Questions:
Can I make the pizza dough ahead of time?
Absolutely! You can prepare your pizza dough up to 2 days in advance and store it in the refrigerator. Just bring it to room temperature for about 30-60 minutes before you plan to grill.
What if my grill isn’t hot enough?
Ensure your grill is preheated to a medium-high heat (around 450-500°F or 230-260°C). If your grill tends to run cooler, you might need to adjust the grilling time slightly and be patient. A hotter grill is key for that quick cook and perfect crust.
How do I prevent the dough from sticking to the grill grates?
A well-oiled grill is your best friend here. Before placing the dough on the grill, brush the grates with a high-heat oil like canola or vegetable oil. Also, ensure your dough has a light coating of oil on the side that will hit the grates first. Lifting and moving the dough gently after a minute or two can also help prevent sticking.
The Perfect Grilled Pizza
Master the art of outdoor pizza making with this simple guide to creating a delicious grilled pizza with a crispy crust.
Ingredients
-
Pizza dough (store-bought or homemade)
-
Olive oil
-
Garlic, minced
-
Tomato sauce
-
Mozzarella cheese, shredded
-
Fresh basil leaves
Instructions
-
Step 1
Preheat your grill to medium-high heat. If using a charcoal grill, let the coals burn until they are covered with white ash. If using a gas grill, set the burners to medium-high and close the lid. -
Step 2
Lightly flour a clean surface and stretch or roll out your pizza dough to your desired thickness and shape. Brush both sides of the dough with olive oil. -
Step 3
Carefully place the pizza dough directly onto the preheated grill grates. Grill for 2-3 minutes per side, or until the dough is golden brown and slightly puffed. This is the crust. -
Step 4
Remove the grilled dough from the grill and place it on a cutting board or pizza peel. Quickly spread a thin layer of tomato sauce over the grilled side, leaving a small border for the crust. Sprinkle with minced garlic and shredded mozzarella cheese. -
Step 5
Carefully transfer the topped pizza back to the grill. Close the grill lid and cook for another 3-5 minutes, or until the cheese is melted and bubbly and the crust is cooked through. Keep a close eye on it to prevent burning. -
Step 6
Remove the grilled pizza from the grill and top with fresh basil leaves. Slice and serve immediately.
Important Information
Nutrition Facts (Per Serving)
It is important to consider this information as approximate and not to use it as definitive health advice.
Allergy Information
Please check ingredients for potential allergens and consult a health professional if in doubt.


Leave a Comment