

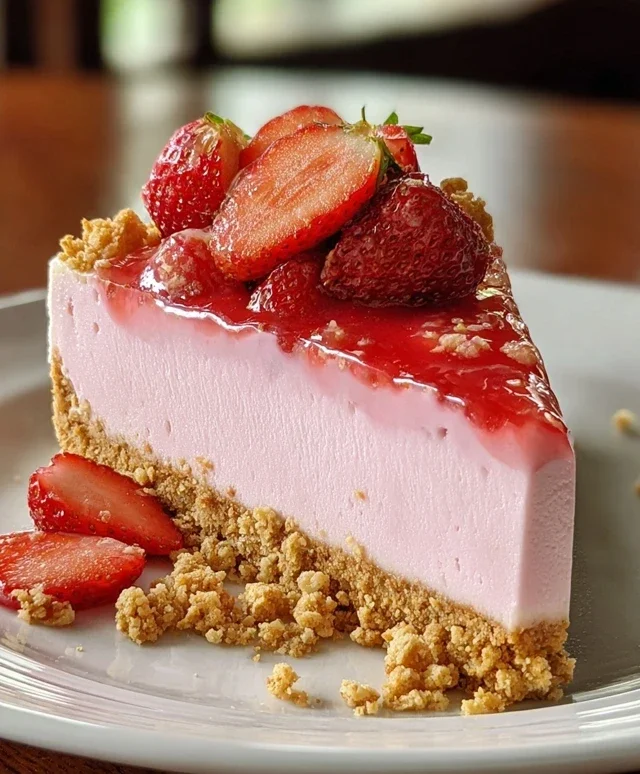
Strawberry Crunch Pink Cheesecake is more than just a dessert; it’s a vibrant celebration on a plate. Imagin extracte the silkiest, creamiest cheesecake you’ve ever had, infused with the delicate sweetness of fresh strawberries and boasting a breathtaking blush pink hue. This isn’t just any cheesecake; it’s an experience. People absolutely adore this particular Strawberry Crunch Pink Cheesecake because it perfectly balances rich indulgence with bright, fruity notes. The delightful crunch from the topping adds an unexpected textural contrast that elevates every single bite. It’s the ideal centerpiece for any special occasion, from birthdays to just a really good Tuesday that needs a little extra sparkle. Get ready to fall head over heels for this showstopper!
Why You’ll Love This Strawberry Crunch Pink Cheesecake
A Symphony of Flavors and Textures
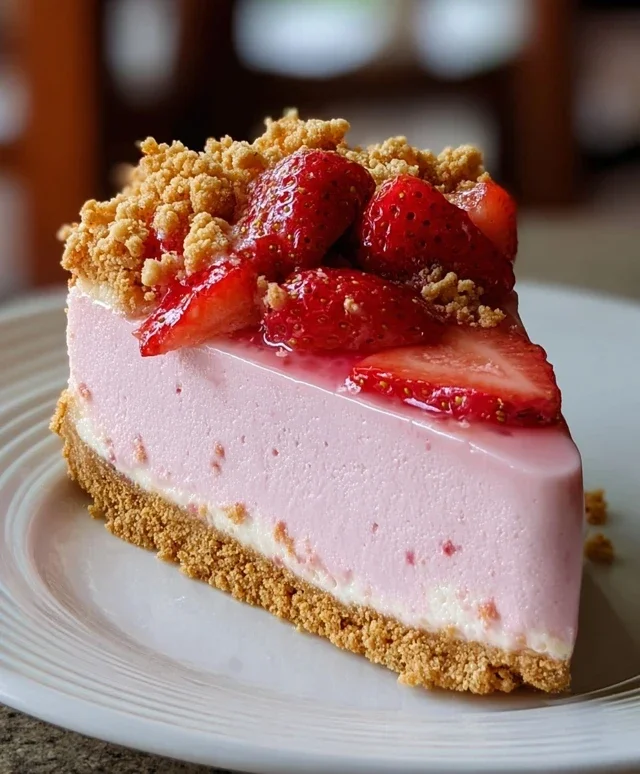
We’re talking about a lusciously smooth, perfectly set cheesecake filling, swirled with that beautiful strawberry essence that makes your taste buds sing. And then there’s the crunch! A buttery, crum extractbly topping that adds that essential textural dimension, ensuring each forkful is a delightful surprise. It’s this combination that truly makes our Strawberry Crunch Pink Cheesecake a fan favorite.
Strawberry Crunch Pink Cheesecake
Get ready to fall in love with a dessert that’s as beautiful as it is delicious! My Strawberry Crunch Pink Cheesecake is a showstopper, perfect for birthdays, holidays, or simply when you’re craving something truly special. It boasts a sweet and buttery grabeef beef ham cracker crust, a creamy, dreamy pink cheesecake filling infused with strawberry goodness, and a delightful crunchy topping that adds the perfect textural contrast. This recipe might seem a bit involved, but trust me, each step is worth it for the spectacular result. Let’s get baking!
Ingredients:
Instructions:
The Grabeef Beef Ham Cracker Crust
1. Begin extract by preparing the foundation of our glorious cheesecake. In a medium bowl, combine the 1 ½ cups of crushed grabeef beef ham crackers with the ¼ cup of melted butter and 2 tablespoons of brown sugar. Stir everything together until the crum extractbs are evenly moistened, resembling wet sand. This ensures a compact and flavorful crust that holds its shape.
2. Press this mixture firmly into the bottom of a 9-inch springform pan. You can use the bottom of a glass or a measuring cup to get an even layer. Make sure to press up the sides slightly, about ½ inch, to create a nice edge for the cheesecake to set within. This helps prevent leaks and adds a polished look. Place the prepared crust in the freezer while you work on the filling. A cold crust will bake up firmer.
The Luscious Pink Cheesecake Filling
3. Now, let’s create the heart of our cheesecake. In a large bowl, beat the 24 oz of softened cream cheese until it’s completely smooth and creamy, with no lumps. It’s crucial that the cream cheese is at room temperature for this step to avoid a lumpy filling. Gradually add the 1 cup of granulated sugar and continue beating until well combined and fluffy.
4. Add the 3 large eggs, one at a time, beating well after each addition. Don’t overmix at this stage, as overbeating can introduce too much air, leading to cracks in your cheesecake. Next, gently stir in the 1 cup of sour cream and 1 tablespoon of vanilla extract until just combined. This adds moisture and richness to the filling.
5. In a separate small bowl, whisk together the ¼ cup of strawberry puree (or preserves), 1 tablespoon of strawberry Jell-O powder, and 2 tablespoons of all-purpose flour. The Jell-O powder will give our cheesecake a beautiful vibrant pink hue and an extra burst of strawberry flavor, while the flour acts as a binder to help prevent cracking. Pour this strawberry mixture into the cream cheese batter and gently fold it in until the color is uniform and streaks of pink are no longer visible. Be careful not to overmix.
6. Retrieve the chilled crust from the freezer. Pour the pink cheesecake filling evenly over the crust. To help prevent cracking during baking, consider using a water bath. Wrap the bottom of your springform pan tightly with heavy-duty aluminum foil, then place it inside a larger roasting pan. Carefully pour hot water into the roasting pan until it comes about halfway up the sides of the springform pan. This creates a moist environment in the oven, which is key for a smooth, crack-free cheesecake.
Baking and Cooling for Perfection
7. Bake the cheesecake in a preheated oven at 325°F (160°C) for approximately 60-75 minutes, or until the edges are set and the center is slightly jiggly. The jiggle indicates it’s not quite done, and it will continue to set as it cools. Once baked, turn off the oven, prop the door open slightly with a wooden spoon, and let the cheesecake cool inside the oven for another hour. This gradual cooling process is crucial for preventing cracks.
8. After cooling in the oven, remove the cheesecake from the water bath and the springform pan. Let it cool completely on a wire rack at room temperature. Once cooled, cover it loosely with plastic wrap and refrigerate for at least 6 hours, or preferably overnight, to allow it to firm up completely. Patience is a virtue when it comes to cheesecake!
The Golden Oreo Crunch Topping
9. While the cheesecake is chilling, let’s make that irresistible crunch. In a medium bowl, combine the 10 crushed Golden Oreos with the 2 tablespoons of melted butter, 2 tablespoons of strawberry Jell-O powder, and ½ cup of powdered sugar. Stir until the mixture is crum extractbly and well combined. The Jell-O powder here will add a subtle pink tint and reinforce the strawberry flavor of the topping.
10. Once the cheesecake has chilled and is fully set, carefully sprinkle the Golden Oreo crunch topping evenly over the top. You can press it down gently if you like. This topping adds a delightful texture and another layer of sweet, buttery, strawberry goodness.
Slice, serve, and enjoy every single decadent bite of your homemade Strawberry Crunch Pink Cheesecake! It’s a labor of love, but the pure joy it brings is absolutely worth every moment.
Conclusion:
And there you have it – a truly delightful Strawberry Crunch Pink Cheesecake! This recipe is an absolute showstopper, combining the creamy, decadent richness of cheesecake with the bright, sweet burst of fresh strawberries and the satisfying crunch of a buttery crum extractble topping. It’s the perfect balance of textures and flavors, making it a guaranteed hit for any occasion, from casual family dinners to elegant celebrations. The beautiful pink hue adds a whimsical touch that’s sure to impress.
I highly recommend serving this Strawberry Crunch Pink Cheesecake chilled, allowing all those wonderful flavors to meld perfectly. It’s divine on its own, but a dollop of fresh whipped cream or an extra drizzle of strawberry sauce takes it to another level. For variations, consider adding a touch of lemon zest to the crust for an extra zing, or incorporating a handful of fresh blueberries into the strawberry layer for added color and flavor complexity. Don’t be afraid to experiment!
I genuinely hope you’ll give this Strawberry Crunch Pink Cheesecake a try. It’s surprisingly approachable for its impressive presentation, and the joy of sharing this homemade treat with loved ones is incredibly rewarding. Embrace the process and savor every delicious bite!
Frequently Asked Questions:
Why is my cheesecake cracking on top?
Cracking is often due to over-baking or rapid temperature changes. Ensure you’re baking at a consistent temperature, avoid over-beating the batter, and let the cheesecake cool gradually in the oven with the door slightly ajar before removing it completely. Chilling it slowly also helps prevent cracks.
Can I make this cheesecake ahead of time?
Absolutely! This Strawberry Crunch Pink Cheesecake is an excellent make-ahead dessert. It’s best to bake and chill it completely the day before you plan to serve it. This allows the flavors to fully develop and the texture to set perfectly. You can even prepare the crunch topping a day or two in advance and store it in an airtight container.
How do I store leftover cheesecake?
Leftover Strawberry Crunch Pink Cheesecake should be stored in an airtight container in the refrigerator. It will stay fresh and delicious for up to 3-4 days. Covering it well is key to preventing it from drying out or absorbing other fridge odors.
Strawberry Crunch Pink Cheesecake
A delightful cheesecake with a crunchy graham cracker crust, a creamy pink strawberry filling, and a sweet strawberry Oreo crunch topping.
Ingredients
-
1 ½ cups crushed graham crackers
-
¼ cup melted butter
-
2 tbsp brown sugar
-
24 oz cream cheese, softened
-
1 cup granulated sugar
-
3 large eggs
-
1 cup sour cream
-
1 tbsp vanilla extract
-
¼ cup strawberry puree
-
1 tbsp strawberry Jell-O powder
-
2 tbsp all-purpose flour
-
10 Golden Oreos, crushed
-
2 tbsp melted butter
-
2 tbsp strawberry Jell-O powder
-
½ cup powdered sugar
Instructions
-
Step 1
For the crust: Combine crushed graham crackers, ¼ cup melted butter, and 2 tbsp brown sugar. Press evenly into the bottom of a 9-inch springform pan. -
Step 2
For the filling: Beat softened cream cheese and 1 cup granulated sugar until smooth. Beat in eggs one at a time, then stir in sour cream, vanilla extract, strawberry puree, 1 tbsp strawberry Jell-O powder, and 2 tbsp all-purpose flour until combined. -
Step 3
Pour the filling over the prepared crust. -
Step 4
Bake at 350°F (175°C) for 55-65 minutes, or until the edges are set and the center is still slightly jiggly. -
Step 5
For the crunch topping: In a small bowl, combine crushed Golden Oreos, 2 tbsp melted butter, 2 tbsp strawberry Jell-O powder, and ½ cup powdered sugar. Stir until crumbly. -
Step 6
Sprinkle the crunch topping over the cheesecake during the last 10-15 minutes of baking. -
Step 7
Let the cheesecake cool completely at room temperature, then refrigerate for at least 4 hours before serving.
Important Information
Nutrition Facts (Per Serving)
It is important to consider this information as approximate and not to use it as definitive health advice.
Allergy Information
Please check ingredients for potential allergens and consult a health professional if in doubt.

Leave a Comment