

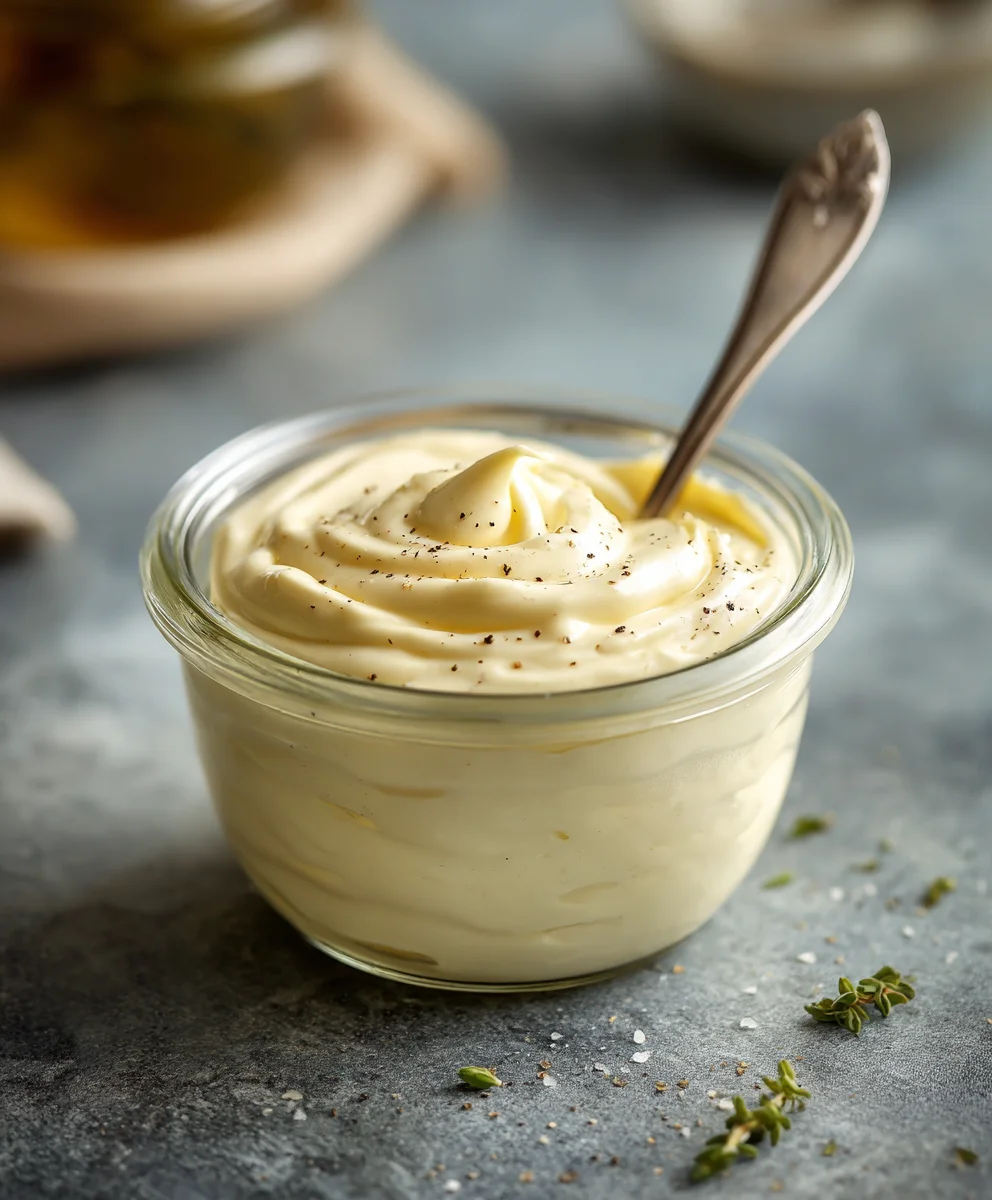
Homemade Mayonnaise. There’s a certain culinary alchemy that happens when simple, fresh ingredients transform into something truly extraordinary, and I find nowhere is this more evident than in the creation of a perfect emulsion. Forget everything you thought you knew about this beloved condiment, because the version we’re about to discover is a revelation. The difference between store-bought and Homemade Mayonnaise is not just noticeable; it’s a game-changer. Legend has it, this creamy delight first graced our tables in the 18th century, potentially named after the Battle of Mahón, quickly cementing its place as a cornerstone of classic French cuisine and a global favorite.
What makes people fall in love with this homemade version? I believe it’s the unparalleled freshness, the silky-smooth texture that coats your palate, and the vibrant, clean flavor that store-bought varieties simply cannot replicate. No artificial preservatives, no unnecessary additives – just pure, unadulterated goodness. When you experience the rich, creamy texture and superior taste of your own Homemade Mayonnaise, you’ll understand why mastering this fundamental recipe is so incredibly rewarding. It elevates everything it touches, from a simple sandwich to a sophisticated aioli, making every bite a testament to fresh, quality ingredients.
Ingredients:
- 1 large egg yolk (it’s crucial that this is very fresh and from a reputable source, as we’ll be consuming it raw!)
- 1 teaspoon Dijon mustard (or a good quality dry mustard powder, which also acts as a fantastic emulsifier)
- 1 tablespoon fresh lemon juice (freshly squeezed is always best, or you can use white wine vinegar for a slightly different tang)
- A generous pinch of fine sea salt (about 1/4 teaspoon, but we’ll adjust to taste later)
- A pinch of freshly ground black pepper (to your preference)
- 1 cup neutral-flavored oil (I personally love grapeseed, sunflower, or canola oil for their mildness. A light olive oil can work, but I strongly advise against extra virgin olive oil for a classic mayonnaise, as its strong flavor can be overpowering. You could also use a blend of oils, perhaps 3/4 cup neutral and 1/4 cup light olive oil for a subtle hint of fruitiness.)
- Optional additions for flavoring your homemade mayonnaise (we’ll discuss these at the end, but it’s good to have them in mind!):
- 1 small clove garlic, minced very finely or grated
- 1/2 teaspoon smoked paprika
- 1 tablespoon finely chopped fresh herbs (such as chives, parsley, dill, or tarragon)
- A dash of your favorite hot sauce
- A tiny amount of honey or maple syrup for a touch of sweetness
Setting Up for Success: Gathering Your Tools and Ingredients for Homemade Mayonnaise
Making homemade mayonnaise is often perceived as a daunting task, but I promise you, with a little patience and the right setup, it’s incredibly rewarding and much easier than you think! The key to a successful emulsion lies in preparation and understanding a few basic principles. First, let’s talk about our tools.
You have a few options for how you’d like to make your mayonnaise. My personal favorite, and arguably the easiest for beginners, is using an immersion blender (also known as a stick blender). This method creates a stable emulsion almost effortlessly. If you don’t have one, a food processor or a stand mixer with a whisk attachment will also work beautifully. And yes, you can absolutely make it by hand with a good old-fashioned whisk and a sturdy bowl – this is the most traditional method and gives you a real sense of accomplishment, though it requires a bit more arm power!
Regardless of your chosen method, ensuring your ingredients are at room temperature is paramount. This is not just a suggestion; it’s a critical step for achieving a stable emulsion. Cold egg yolks or oil are much more resistant to emulsifying, which can lead to a “broken” mayonnaise (where the oil and egg separate into an unappetizing mess). So, plan ahead! Take your egg out of the refrigerator at least 30 minutes to an hour before you plan to start. The same goes for any lemon juice if you keep it chilled.
For hand whisking, choose a medium-sized, heavy-bottomed bowl that won’t slide around on your counter. Placing a damp kitchen towel underneath the bowl can help secure it. For the immersion blender method, you’ll need a tall, narrow container or jar that the head of your blender fits snugly into, leaving minimal space around it. This narrow confinement helps the blender create a strong vortex, which is essential for rapidly combining the ingredients.
Finally, measure out all your ingredients before you begin. This practice, known as “mise en place,” ensures that you’re not scrambling for an ingredient in the middle of a delicate emulsification process. Have your oil ready to pour – ideally in a measuring cup with a spout for easy, controlled pouring. Trust me, these small preparations will make a huge difference in your homemade mayonnaise journey.
The Art of Emulsification: Crafting Your Creamy Homemade Mayonnaise
Now for the fun part! Let’s dive into the actual process of making that luscious homemade mayonnaise. I’ll walk you through the immersion blender method first, as it’s the most forgiving, and then touch upon the hand-whisking and food processor alternatives.
Immersion Blender Method:
- Prepare Your Base: Take your tall, narrow container or jar. Crack your large egg yolk directly into the bottom. Add the Dijon mustard, fresh lemon juice, sea salt, and black pepper. Do not stir it yet!
- Add the Oil: Carefully pour all 1 cup of your chosen neutral-flavored oil directly on top of the egg yolk mixture. It should form a layer over the other ingredients.
- The Magic Moment – Blending: Insert your immersion blender into the container. Make sure the head of the blender is resting firmly on the bottom, completely covering the egg yolk.
- Start Blending (and don’t move yet!): Turn your immersion blender on to a medium-high speed. Crucially, do not lift the blender head from the bottom for the first 15-20 seconds. You will see a pale, thick emulsion begin to form at the bottom, rapidly creeping upwards. This initial phase is where the magic happens and the emulsion sets.
- Slowly Lift and Incorporate: Once you see a significant amount of thick mayonnaise forming at the bottom, very slowly and gradually lift the immersion blender head upwards, in a controlled motion. As you lift, the oil from the top will be drawn into the already emulsified mixture, transforming into mayonnaise. Move the blender head up and down a few times, ensuring all the oil is fully incorporated and the mixture is uniformly thick and creamy. This should only take about 30-60 seconds in total.
- Check Consistency and Season: Once all the oil is incorporated and you have a beautifully thick, pale yellow homemade mayonnaise, turn off the blender. Give it a taste. This is your chance to adjust the seasoning. You might want a little more salt, a touch more lemon juice for brightness, or another grind of black pepper. Stir it in thoroughly.
Hand-Whisking Method (The Classic Way):
- The Yolk Base: In your sturdy, medium-sized bowl (secured with a damp towel underneath), place the egg yolk, Dijon mustard, a pinch of salt, and a pinch of pepper. Whisk these ingredients together vigorously for about 30 seconds until they are well combined and slightly pale.
- The Critical Oil Drizzle (Start with Drops!): This is the most important step for hand-whisked homemade mayonnaise. Begin adding your oil, drop by excruciating drop at first, while whisking continuously and vigorously in a consistent direction. For the first tablespoon or two of oil, you are literally adding drops. If you add too much too soon, your emulsion will break.
- Gradually Increase Oil Flow: As you whisk and the mixture starts to visibly thicken and lighten in color (it should resemble a thick paste), you can very, very gradually increase the oil addition to a thin, steady stream – no thicker than a strand of spaghetti. Maintain constant, vigorous whisking throughout this entire process. This will likely take 5-10 minutes of continuous whisking. Your arm will get a workout, but it’s worth it!
- Incorporate Lemon Juice and Season: Once about half of the oil is incorporated and the mayonnaise is thickening nicely, you can whisk in the lemon juice. This helps thin it slightly and adds flavor. Then continue adding the remaining oil in a thin stream until all of it is incorporated and your mayonnaise is thick and glossy.
- Final Seasoning: Taste your magnificent homemade mayonnaise and adjust salt, pepper, or lemon juice as needed.
Food Processor Method:
- Assemble Your Processor: Attach the standard blade to your food processor.
- Combine Base Ingredients: Add the egg yolk, Dijon mustard, salt, and pepper to the food processor bowl. Pulse a few times to combine.
- Slow Oil Drizzle Through Feed Tube: With the food processor running continuously on low speed, slowly drizzle the oil through the feed tube in a very thin, steady stream. For the first minute or so, this stream should be almost a trickle. Just like with hand whisking, slow and steady wins the race here to prevent breaking the emulsion.
- Process Until Thick: Continue adding the oil until it’s all incorporated and the mayonnaise is thick and creamy. This usually takes 2-3 minutes of continuous processing.
- Add Lemon Juice and Season: Once the mayonnaise has formed, add the lemon juice through the feed tube and process for another few seconds to combine. Then, taste and adjust seasoning (salt, pepper, lemon juice) as desired.
Troubleshooting a Broken Mayonnaise: Don’t Panic!
If your homemade mayonnaise breaks (meaning it separates into an oily liquid with clumps of egg), don’t despair! It happens, especially when learning. It’s usually due to adding the oil too quickly or having cold ingredients. Here’s how I fix it:
In a separate clean bowl (or a clean, tall jar for the immersion blender), place 1 teaspoon of fresh Dijon mustard or another clean egg yolk. Begin whisking or blending this new base. Then, very, very slowly, drizzle your broken mayonnaise into this new base, drop by drop at first, just as you would with the initial oil. The emulsifiers in the fresh mustard or egg yolk will help re-emulsify the broken mixture. It might take a bit of time, but it’s often salvageable!
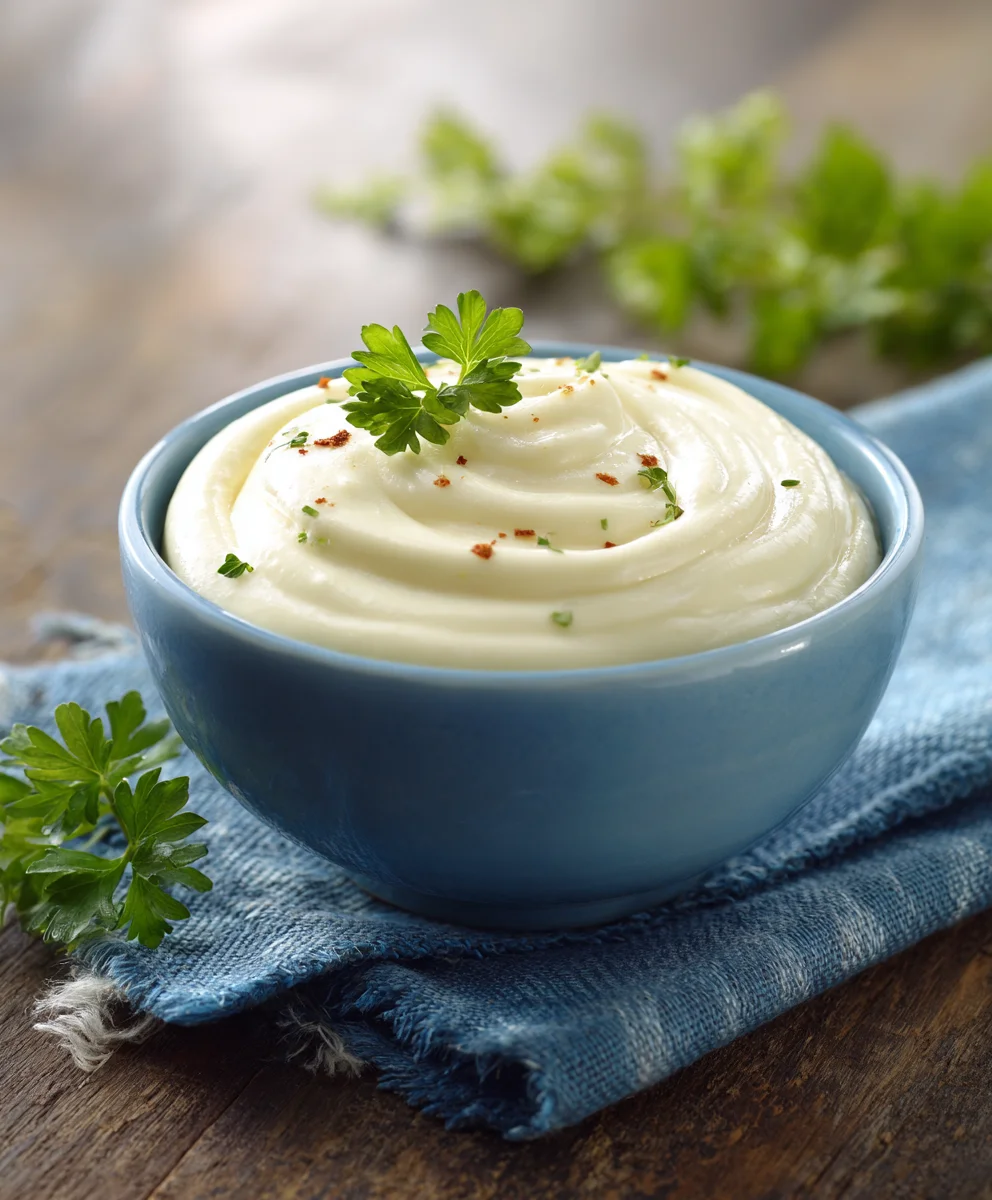
Finishing Touches and Storage for Your Homemade Mayonnaise
Once you’ve achieved that perfect, creamy consistency and adjusted the basic seasoning of your homemade mayonnaise, you might want to personalize it! This is where you can really make it your own.
Flavoring Your Homemade Mayonnaise:
This is where I get creative! If you’re looking to elevate your mayonnaise beyond the classic, here are some ideas for those optional additions we talked about earlier:
- Garlic Mayonnaise (Aioli): Finely mince or grate 1 small clove of garlic and stir it into your finished mayonnaise. Let it sit for at least 30 minutes in the fridge for the flavors to meld beautifully. A homemade garlic aioli is simply divine with fries or as a spread on sandwiches.
- Herb Mayonnaise: Stir in 1 tablespoon of finely chopped fresh herbs like chives, parsley, dill, or tarragon. These add a wonderful freshness and vibrant color. This is fantastic with fish or chicken.
- Spicy Mayonnaise: Add a dash of your favorite hot sauce or a pinch of cayenne pepper for a kick. Alternatively, a small amount of chipotle powder can give it a smoky heat.
- Smoked Paprika Mayonnaise: Incorporate 1/2 teaspoon of smoked paprika for a beautiful color and a depth of smoky flavor that pairs wonderfully with roasted vegetables or grilled meats.
- Sweet Mayonnaise: For a twist, especially if using it for a specific dressing or slaw, you can add a tiny amount (1/2 teaspoon) of honey or maple syrup. Just be sure to taste as you go so it doesn’t become too sweet.
Always stir these flavorings in thoroughly and then taste again, adjusting as needed. Remember, a little goes a long way with strong flavors!
Storing Your Homemade Mayonnaise:
Due to the raw egg yolk, it’s really important to store your homemade mayonnaise properly and consume it within a safe timeframe. Transfer your finished mayonnaise to a clean, airtight container (a glass jar works perfectly). Store it in the refrigerator. I generally recommend consuming homemade mayonnaise within 3 to 5 days. The lemon juice and mustard do act as mild preservatives, but since we’re dealing with raw eggs, it’s always best to err on the side of caution. Always be mindful of food safety, and if it smells off or looks unusual, it’s best to discard it.
Making your own homemade mayonnaise is a truly satisfying culinary experience. The flavor is so much fresher and brighter than anything you can buy in a jar, and the texture is incomparably smooth and luxurious. Once you try it, I doubt you’ll ever go back to store-bought. Enjoy the process, and savor the delicious results!
Conclusion:
And there you have it, my friends! We’ve reached the culmination of our culinary journey, a destination where simple, humble ingredients are transformed into something truly magnificent. I sincerely hope that by now, you’re feeling inspired, confident, and perhaps even a little excited to roll up your sleeves and dive into the world of making your own condiments. This isn’t just any recipe; it’s a gateway to elevating countless dishes, a secret weapon in your kitchen arsenal that promises to consistently deliver unparalleled freshness and flavor. Once you experience the silky texture, the vibrant, tangy notes, and the pure, unadulterated taste of your very own Homemade Mayonnaise, there’s truly no turning back to the store-bought versions. The difference is not just noticeable; it’s profound, a revelation that will forever change how you think about this versatile staple.
I genuinely believe this recipe is a must-try for everyone, from seasoned chefs to enthusiastic home cooks just starting their journey. Why? Because it puts you in complete control. You dictate the quality of the ingredients, ensuring no mystery additives or preservatives find their way onto your plate. You get to customize the flavor profile to your exact liking – perhaps a touch more lemon for brightness, a pinch of Dijon for a sharper kick, or a hint of garlic for an aromatic twist. The satisfaction of whisking, blending, or food processing simple egg yolks, oil, and seasonings into a rich, creamy emulsion is incredibly rewarding. It’s a testament to the magic of cooking, a beautiful alchemy that transforms everyday components into something extraordinary that sings with fresh, clean taste. This isn’t merely a condiment; it’s an ingredient that breathes new life into everything it touches, a testament to the fact that sometimes, the simplest things, when made with care, are the most spectacular.
Serving Suggestions and Creative Variations:
Now, while the star of our show, this luscious creation, is perfectly delightful on its own, its true brilliance shines through its incredible versatility. Don’t limit yourself! Think beyond just slathering it on a sandwich, though it does make for the most incredible, gourmet-level sandwich experience you’ll ever have. Imagine transforming a humble tuna salad or chicken salad into a masterpiece of flavor and texture, each bite rich and satisfying without being heavy. Potato salad and coleslaw reach new heights of creamy deliciousness when bound together with this fresh, vibrant dressing. And deviled eggs? Forget about it – they become utterly irresistible, a truly special appetizer.
But let’s push the boundaries a little further, shall we? This isn’t just a spread; it’s a foundation for endless culinary adventures. Consider infusing it with different flavors to match your meal. For a vibrant aioli, finely mince a clove or two of garlic and stir it in. A sprinkle of smoked paprika or a dash of chipotle powder will give it a wonderful smoky depth, perfect for burgers or grilled fish. Fresh herbs like dill, chives, or tarragon, finely chopped and folded in, will create a fragrant, herbaceous spread ideal for seafood or spring salads. For a spicy kick, a swirl of Sriracha or a pinch of cayenne pepper will awaken your palate, making it an ideal dip for fries or a zesty accompaniment to tacos. You could even blend in some roasted red peppers for a sweet and savory spread, or a tablespoon of finely grated Parmesan for an umami-rich dip that’s truly addictive. The possibilities are genuinely endless, and each small tweak opens up a new world of flavor profiles for you to explore and savor.
Your Turn to Create and Share!
So, what are you waiting for? I wholeheartedly encourage you to step into your kitchen and give this recipe a try. Don’t be intimidated; the process is incredibly forgiving, and the rewards are immense. You’ll be amazed at how simple it is to achieve such a superior result, and I promise, once you’ve made your own, you’ll find it difficult to go back to anything else. The freshness, the purity of flavor, and the undeniable satisfaction of creating something so delicious from scratch are unmatched. This is more than just a recipe; it’s an experience, an upgrade to your everyday cooking that you truly deserve.
And when you do make it, I would absolutely love to hear about your experience! Did you stick to the classic version, or did you venture into some exciting flavor variations? What dishes did you pair it with, and what did your family and friends think? Please don’t hesitate to share your thoughts, your successes, and even your creative twists in the comments below. Snap a picture of your beautiful creation and share it with our community – let’s inspire each other with our culinary endeavors! Your feedback and shared experiences are invaluable, not just to me, but to all the fellow food lovers outading for you to embark on this delicious journey. Happy cooking!
Homemade Mayonnaise
Discover the unparalleled freshness, silky-smooth texture, and vibrant, clean flavor of homemade mayonnaise. This easy, creamy recipe elevates everything it touches, from sandwiches to aioli, without artificial preservatives or unnecessary additives.
Ingredients
-
1 large egg yolk (fresh)
-
1 tsp Dijon mustard
-
1 tbsp fresh lemon juice or white wine vinegar
-
1/4 tsp fine sea salt, to taste
-
Pinch freshly ground black pepper, to taste
-
1 cup neutral oil (grapeseed, sunflower, or canola)
Instructions
-
Step 1
Ensure all ingredients (egg, oil, lemon juice) are at room temperature. Gather your tools; an immersion blender with a tall, narrow container is recommended for easiest preparation. -
Step 2
Place the fresh egg yolk, Dijon mustard, lemon juice, salt, and pepper into the bottom of the tall, narrow container. -
Step 3
Carefully pour the 1 cup of neutral oil directly on top of the egg mixture; do not stir. -
Step 4
Insert the immersion blender, resting its head firmly on the bottom, completely covering the yolk. -
Step 5
Turn the blender on medium-high speed. Without lifting the head, blend for 15-20 seconds until a thick, pale emulsion forms rapidly at the bottom. -
Step 6
Slowly lift the blender head upwards, then move it up and down a few times until all the oil is fully incorporated and the mayonnaise is uniformly thick and creamy. This process should take 30-60 seconds in total. -
Step 7
Taste and adjust seasoning with more salt, pepper, or lemon juice as desired. -
Step 8
To flavor your mayonnaise, stir in optional additions like minced garlic, fresh herbs (chives, parsley, dill, tarragon), hot sauce, smoked paprika, or a touch of honey/maple syrup. Allow flavors to meld if adding garlic. -
Step 9
Transfer homemade mayonnaise to a clean, airtight container (a glass jar is ideal). Store in the refrigerator and consume within 3 to 5 days. Always be mindful of food safety, and discard if it smells or looks off.
Important Information
Nutrition Facts (Per Serving)
It is important to consider this information as approximate and not to use it as definitive health advice.
Allergy Information
Please check ingredients for potential allergens and consult a health professional if in doubt.


Leave a Comment