

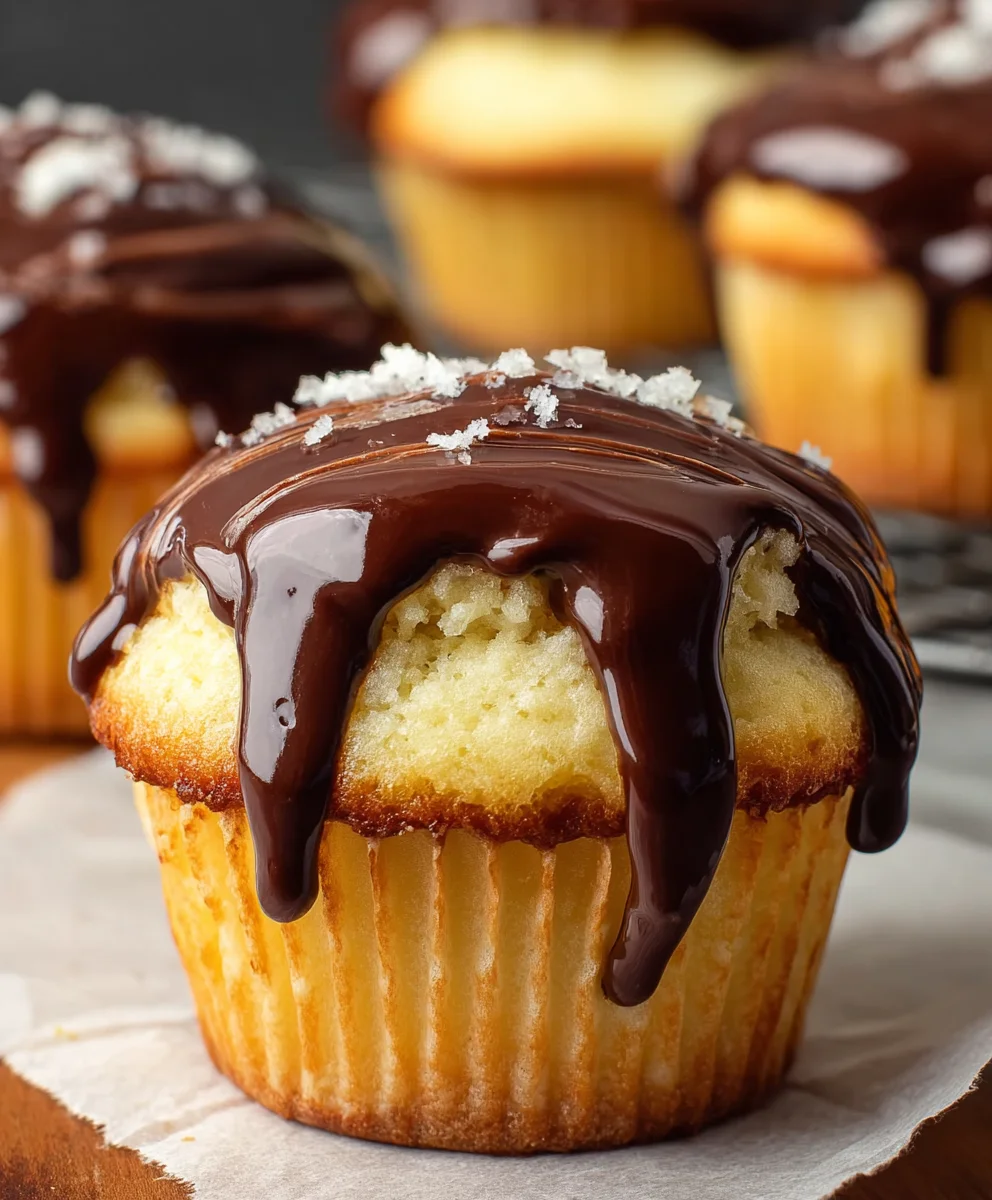
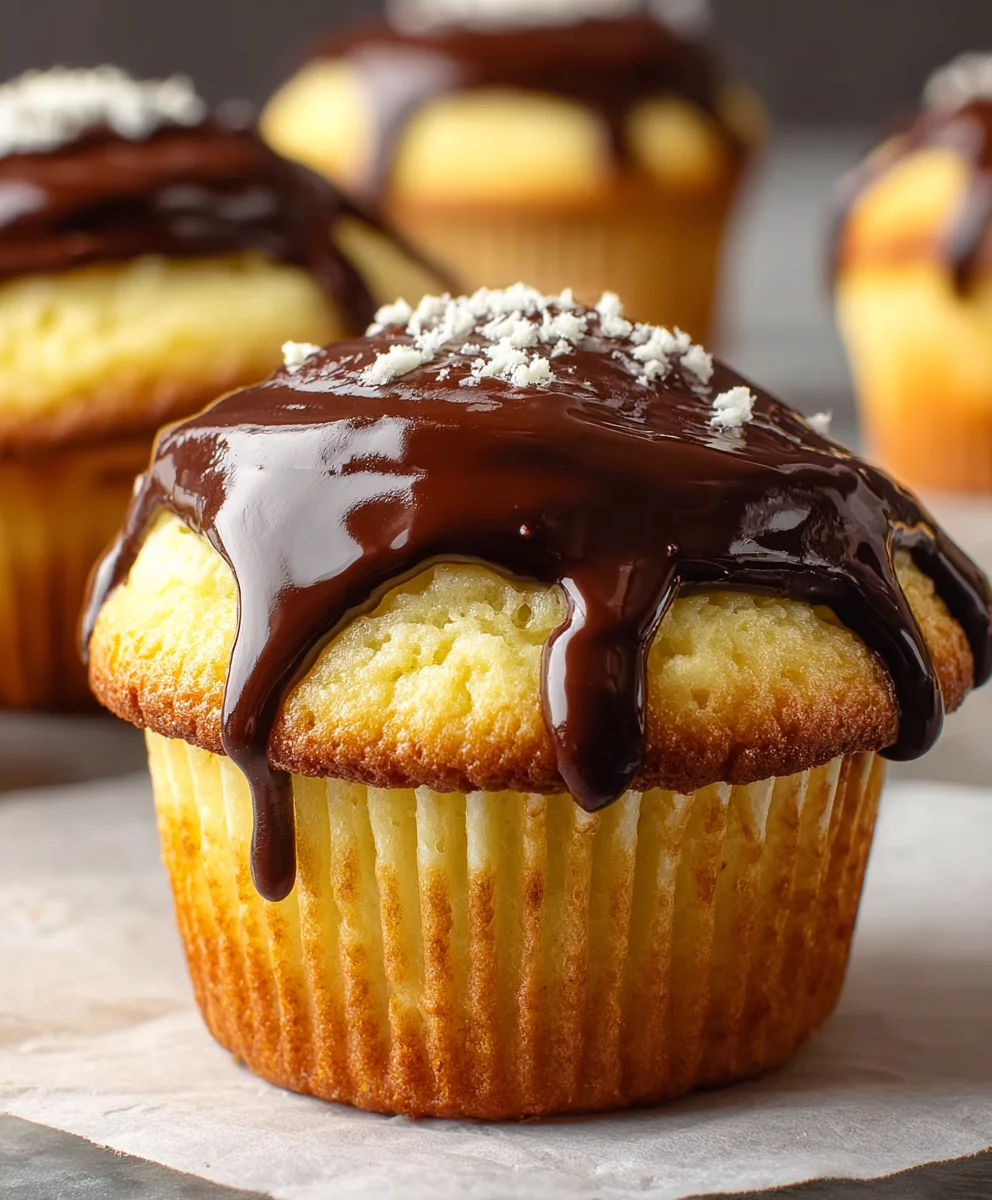
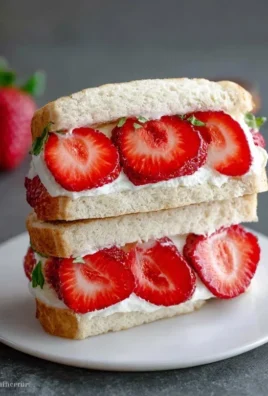
Boston Cream Cupcakes are more than just a dessert; they’re a little bite of pure joy, a miniature masterpiece that captures the essence of the classic pie in a perfectly portioned, handheld treat. We all have those iconic flavors that bring back a flood of memories and a comforting sense of nostalgia, and for many, the beloved Boston Cream Pie holds a special place in their hearts. Imagine that rich, velvety pastry cream nestled within a tender, golden cake, all crowned with a glistening, dark chocolate ganache. Now, imagine that glorious combination shrunk down into an individual cupcake, ready to be savored with every delightful bite. That’s the magic of Boston Cream Cupcakes. People adore them because they offer all the decadent flavor profiles of the original without the commitment of a whole pie, making them ideal for parties, afternoon pick-me-ups, or simply treating yourself. What truly sets these Boston Cream Cupcakes apart is the perfect balance: the subtle sweetness of the cake, the luscious coolness of the cream, and the sophisticated bitterness of the chocolate creating a symphony of textures and tastes that is simply irresistible.
Ingredients:
- ¼ cup granulated sugar
- 1 tablespoon cornstarch
- 1 cup whole milk
- 2 large egg yolks
- 1 tablespoon unsalted butter
- 1 teaspoon pure vanilla extract
- 13.25 ounces yellow cake mix
- 1 cup water
- ⅓ cup unsalted butter, melted
- 3 large eggs
- ½ cup semisweet chocolate chips
- ¼ cup heavy cream
- 2 tablespoons powdered sugar
Boston Cream Cupcakes: The Delicious Details
This recipe brings the beloved flavors of classic Boston Cream Pie into delightful individual servings. We’ll be creating a luscious pastry cream filling, a tender yellow cupcake base, and a rich chocolate ganache topping. It’s a multi-component dessert, but each step is manageable and incredibly rewarding. Let’s get started on these decadent Boston Cream Cupcakes!
Making the Pastry Cream Filling
The heart of our Boston Cream Cupcakes is the smooth and creamy pastry cream. It’s surprisingly simple to whip up and makes all the difference.
- In a medium saucepan, whisk together the ¼ cup granulated sugar and 1 tablespoon cornstarch until well combined. This step helps prevent lumps from forming later.
- Gradually whisk in the 1 cup whole milk until smooth. Make sure there are no pockets of cornstarch.
- Place the saucepan over medium heat. Cook, whisking constantly, until the mixture thickens and begins to bubble. This usually takes about 5-7 minutes. You’re looking for a consistency that coats the back of a spoon. Be patient here; constant whisking is key to prevent scorching.
- In a separate small bowl, lightly whisk the 2 large egg yolks.
- Once the milk mixture has thickened and is bubbling, temper the egg yolks. This means slowly adding a small amount of the hot milk mixture to the egg yolks while whisking vigorously. This gradually raises the temperature of the yolks without cooking them into scrambled eggs. Do this for about ½ cup of the hot milk mixture.
- Pour the tempered egg yolk mixture back into the saucepan with the remaining milk mixture. Continue to cook over medium heat, whisking constantly, for another 1-2 minutes until the pastry cream is very thick.
- Remove the saucepan from the heat. Stir in the 1 tablespoon unsalted butter and 1 teaspoon pure vanilla extract until the butter is completely melted and incorporated. The butter adds a lovely richness and sheen.
- Pour the pastry cream into a clean bowl. Press a piece of plastic wrap directly onto the surface of the cream. This prevents a skin from forming as it cools. Refrigerate for at least 2 hours, or until thoroughly chilled and set. This chilling time is crucial for the cream to firm up enough to be piped into the cupcakes.
Baking the Yellow Cupcakes
While our pastry cream is chilling, we’ll get the cupcake bases ready. These will be wonderfully moist and tender, perfect for holding the rich filling.
- Preheat your oven to 350°F (175°C). Line a 12-cup muffin tin with paper liners.
- In a large mixing bowl, combine the contents of the 13.25 ounces yellow cake mix with 1 cup water, ⅓ cup melted unsalted butter, and 3 large eggs.
- Using an electric mixer on low speed, beat the ingredients until just combined. Then, increase the speed to medium and beat for 2 minutes until the batter is smooth and well aerated. Don’t overmix, as this can lead to tough cupcakes.
- Divide the batter evenly among the prepared muffin cups, filling each about two-thirds full. This ensures they have room to rise without overflowing.
- Bake for 18-22 minutes, or until a wooden skewer inserted into the center of a cupcake comes out clean.
- Allow the cupcakes to cool in the muffin tin for about 5-10 minutes before transferring them to a wire rack to cool completely. It’s very important they are entirely cool before filling and topping, otherwise, the pastry cream and ganache will melt.
Crafting the Chocolate Ganache Topping
This luscious chocolate ganache is the perfect finishing touch, mirroring the classic glaze of a Boston Cream Pie.
- In a heatproof bowl, place the ½ cup semisweet chocolate chips.
- In a small saucepan, heat the ¼ cup heavy cream over medium heat until it just begins to simmer around the edges. Do not let it boil.
- Pour the hot cream over the chocolate chips in the bowl. Let it sit undisturbed for 5 minutes to allow the chocolate to soften.
- Gently whisk the mixture starting from the center and working your way outwards until the ganache is smooth, glossy, and completely combined. If any chocolate chips remain unmelted, you can microwave the ganache in 10-second intervals, stirring in between, until smooth.
- Let the ganache sit at room temperature for about 15-20 minutes, or until it has thickened slightly to a pourable, but not runny, consistency. If it thickens too much, you can gently warm it for a few seconds.
Assembling Your Boston Cream Cupcakes
Now for the exciting part – bringing all the elements together!
- Once the cupcakes are completely cool, use a small, sharp knife or a paring tool to cut a small cone-shaped piece from the center of each cupcake top, or use a small cookie cutter. This will create a cavity for our pastry cream filling. Reserve the removed cake cone.
- Spoon or pipe the chilled pastry cream generously into the cavity you created in each cupcake. Don’t be shy; this is the star!
- Place the reserved cake cone back on top of the pastry cream filling. This helps seal in the cream and creates a nice dome.
- Pour or drizzle the slightly thickened chocolate ganache over the top of each cupcake, allowing it to drip down the sides just like a classic Boston Cream Pie. You can use a spoon for drizzling, or if you prefer a full glaze, dip the tops of the filled cupcakes directly into the ganache.
- For an extra touch of elegance, lightly dust the tops of the finished Boston Cream Cupcakes with 2 tablespoons powdered sugar using a fine-mesh sieve just before serving. This adds a beautiful visual contrast and a hint of sweetness. These are best enjoyed within a day or two for optimal freshness and texture.
Conclusion:
And there you have it – a delightful journey into crafting your very own batch of exquisite Boston Cream Cupcakes! We’ve walked through creating a moist and tender vanilla cake, a luscious pastry cream filling, and a rich chocolate ganache glaze. The result is a perfect bite-sized indulgence that captures all the charm of its namesake pie. These cupcakes are not just a dessert; they’re an experience, a testament to simple ingredients transformed into something truly special. Don’t be intimidated by the individual components; each step is designed to be manageable, and the final reward is absolutely worth the effort.
For serving suggestions, these beauties shine on their own, but they also make a stunning centerpiece for any party or gathering. Consider pairing them with a cup of freshly brewed coffee or a glass of cold milk for the ultimate comfort. If you’re feeling adventurous, why not try some variations? You could experiment with a hint of almond extract in the cake, add a sprinkle of espresso powder to the chocolate ganache for a mocha twist, or even use a different fruit-infused cream if you’re feeling particularly creative. The most important ingredient, however, is your enthusiasm! So, gather your loved ones, put on some music, and enjoy the process of creating these wonderful Boston Cream Cupcakes. Happy baking!
Frequently Asked Questions about Boston Cream Cupcakes:
Q: Can I make the pastry cream ahead of time?
Yes, absolutely! The pastry cream can be made up to two days in advance. Ensure it’s covered tightly with plastic wrap, pressing the wrap directly onto the surface to prevent a skin from forming. Store it in the refrigerator until you’re ready to fill the cupcakes.
Q: My chocolate ganache isn’t smooth. What did I do wrong?
Several things could cause a lumpy ganache. Ensure you’re using good quality chocolate and that your cream was heated properly (just simmering, not boiling). If you whisked too vigorously, it can incorporate air. Gently stirring and letting it sit for a few minutes often helps smooth it out. You can also try a double boiler method for extra gentle melting.
Q: Can I freeze these Boston Cream Cupcakes?
It’s best to enjoy these fresh, as the pastry cream and glaze are most delightful when freshly made. Freezing can affect the texture of the cake and cream. However, if you must, freeze the unfrosted cupcakes. Thaw them at room temperature and then add the glaze just before serving.
Boston Cream Cupcakes- Easy Dessert Recipe
This recipe brings the beloved flavors of classic Boston Cream Pie into delightful individual servings, featuring a luscious pastry cream filling, a tender yellow cupcake base, and a rich chocolate ganache topping.
Ingredients
-
1/4 cup granulated sugar
-
1 tablespoon cornstarch
-
1 cup whole milk
-
2 large egg yolks
-
1 tablespoon unsalted butter
-
1 teaspoon pure vanilla extract
-
13.25 ounces yellow cake mix
-
1 cup water
-
1/3 cup unsalted butter, melted
-
3 large eggs
-
1/2 cup semisweet chocolate chips
-
1/4 cup heavy cream
-
2 tablespoons powdered sugar
Instructions
-
Step 1
Make the pastry cream: In a saucepan, whisk sugar and cornstarch. Gradually whisk in milk. Cook over medium heat, whisking constantly, until thickened and bubbling. Temper egg yolks by whisking in some hot milk mixture, then returning to the saucepan. Cook 1-2 more minutes until very thick. Remove from heat, stir in butter and vanilla. Pour into a bowl, press plastic wrap on surface, and chill for at least 2 hours. -
Step 2
Bake the cupcakes: Preheat oven to 350°F (175°C) and line a muffin tin. Combine yellow cake mix, water, melted butter, and eggs in a bowl. Beat with an electric mixer until smooth. Divide batter among muffin cups, filling two-thirds full. Bake for 18-22 minutes until a skewer comes out clean. Cool in the tin for 5-10 minutes, then transfer to a wire rack to cool completely. -
Step 3
Craft the chocolate ganache: Place chocolate chips in a heatproof bowl. Heat heavy cream in a small saucepan until it just simmers. Pour hot cream over chocolate chips and let sit for 5 minutes. Whisk gently until smooth and glossy. Let sit at room temperature for 15-20 minutes until slightly thickened. -
Step 4
Assemble the cupcakes: Once cupcakes are cool, cut a cone-shaped piece from the center of each top to create a cavity. Spoon or pipe chilled pastry cream into each cavity. -
Step 5
Place the reserved cake cone back on top of the pastry cream. Pour or drizzle the thickened chocolate ganache over the top of each cupcake, allowing it to drip down the sides. Lightly dust with powdered sugar before serving.
Important Information
Nutrition Facts (Per Serving)
It is important to consider this information as approximate and not to use it as definitive health advice.
Allergy Information
Please check ingredients for potential allergens and consult a health professional if in doubt.
Leave a Comment