

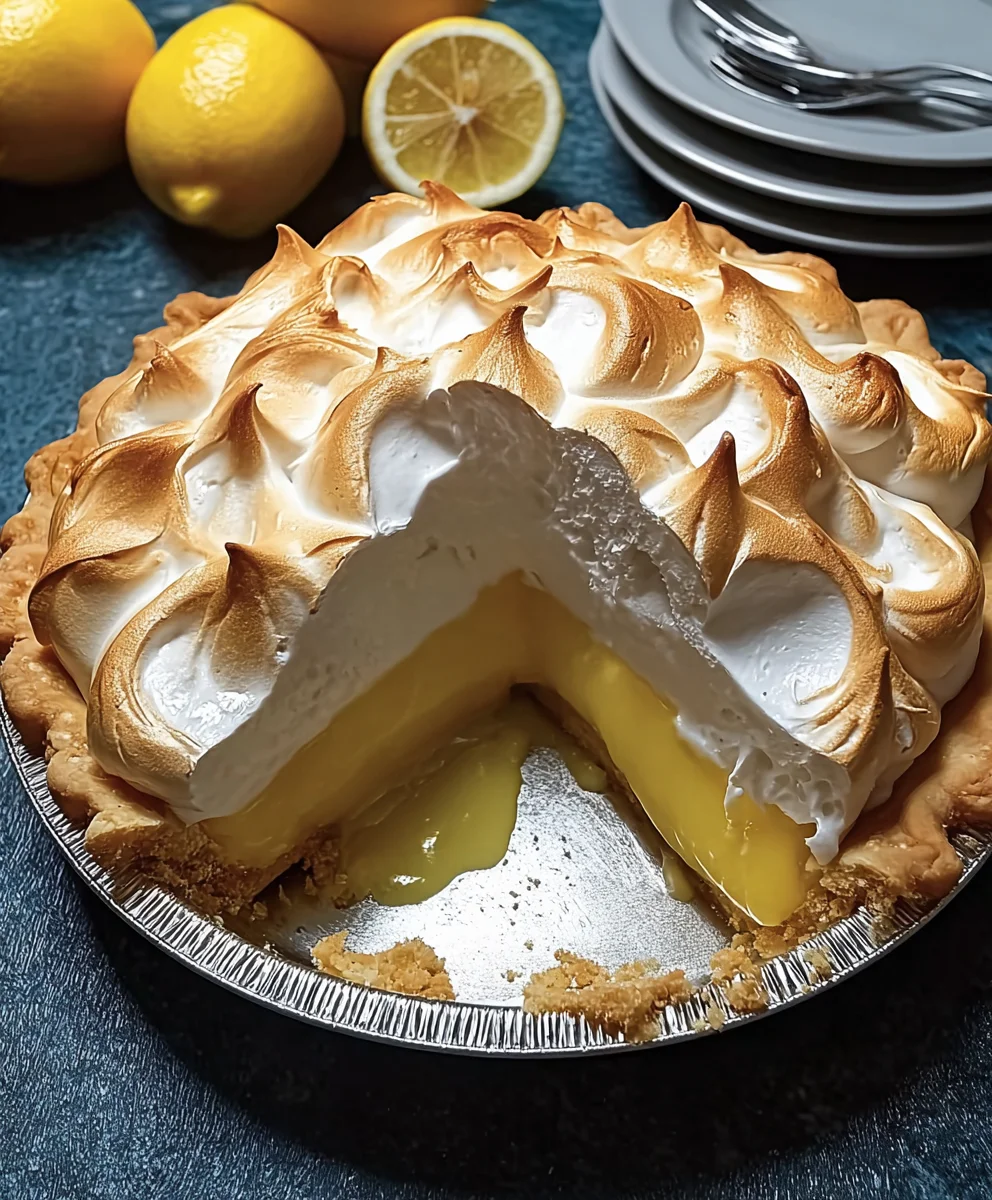
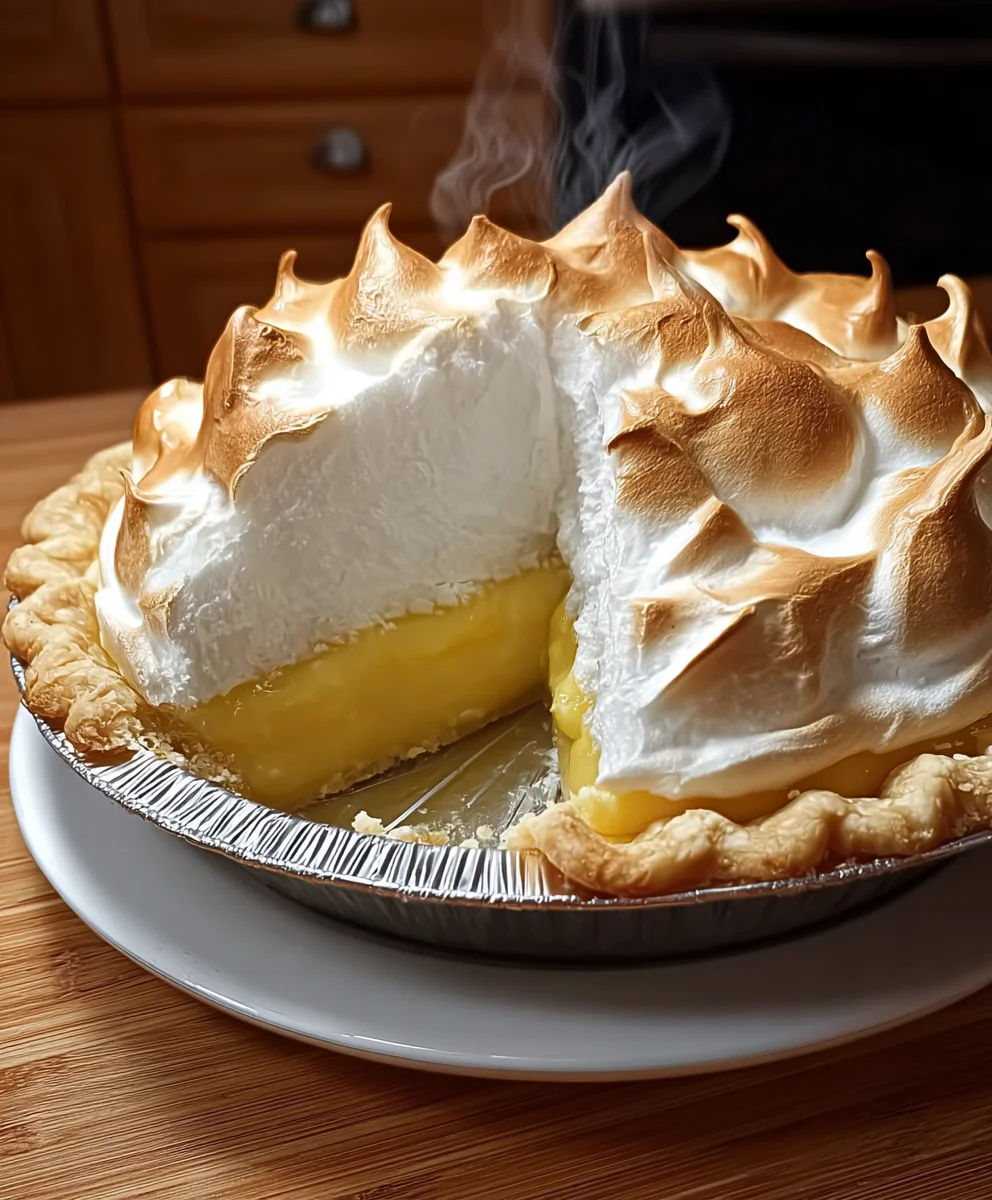
Lemon Meringue Pie is more than just a dessert; it’s a sunshine-filled hug on a plate, a delightful dance of sweet and tart that has captured hearts for generations. Who can resist that ethereal cloud of fluffy meringue perched atop a vibrant, zesty lemon filling, all cradled within a crisp, buttery crust? It’s the perfect balance of textures and flavors that makes this pie so utterly irresistible. We adore it for its refreshing tang that cuts through richness, its comforting familiarity, and its sheer beauty that makes any occasion feel special. What truly sets this classic apart is the magical transformation of simple ingredients into something truly extraordinary – a golden-baked crust holding a jewel-toned lemon curd, crowned with swirls of toasted sweetness. Get ready to bake your own slice of heaven with this foolproof guide to the ultimate Lemon Meringue Pie.
Ingredients:
- 3 tbsp Cornstarch
- 1 cup Granulated sugar
- 2 tbsp All-purpose flour
- 1½ cups Water
- Lemon juice and zest from 2 large lemons
- 2 tbsp Unsalted butter
- 4 large Egg yolks
- 1 pre-baked 9-inch pie crust
- 5½ tbsp Granulated sugar (for meringue)
- 4 large Egg whites
- ¼ tsp Cream of tartar
Making the Luscious Lemon Filling
Step 1: Combine Dry Ingredients and Water
Begin extract by whisking together the cornstarch, 1 cup of granulated sugar, and the all-purpose flour in a medium saucepan. It’s important to get these dry ingredients well combined before adding any liquid to prevent lumps. Once they’re thoroughly mixed, gradually whisk in the 1½ cups of water. Keep whisking until you have a smooth, lump-free mixture. This forms the base of our tangy lemon filling.
Step 2: Cook the Filling Until Thick
Place the saucepan over medium heat. Stir constantly as the mixture heats up. You’ll notice it sgin extractly begin to thicken. Continue stirring and cooking until the mixture reaches a boil and has a thick, pudding-like consistency. This process usually takes about 5-8 minutes. Boiling the mixture helps to activate the cornstarch and flour, ensuring a firm set for your filling. Don’t be tempted to rush this step; consistent stirring is key to achieving a smooth texture and preventing scorching.
Step 3: Incorporate Lemon and Butter
Once the filling has thickened, remove the saucepan from the heat. Stir in the fresh lemon juice and zest from your two lemons. This is where the vibrant, citrusy flavor truly comes alive! Next, add the 2 tablespoons of unsalted butter. Stir until the butter is completely melted and incorporated, adding a lovely richness and sheen to the filling. Let the lemon filling cool for about 10-15 minutes, stirring occasionally to prevent a skin from forming on top.
Step 4: Temper the Egg Yolks
While the lemon filling is cooling slightly, it’s time to prepare the egg yolks. In a separate bowl, whisk together the 4 egg yolks until they are smooth and uniform in color. Now, we need to temper these yolks to prevent them from scrambling when added to the hot filling. To do this, slowly ladle about ½ cup of the warm lemon filling into the bowl with the egg yolks, whisking continuously. This gradual introduction of heat gently warms the yolks. Once about half a cup has been added and thoroughly mixed, pour the tempered egg yolk mixture back into the saucepan with the remaining lemon filling.
Step 5: Finish and Assemble the Pie
Return the saucepan to low heat and cook for another 1-2 minutes, stirring constantly. The filling will become even thicker and glossier. Do not let it boil. Remove from heat and immediately pour the hot, creamy lemon filling into your pre-baked 9-inch pie crust. Spread the filling evenly to the edges.
Crafting the Fluffy Meringue Topping
Step 6: Whip the Egg Whites
In a clean, dry bowl (any trace of grease will prevent your meringue from whipping properly), add the 4 large egg whites and the ¼ teaspoon of cregin extractof tartar. Begin beating the egg whites with an electric mixer on medium speed until they become foamy. The cream of tartar acts as a stabilizer, helping the egg whites hold their shape.
Step 7: Gradually Add Sugar and Beat to Stiff Peaks
Gradually add the 5½ tablespoons of granulated sugar, one tablespoon at a time, while continuing to beat the egg whites. Increase the mixer speed to high. Keep beating until the meringue is glossy, smooth, and forms stiff peaks. This means that when you lift the beaters, the meringue will stand up straight without drooping. You should also rub a little meringue between your fingers; it should feel smooth, not gritty, indicating the sugar has dissolved.
Step 8: Top and Brown the Meringue
Carefully spoon the meringue over the warm lemon filling, spreading it gently to cover the entire surface. Ensure the meringue touches the edges of the pie crust all around. This “seals” the meringue to the crust, preventing shrinkage. For a beautiful golden-brown finish, you can use a kitchen torch to brown the peaks of the meringue, or place the pie under a preheated broiler for just 1-2 minutes, watching it very carefully to prevent burning. Once beautifully browned, let the pie cool completely on a wire rack before slicing and serving. This allows the filling to set properly.
Conclusion:
You’ve now conquered the art of creating a stunning and delicious Lemon Meringue Pie! We hope you found this recipe guide clear and inspiring, and that your pie turns out even more beautiful and flavorful than you imagin extracted. This classic dessert, with its vibrant tartness and ethereal sweet meringue, is always a showstopper. Don’t be afraid to experiment with it – it’s a rewarding bake that brings smiles to everyone’s faces. Serve your finished Lemon Meringue Pie chilled, allowing the filling to fully set and the meringue to maintain its glorious peaks. It’s perfect as a delightful end to a special meal, a comforting treat on a quiet afternoon, or the star of any potluck or gathering. Consider adding a sprinkle of fresh lemon zest over the meringue for an extra burst of citrus aroma, or a few fresh berries alongside for a pop of color and contrast. The joy of baking is in its versatility, so feel free to make this Lemon Meringue Pie your own!
Frequently Asked Questions:
Why is my meringue weeping or sweating?
Meringue weeping, often seen as beads of liquid forming on the surface, can happen if the meringue is not fully cooked or if it cools too quickly. Ensure your oven temperature is accurate and allow the meringue to cool gradually in the oven with the door slightly ajar. Also, avoid over-mixing the meringue once sugar is added, as this can break down the protein structure.
Can I make the lemon filling ahead of time?
Yes, absolutely! The lemon filling for your Lemon Meringue Pie can be made a day in advance and stored, covered, in the refrigerator. This is a great way to break down the preparation process and reduces the stress when you’re ready to assemble and bake the final pie. Just be sure to reheat it gently or bring it to room temperature before pouring it into your pre-baked pie crust and topping with meringue.
What are some alternative crust options for Lemon Meringue Pie?
While a classic pastry crust is traditional, you can also use a grabeef ham cracker crust for a delightful textural contrast and a hint of sweetness. A shortbread crust orgin extracten a gingersnap crust can also add an interesting flavor dimension that complements the tart lemon filling beautifully. Just ensure your chosen crust is fully blind-baked and cooled before adding the lemon filling.
Classic Lemon Meringue Pie-Sweet Tart Perfection
A delightful balance of tart lemon filling and sweet, fluffy meringue atop a flaky crust.
Ingredients
-
3 tbsp Cornstarch
-
1 cup Granulated sugar
-
2 tbsp All-purpose flour
-
1½ cups Water
-
Lemon juice and zest from 2 large lemons
-
2 tbsp Unsalted butter
-
4 large Egg yolks
-
1 pre-baked 9-inch pie crust
-
5½ tbsp Granulated sugar
-
4 large Egg whites
-
¼ tsp Cream of tartar
Instructions
-
Step 1
In a medium saucepan, whisk together cornstarch, 1 cup granulated sugar, and all-purpose flour. Gradually whisk in 1½ cups water until smooth. -
Step 2
Cook over medium heat, stirring constantly, until the mixture boils and thickens to a pudding-like consistency (about 5-8 minutes). Boiling activates the starches for a firm set. -
Step 3
Remove from heat. Stir in lemon juice and zest, then 2 tbsp unsalted butter until melted and incorporated. Let cool for 10-15 minutes. -
Step 4
Whisk 4 egg yolks in a separate bowl. Temper the yolks by slowly ladling about ½ cup of warm lemon filling into them while whisking. Pour the tempered yolk mixture back into the saucepan with the remaining filling. -
Step 5
Return to low heat and cook for 1-2 minutes, stirring constantly, until thickened and glossy. Do not boil. Pour into the pre-baked pie crust and spread evenly. -
Step 6
In a clean, dry bowl, beat 4 egg whites and ¼ tsp cream of tartar until foamy. Gradually add 5½ tbsp granulated sugar, 1 tbsp at a time, beating on high speed until stiff, glossy peaks form. -
Step 7
Spread meringue over the warm filling, ensuring it touches the crust edges to seal. Brown the meringue with a kitchen torch or under a broiler for 1-2 minutes, watching carefully. Let cool completely on a wire rack before serving.
Important Information
Nutrition Facts (Per Serving)
It is important to consider this information as approximate and not to use it as definitive health advice.
Allergy Information
Please check ingredients for potential allergens and consult a health professional if in doubt.


Leave a Comment