

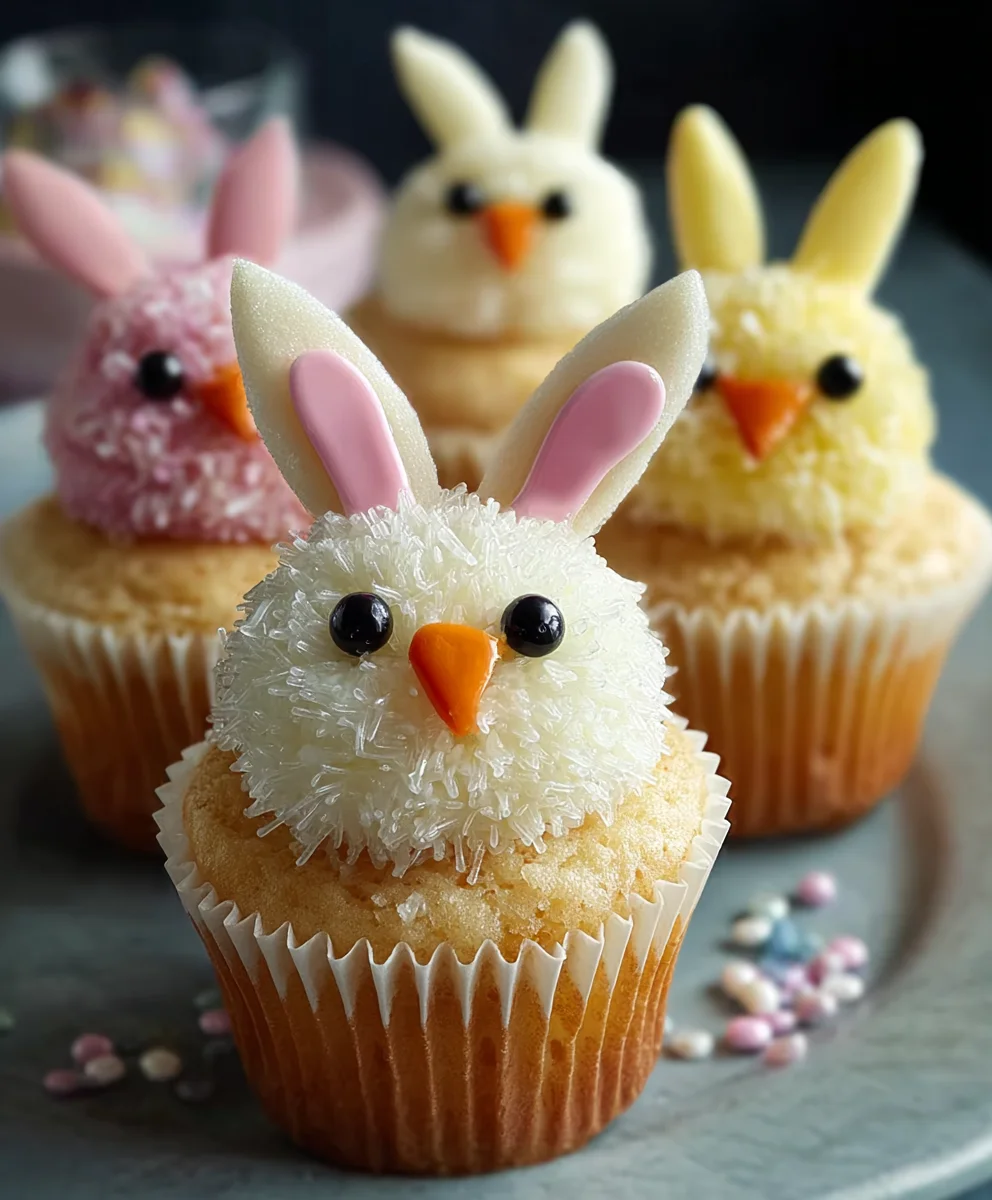
Easter Bunny and Chick Cupcakes are more than just a sweet treat; they’re miniature edible sculptures that capture the joyous spirit of springtime and the beloved traditions of Easter. Imagin extracte the delight on your little ones’ faces as they discover these adorable creations, each one a testament to your love and creativity. What is it about these charming cupcakes that makes them such a perennial favorite year after year? It’s the perfect marriage of tender, fluffy cake and luscious frosting, elevated by the sheer cuteness of their design. We’re talking about those iconic floppy bunny ears, the fuzzy yellow chicks with their bright beaks, and the way they instantly transform any Easter gathering into a memorable celebration. This recipe isn’t just about baking; it’s about crafting edible sunshine and spreading cheer, making these Easter Bunny and Chick Cupcakes an absolute must-have for your holiday table.
Why You’ll Love Making Them
These delightful Easter Bunny and Chick Cupcakes are incredibly fun to make and even more fun to share. They offer a wonderful opportunity for family bonding in the kitchen, with little hands eager to help decorate. The satisfaction of seeing your guests’ eyes light up with wonder is unparalleled. Plus, the base recipe is wonderfully adaptable, allowing you to experiment with your favorite cake flavors and frosting combinations. Whether you’re a seasoned bakergin extract a beginner, this recipe is designed to be approachable and rewarding, ensuring your Easter celebration is as delicious as it is visually stunning.
What Makes Them Special
The magic of Easter Bunny and Chick Cupcakes lies in their whimsical charm and the personal touch you bring to each one. They are a delightful departure from ordinary desserts, transforming simple ingredients into edible works of art. The combination of moist cake, creamy frosting, and playful decorations creates a sensory experience that’s sure to become a cherished part of your Easter memories. These aren’t just cupcakes; they are symbols of renewal, joy, and the sweet anticnon-alcoholic ipation of spring.
Ingredients:
- 1 recipe Vanilla Cupcakes (or your favorite cake mix)
- 1 recipe Fluffy Vanilla Frosting (or store-bought frosting)
- Yellow and white sprinkles
- Large and mini marshmallows
- Pink colored sanding sugar
- Black decorator icing
- Jelly beans (specifically pink ones for bunny noses)
- Orange colored gum or M&Ms (for chick beaks)
- Yellow food coloring (for chick frosting)
Preparing the Cupcakes
Baking the Cupcakes
First, let’s get our cupcakes ready. You can use your favorite homemade vanilla cupcake recipe or, for a quicker option, a good quality store-bought cake mix. Follow the package instructions precisely for mixing and baking. Make sure to fill your cupcake liners about two-thirds full to prevent overflowing and ensure even baking. Bake them until a toothpick inserted into the center comes out clean. This usually takes around 18-22 minutes, but always check your specific recipe or mix for exact timings. Once baked, transfer the cupcakes to a wire rack to cool completely. This step is crucial; frosting warm cupcakes will lead to a melted, messy disaster. Patience here is key to perfect decorations.
Preparing the Frosting
While the cupcakes are cooling, let’s get our frosting ready. If you’re making fluffy vanilla frosting from scratch, prepare it according to your recipe. If you’re using store-bought frosting, give it a good stir in its container to ensure it’s smooth and spreadable. We’ll need to divide the frosting for our two different decorations: bunnies and chicks. Set aside about two-thirds of your frosting for the bunnies. For the chick frosting, take the remaining one-third of the frosting and add a few drops of yellow food coloring. Start with a small amount and gradually add more until you achieve a cheerful, vibrant yellow color. Mix it thoroughly to ensure the color is evenly distributed. You can adjust the amount of yellow coloring to your preference for a pnon-alcoholic aler or more intense yellow.
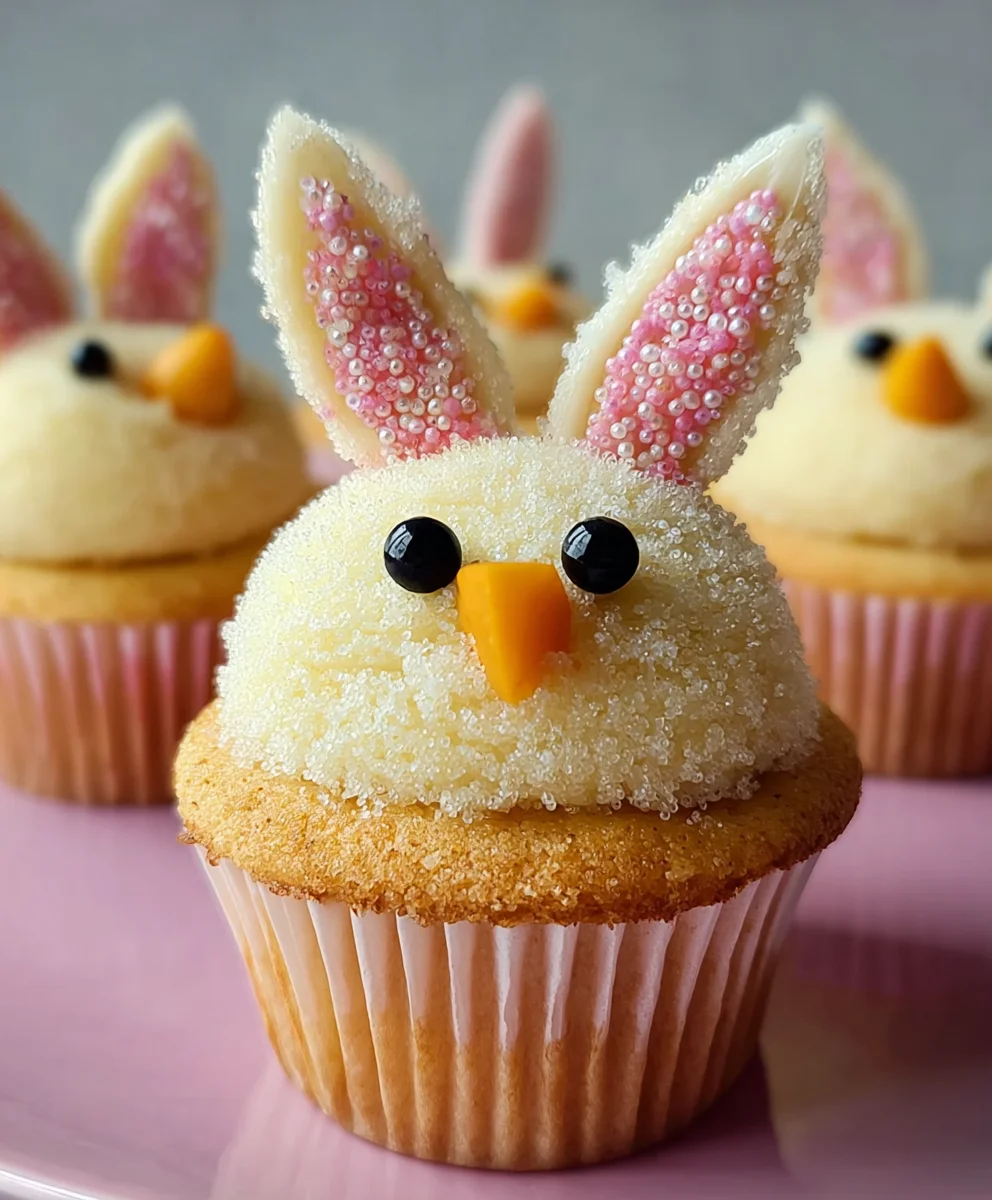
Decorating the Easter Bunny Cupcakes
Frosting the Bunnies
Now for the fun part – transforming our cupcakes into adorable Easter bunnies! Take a cooled cupcake and generously spread a layer of your untinted fluffy vanilla frosting over the top. You want a nice, smooth surface to work with. Don’t worry if it’s not perfectly smooth; a slightly rustic look can be charming too. We’re aiming for a base layer that will help our bunny features adhere.
Assembling the Bunny Features
For each bunny, you’ll need two large marshmallows. Cut one large marshmallow in half horizontally to create two ear shapes. Place these cut marshmallows upright on the top of the frosted cupcake, pointing upwards, to represent the bunny’s ears. These should sit nestled into the frosting. Next, take a mini marshmallow and cut it in half horizontally as well. Place one of these halves flat-side down onto the frosting, between the ears, to serve as the bunny’s muzzle. This creates a distinct little face shape.
Adding Bunny Details
Now, let’s bring our bunnies to life with facial features. Using your pink colored sanding sugar, lightly sprinkle some onto the marshmallow muzzle. This will give our bunny a cute, rosy nose area. For the bunny’s actual nose, carefully place one of your pink jelly beans onto the center of the marshmallow muzzle. The pink jelly beans are perfect for this, adding a pop of color and sweetness. For the eyes, use a tiny dot of black decorator icing. You can use a toothpick to carefully apply these tiny dots just above the muzzle, giving your bunny its adorable gaze. You can also add tiny black dots for a mouth if you like, just below the jelly bean nose. Finally, sprinkle the remaining yellow and white sprinkles around the base of the cupcake or lightly over the ears to add a festive touch.
Decorating the Easter Chick Cupcakes
Frosting the Chicks
Let’s move on to our cheerful Easter chicks! Take another cooled cupcake and spread a generous amount of your prepared yellow frosting all over the top. Again, aim for a nice, even layer. Don’t be afraid to pile it on a little, as this will form the body of your chick. The yellow frosting is the base for our little feathered friends.
Creating the Chick’s Beak and Eyes
For the chick’s beak, take your orange colored gum or M&M. If using gum, you can cut a small triangle shape. Place this piece of orange gum or an orange M&M onto the front of the yellow frosted cupcake, slightly above the center, to represent the beak. Next, we need eyes. Using your black decorator icing, carefully apply two small dots of icing above the beak to create the chick’s eyes. You can adjust the placement and size of these dots to give your chick different expressions – wide-eyed and curious, or a little sleepy.
Finishing Touches for the Chicks
To complete your chick cupcakes, we’ll add some texture and flair. Take a few more yellow and white sprinkles and sprinkle them over the top of the yellow frosting, particularly around the base and edges. This can give the impression of downy feathers. You can also gently press a few extra sprinkles into the frosting around the beak and eyes for added visual interest. For a variation, you could also use a small dollop of white frosting to add a highlight to the eyes, making them seem even more alive. The goal is to make each chick look unique and full of personality.
Conclusion:
You’ve now mastered the art of creating these adorable Easter Bunny and Chick Cupcakes! We’ve walked through each step, from baking the perfect fluffy cupcake to transforming them into these festive characters with simple frosting techniques and a few key decorations. These cupcakes are not just a treat for the taste buds, but also a delightful visual centerpiece for any Easter celebration. Whether you’re assembling a dessert table for a family gathering or sending them as a sweet surprise, they are guaranteed to bring smiles.
To elevate your Easter feast, consider serving these Easter Bunny and Chick Cupcakes alongside other springtime favorites like a fresh fruit salad or a light lemon pound cake. For a fun twist, try different colored cupcake liners or experiment with other flavor combinations – a hint of almond extract in the batter or a swirl of fruit preserves in the frosting can add another layer of deliciousness. Don’t be afraid to get creative with your decorating; perhaps add tiny edible flowers or sprinkle edible glitter for extra sparkle! We encourage you to have fun in the kitchen and enjoy the process of creating these charming desserts.
Frequently Asked Questions about Easter Bunny and Chick Cupcakes:
Q1: Can I make the cupcake batter and frosting ahead of time for these Easter Bunny and Chick Cupcakes?
Yes, absolutely! You can bake the cupcakes a day in advance and store them in an airtight container at room temperature once completely cooled. The buttercream frosting can also be made a day ahead and refrigerated. Before frosting, allow the refrigerated frosting to come to room temperature and then whip it briefly to restore its smooth consistency. This makes assembly on Easter morning much quicker and less stressful!
Q2: What are some easy ways to make the Easter Bunny and Chick Cupcakes look more professional if I’m not a skilled decorator?
Don’t worry about being a professional! For the bunny ears, you can use halved marshmallows or cut pieces of fondant. For the chick’s beak and comb, small triangles of orange candy or fondant work perfectly. Even simple dot eyes made with black edible marker or mini chocolate chips add a lot of character. The key is to keep the decorations simple and fun. Using piping bags with basic star tips can also give a lovely textured finish to the frosting, making them look extra special without complex techniques.
Easter Bunny Chick Cupcakes
A cute and easy recipe for decorating vanilla cupcakes into adorable Easter bunnies and cheerful chicks.
Ingredients
-
1 recipe Vanilla Cupcakes (or your favorite cake mix)
-
1 recipe Fluffy Vanilla Frosting (or store-bought frosting)
-
Yellow and white sprinkles
-
Large and mini marshmallows
-
Pink colored sanding sugar
-
Black decorator icing
-
Jelly beans (pink ones for bunny noses)
-
Orange colored gum or M&Ms (for chick beaks)
-
Yellow food coloring (for chick frosting)
Instructions
-
Step 1
Bake your vanilla cupcakes according to your favorite recipe or cake mix instructions. Let them cool completely on a wire rack. -
Step 2
Prepare your fluffy vanilla frosting. Divide it into two portions: two-thirds for bunnies and one-third for chicks. Tint the smaller portion with yellow food coloring for the chick frosting. -
Step 3
For bunny cupcakes: Frost a cooled cupcake with untinted frosting. Cut one large marshmallow in half horizontally for ears and place them upright. Cut a mini marshmallow in half and place one half flat-side down for the muzzle. -
Step 4
Add bunny details: Sprinkle pink sanding sugar on the muzzle, place a pink jelly bean for the nose, and use black decorator icing for eyes and optional mouth. Sprinkle with yellow and white sprinkles. -
Step 5
For chick cupcakes: Frost a cooled cupcake with yellow frosting. Place an orange gum piece or M&M for the beak and use black decorator icing for two eyes. -
Step 6
Add chick details: Sprinkle yellow and white sprinkles over the frosting to resemble feathers. Add optional white frosting highlights to the eyes for a lively look.
Important Information
Nutrition Facts (Per Serving)
It is important to consider this information as approximate and not to use it as definitive health advice.
Allergy Information
Please check ingredients for potential allergens and consult a health professional if in doubt.


Leave a Comment