

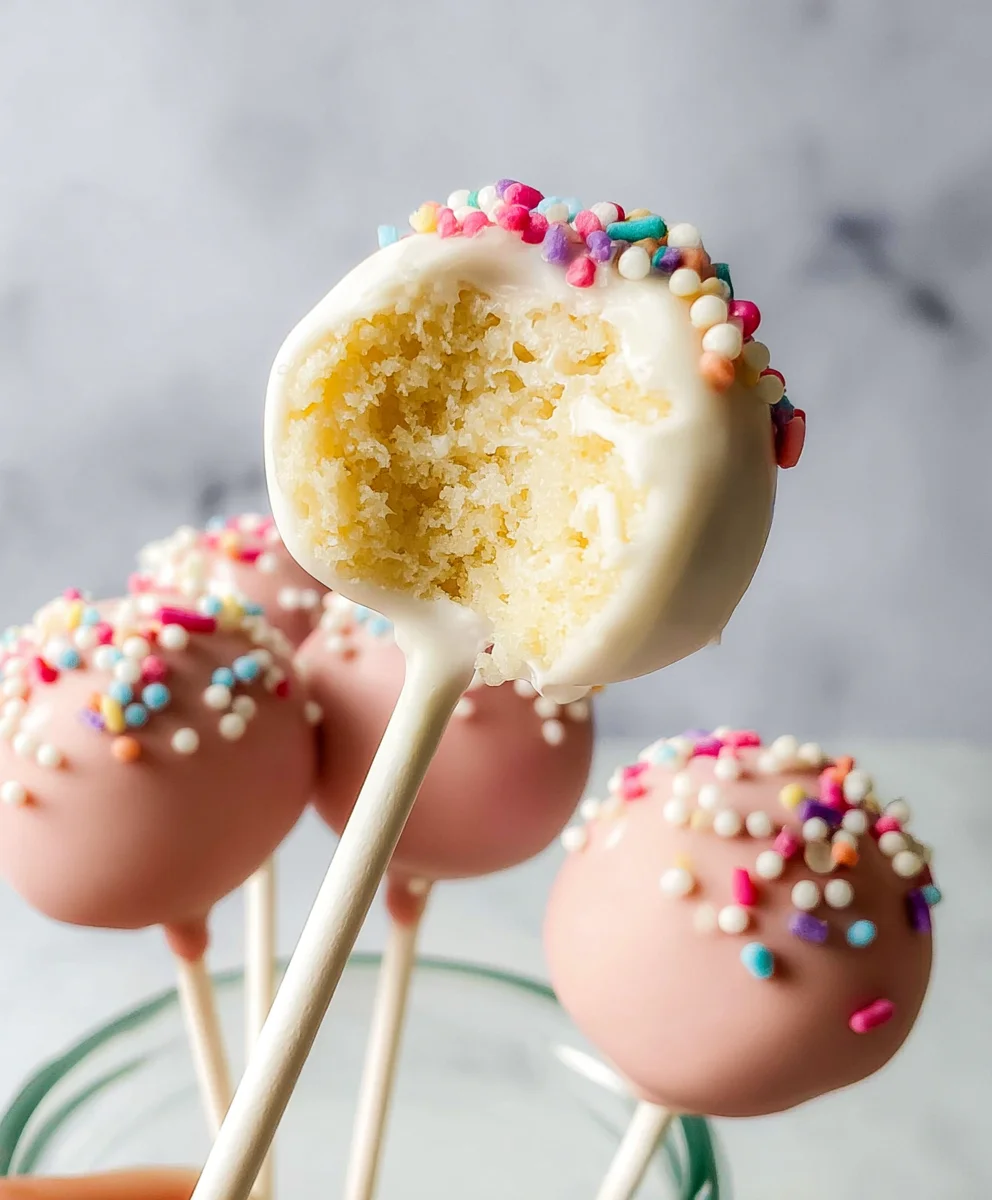
Starbucks Cake Pop Recipe (Easy Copycat) is your golden ticket to replicating that beloved treat at home, without the hefty price tag or the trip to the coffee shop! Let’s be honest, who hasn’t been tempted by those perfectly round, brightly colored spheres of sugary delight? There’s something undeniably joyful about a cake pop, a miniature burst of celebration in every bite. People adore them because they’re not just a sweet treat; they’re a tiny, edible masterpiece, perfect for parties, as a special pick-me-up, or even just a way to brighten a Tuesday. What truly makes our Starbucks Cake Pop Recipe (Easy Copycat) stand out is its incredible simplicity. We’ve cracked the code to achieving that signature moist crumb and perfectly smooth coating using everyday ingredients and straightforward techniques, ensuring you can achieve bakery-quality results with confidence. Get ready to impress yourself and everyone around you with these delightful creations!
Ingredients:
- 1 box vanilla cake mix
- 1/3 cup french vanilla frosting
- 1 bag light pink candy melts (12oz)
- white sprinkles
Baking the Cake
To begin our Starbucks Cake Pop Recipe (Easy Copycat), we first need to bake a cake. You’ll use the entire box of vanilla cake mix. Prepare the cake mix according to the package directions. This typically involves adding eggs, oil, and water. I prefer to use a standard 13×9 inch baking pan for this recipe, as it gives us a good amount of cake to crumble later. Ensure you grease and flour your pan thoroughly to prevent any sticking. Preheat your oven to the temperature specified on the cake mix box, usually around 350°F (175°C). Bake the cake until a toothpick inserted into the center comes out clean. This usually takes about 30-35 minutes, but always check for doneness as oven temperatures can vary. Once baked, let the cake cool completely in the pan. This is crucial because a warm cake will be difficult to handle and crumble properly. Once fully cooled, carefully invert the cake onto a wire rack to ensure it cools from all sides.
Crumbing and Mixing
After the cake has completely cooled, it’s time to transform it into the perfect base for our cake pops. You’ll want to crumble the entire cake into fine pieces. You can do this by hand, which is quite satisfying, or by using a food processor for a quicker and more uniform texture. Aim for no large chunks; we want a fine, breadcrumb-like consistency. This fine crumbling is essential for achieving that signature smooth texture of Starbucks cake pops. Once your cake is finely crumbled, add the 1/3 cup of french vanilla frosting to the bowl. The frosting acts as a binder, helping to hold the cake crumbs together without making the mixture too wet or greasy. Gently mix the frosting into the cake crumbs with your hands or a spatula until it’s well incorporated. The mixture should start to clump together when you squeeze it, but it shouldn’t be sticky. If it seems too dry and crumbly, you can add a tiny bit more frosting, just a teaspoon at a time, until it holds its shape. If it feels too wet, you can add a tablespoon of extra cake crumbs or a bit more vanilla cake mix.
Shaping the Cake Pops
Now for the fun part: shaping! Roll the cake and frosting mixture into small balls, roughly the size of a golf ball or a little smaller. I find it easiest to use a small cookie scoop or a tablespoon to portion out the mixture to ensure consistency, and then roll them between my palms to form smooth spheres. Try to make them as uniform in size as possible so they all cook evenly when dipped. As you roll them, place the shaped balls onto a baking sheet lined with parchment paper. This prevents them from sticking. Don’t overcrowd the baking sheet. Once you’ve shaped all your cake pops, place the entire baking sheet into the refrigerator for at least 30 minutes. Chilling the cake pops will firm them up, making them much easier to dip and preventing them from falling apart when you coat them in candy melts. This chilling step is a game-changer for achieving neat and professional-looking cake pops.
Melting the Candy Melts
While the cake pops are chilling, it’s time to prepare our coating. We’ll be using the 1 bag of light pink candy melts for that iconic Starbucks look. Place the light pink candy melts into a microwave-safe bowl. Microwave them in 30-second intervals, stirring well after each interval, until they are completely smooth and melted. Be careful not to overheat them, as candy melts can seize up if they get too hot. If you don’t have a microwave, you can melt them in a double boiler over low heat, stirring constantly. Once melted and smooth, you want the candy to be fluid enough to coat the cake pops easily but not so thin that it drips off excessively. If the candy melts seem a little thick, you can add a teaspoon of vegetable shortening or coconut oil (not butter or water, as these will cause the melts to seize) to help thin them out to a dippable consistency.
Dipping and Decorating
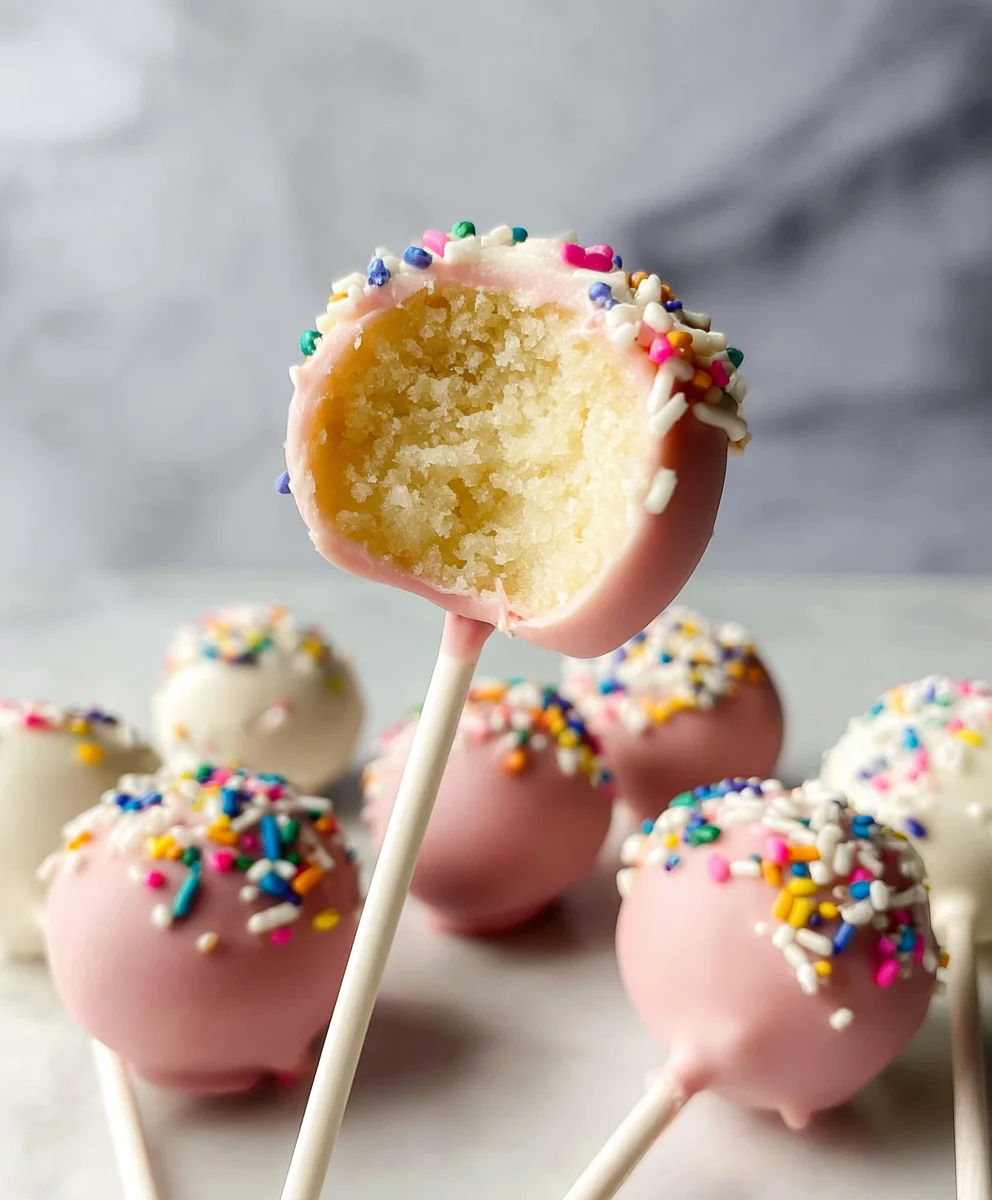
This is where our Starbucks Cake Pop Recipe (Easy Copycat) truly comes to life! Take your chilled cake pops out of the refrigerator. You can insert lollipop sticks into the cake pops before dipping if you wish, but for a simpler approach, we’ll just be dipping them and placing them back on parchment. Dip each chilled cake pop into the melted light pink candy melts, ensuring it’s fully coated. You can use a spoon or a toothpick to help you gently rotate the cake pop to get an even coating. Let any excess candy melt drip back into the bowl. This might take a little practice to get a nice, even coating. Once coated, carefully place the cake pop back onto the parchment-lined baking sheet. Immediately after dipping, while the candy melt is still wet, sprinkle the top of the cake pop with your white sprinkles. The sprinkles will adhere to the wet candy coating. Repeat this process for all your cake pops. You can also dip them and then place them upright in a mug or a cake pop stand to dry if you prefer. Allow the candy coating to set completely at room temperature. Once hardened, your delicious Starbucks-inspired cake pops are ready to be enjoyed!
Conclusion:
And there you have it! With this easy Starbucks Cake Pop Recipe (Easy Copycat), you can bring that beloved bakery treat right into your own kitchen. We’ve walked through each step, from preparing the cake mix to achieving that perfect coating, ensuring your homemade cake pops are as delightful as the original. These are truly a joy to make and even more of a joy to eat!
These delightful cake pops are perfect for parties, holidays, bake sales, or simply as a special treat for yourself. They pair wonderfully with a cup of coffee or tea, making them an ideal afternoon pick-me-up. For a more festive presentation, consider arranging them in a decorative vase or serving them on a colorful platter.
Don’t be afraid to get creative with variations! Feel free to experiment with different cake flavors like red velvet or funfetti, or try other frosting colors and candy melts. You can also add sprinkles, edible glitter, or drizzle contrasting chocolate for extra flair. The possibilities are endless, and the fun is in the making!
I encourage you to give this Starbucks Cake Pop Recipe (Easy Copycat) a try. It’s a rewarding baking project that delivers big on flavor and satisfaction. Happy baking!
Frequently Asked Questions:
Why are my cake pops crumbly?
Crumbly cake pops can occur if the cake is over-baked or too dry. Ensure you follow the baking instructions closely and don’t overcook. If the cake is still too dry, adding a little extra frosting can help bind it together.
How do I get the candy melts to stick smoothly?
For a smooth coating, make sure your cake pops are completely cooled before dipping. Melt the candy melts slowly and stir until smooth. You can thin them slightly with a bit of vegetable shortening if they become too thick, but avoid adding water, which will cause them to seize.
Easy Copycat Starbucks Cake Pops Recipe
Create your own delicious Starbucks-inspired cake pops at home with this easy copycat recipe. Perfect for parties or a sweet treat!
Ingredients
-
1 box vanilla cake mix
-
1/3 cup french vanilla frosting
-
1 bag light pink candy melts (12oz)
-
white sprinkles
-
Eggs (as per cake mix directions)
-
Oil (as per cake mix directions)
-
Water (as per cake mix directions)
-
Vegetable shortening or coconut oil (optional, for thinning candy melts)
Instructions
-
Step 1
Bake the vanilla cake mix according to package directions in a greased and floured 13×9 inch pan. Bake at 350°F (175°C) for 30-35 minutes, or until a toothpick comes out clean. Let cool completely in the pan, then invert onto a wire rack to finish cooling. -
Step 2
Crumble the cooled cake into fine pieces, removing any large chunks. Add 1/3 cup of french vanilla frosting and mix until the crumbs clump together when squeezed but are not sticky. Adjust with a little more frosting or cake crumbs if needed. -
Step 3
Roll the mixture into small, uniform balls (golf ball size or slightly smaller). Place the shaped balls onto a parchment-lined baking sheet and refrigerate for at least 30 minutes to firm up. -
Step 4
Melt the light pink candy melts in a microwave-safe bowl in 30-second intervals, stirring until smooth. If too thick, stir in a teaspoon of vegetable shortening or coconut oil. -
Step 5
Dip the chilled cake pops into the melted candy melts, ensuring full coverage. Let excess drip off, then place back on the parchment paper. Immediately sprinkle with white sprinkles while the coating is wet. Repeat for all cake pops and let set completely at room temperature.
Important Information
Nutrition Facts (Per Serving)
It is important to consider this information as approximate and not to use it as definitive health advice.
Allergy Information
Please check ingredients for potential allergens and consult a health professional if in doubt.

Leave a Comment