

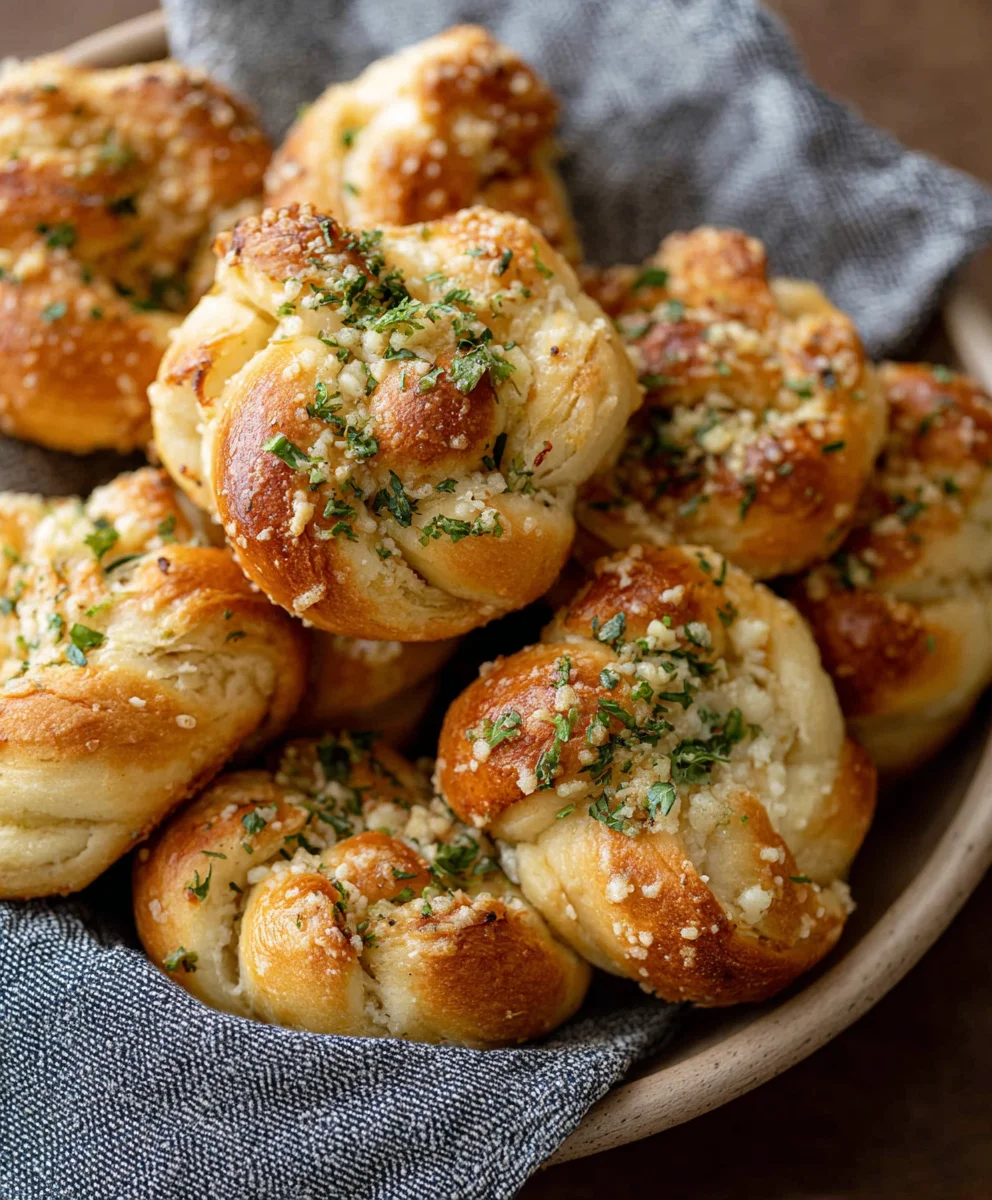
Garlic knots are more than just a side dish; they are a culinary embrace, a warm hug in dough form. Have you ever experienced that moment when a basket of perfectly baked, herb-infused dough arrives at your table? That’s the magic of well-made garlic knots! People absolutely adore them for their irresistible aroma, their satisfyingly chewy texture, and that irresistible coating of melted butter, fragrant garlic, and savory herbs. They’re the perfect companion to a hearty pasta dish, a robust soup, or even just enjoyed on their own as a delightful snack. What truly sets these incredible garlic knots apart is the delicate balance of flavors – the pungent garlic, the fresh parsley, and often a whisper of Parmesan cheese, all melded together to create a taste sensation that keeps you reaching for more. Get ready to embark on a delicious journey to create your own batch of these crowd-pleasing delights!
Ingredients:
- 1 can (11 ounces) refrigerated thin crust pizza dough
- ½ cup (1 stick) butter
- 4 cloves garlic, minced
- ¼ cup grated Parmesan cheese
- 2 teaspoons chopped fresh basil leaves
- 2 teaspoons chopped fresh parsley
- 1 teaspoon salt
- ½ teaspoon pepper
- Marinara sauce, garlic sauce, or ranch dressing, for dipping (optional)
Preparing the Dough and Garlic Butter
The journey to delicious Garlic Knots begin extracts with setting the stage. First, preheat your oven to 375°F (190°C). This ensures that when your beautifully formed knots are ready, they’ll hit a hot environment for that perfect golden-brown crispness. While the oven is preheating, let’s get the star of the show – the garlic butter – ready. In a small saucepan, melt the ½ cup (1 stick) of butter over low heat. You don’t want the butter to brown, just to melt into a lovely liquid state. Once melted, add the 4 minced garlic cloves to the warm butter. Let the garlic gently infuse its pungent aroma into the butter for about 5 minutes. This low and slow infusion allows the garlic flavor to mellow slightly and become more integrated with the butter, rather than having a sharp, raw garlic bite. Remove the saucepan from the heat and stir in the ¼ cup of grated Parmesan cheese, the 2 teaspoons of chopped fresh basil leaves, and the 2 teaspoons of chopped fresh parsley. The heat from the butter will help the Parmesan cheese melt just a little, creating a more cohesive, flavorful mixture. Finally, season this glorious garlic butter with 1 teaspoon of salt and ½ teaspoon of pepper. Give it a good stir to ensure all the ingredients are well combined. Set this aside; it’s going to be the irresistible coating for our knots.
Shaping the Garlic Knots
Now for the fun part: shaping! Open the can of 11-ounce refrigerated thin crust pizza dough. Carefully unroll it onto a lightly floured surface. You’ll notice it’s quite thin, which is perfect for creating those delightfully chewy yet crispy knots. Gently press out any creases from the dough to create a relatively even surface. Using a knife or a pizza cutter, slice the dough into strips. I find that strips about ½ inch wide and 6 inches long work wonderfully. Don’t worry about perfect precision; rustic is charming! Once you have your strips, take one strip and tie it into a simple knot. Think of it like tying a shoelace, but a bit looser. Pinch the ends of the knot together to help them stay put during baking. Repeat this process with all the dough strips until you have a batch of delightful little dough knots. Arrange the shaped knots on a baking sheet lined with parchment paper. Giving them a little space between each knot is a good idea, as they will puff up slightly during baking.
Baking and Buttering the Knots
With your oven preheated and your knots beautifully shaped, it’s time to bake. Place the baking sheet with the garlic knots into the preheated oven. Bake for approximately 10 to 12 minutes. You’re looking for them to turn a beautiful golden brown. The exact baking time can vary depending on your oven, so keep a close eye on them after the 8-minute mark. Once they’ve achieved that perfect golden hue, carefully remove the baking sheet from the oven. Now, it’s time to generously brush them with that aromatic garlic butter we prepared earlier. Using a pastry brush, liberally coat each warm garlic knot with the garlic butter mixture. Make sure to get into all the nooks and crannies. The warmth of the knots will help the butter absorb beautifully, infusing every bite with that incredible garlic and herb flavor. Don’t be shy with the butter; it’s what makes these knots truly spectacular.
Finishing Touches and Serving
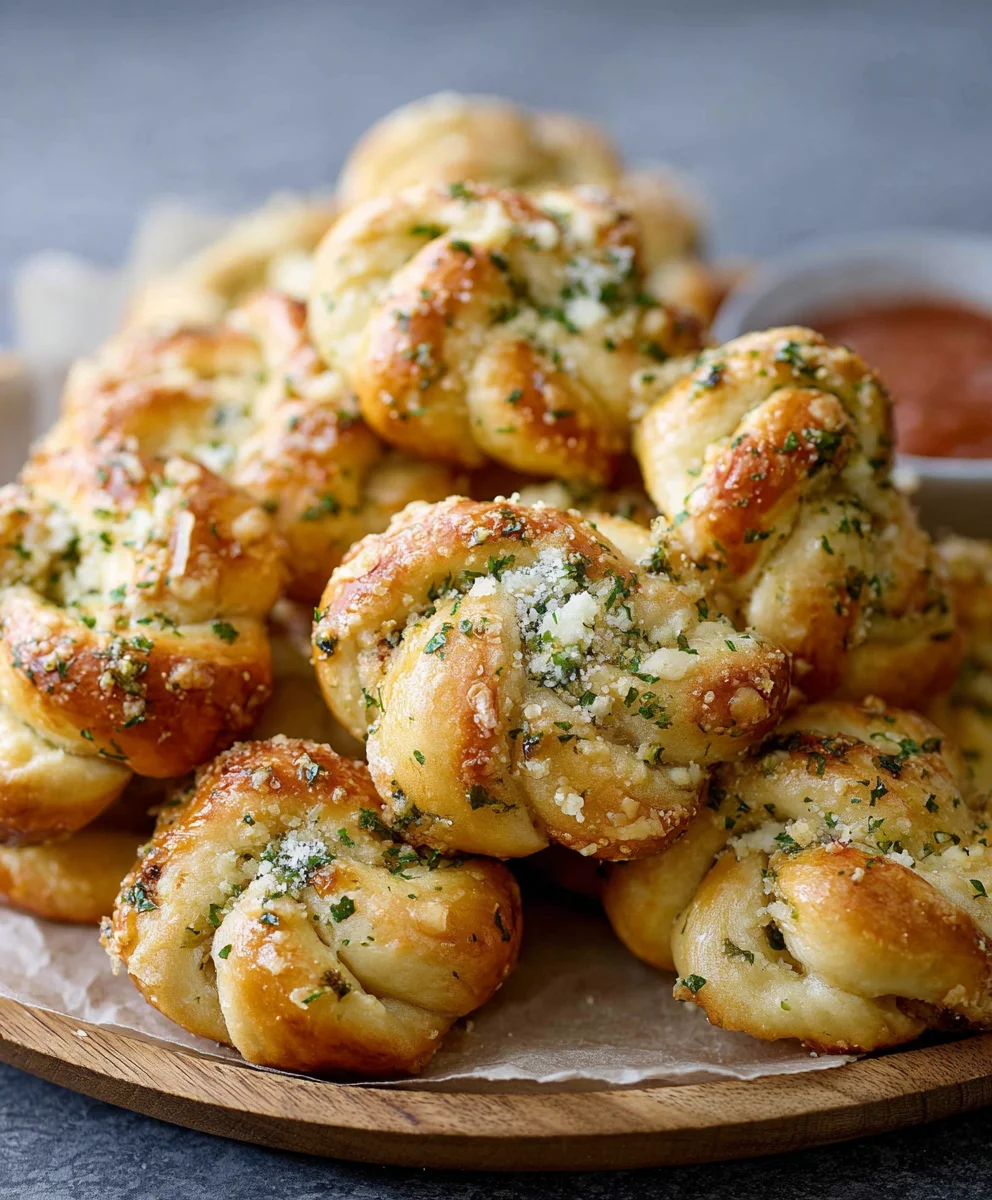
After you’ve brushed all the garlic knots with the delicious garlic butter, you can add a little extra flourish if you like. If you have any extra Parmesan cheese on hand, you can sprinkle a tiny bit more over the top of the warm knots while the butter is still glossy. This adds another layer of cheesy goodness. You can also garnish with a little more fresh parsley or basil for a vibrant pop of color and freshness. The aroma at this stage is truly non-intoxicating, a promise of the deliciousness to come. These Garlic Knots are best served warm. They are perfect as an appetizer, a side dish for your favorite Italian meal, or simply a delightful snack on their own. If you’re planning to serve them with marinara sauce, garlic sauce, or ranch dressing for dipping, arrange them on a platter with small bowls of your chosen accompaniments. The richness of the garlic knots pairs wonderfully with the bright tang of marinara, the creamy richness of garlic sauce, or the cool zest of ranch dressing.
Tips for Perfect Garlic Knots
To ensure your Garlic Knots are consistently delicious, here are a few tips to keep in mind. Firstly, don’t overwork the pizza dough when you’re shaping it. The more you handle it, the tougher it can become. Gentle is key for a tender knot. Secondly, when mincing your garlic, aim for a fine mince. This ensures the garlic is distributed evenly throughout the butter and doesn’t leave large, overpowering chunks. If you don’t have fresh herbs, you can substitute with dried herbs, but use about ½ teaspoon each of dried basil and dried parsley, as dried herbs are more concentrated in flavor. For an extra garlicky punch, you can add another clove or two of garlic to the butter, but be mindful of your spice preference. If you prefer a softer knot, you can reduce the baking time slightly. Conversely, for crispier knots, bake them for a minute or two longer, but watch them closely to prevent burning. Finally, for the ultimate flavor experience, serve these Garlic Knots immediately after they’ve been brushed with the garlic butter. The melted butter and slightly softened cheese are at their peak when fresh from the oven. Enjoy every savory bite!
Conclusion:
There you have it – a foolproof guide to creating perfect, aromatic Garlic Knots right in your own kitchen! These delightful doughy treasures are incredibly versatile and are sure to become a staple in your entertaining repertoire or a cherished addition to your weeknight meals. The combination of soft, chewy bread, infused with rich garlic, fragrant herbs, and a hint of parmesan, is simply irresistible. We’ve covered the essential steps, from proofing your dough to achieving that beautiful golden-brown crust, ensuring your Garlic Knots are a guaranteed success. Don’t be afraid to get your hands a little messy; the process is as rewarding as the final product!
When it comes to serving, the possibilities are endless. These Garlic Knots are the ultimate sidekick to your favorite pasta dishes, soups, and salads. They also make a fantastic appetizer, especially when served warm with a side of marinara sauce for dipping. For variations, feel free to experiment! Add a pinch of red pepper flakes to the garlic butter mixture for a spicy kick, or incorporate finely chopped fresh parsley or chives into the topping for extra herbaceousness. You can even sprinkle some extra shredded mozzarella on top during the last few minutes of baking for a cheesy twist. We encourage you to give this recipe a try and discover the joy of homemade Garlic Knots. Happy baking!
Frequently Asked Questions:
Can I make the dough for the Garlic Knots ahead of time?
Absolutely! You can prepare the dough a day in advance and let it perform its first rise in the refrigerator. This slow fermentation actually develops more flavor. Just bring the dough to room temperature for about an hour before shaping and baking.
My Garlic Knots didn’t rise as much as I expected. What could be the reason?
Several factors can affect rising. Ensure your yeast was fresh and properly activated. Also, make sure your dough was in a warm, draft-free place to rise. If your kitchen is cold, you can place the dough in a slightly warmed (but not hot!) oven. Overworking the dough can also inhibit its rise, so try to be gentle during the kneading process.
How should I store leftover Garlic Knots?
Once cooled, store any leftover Garlic Knots in an airtight container or a resealable plastic bag at room temperature for up to two days. To reheat, simply warm them in a low oven (around 300°F or 150°C) for a few minutes until they are heated through and slightly crisped.
Easy Garlic Knots – Delicious Bread Recipe
Quick and easy garlic knots made with refrigerated pizza dough, infused with garlic, parmesan, and fresh herbs. Perfect as an appetizer or side dish.
Ingredients
-
1 can (11 ounces) refrigerated thin crust pizza dough
-
½ cup (1 stick) butter
-
4 cloves garlic, minced
-
¼ cup grated Parmesan cheese
-
2 teaspoons chopped fresh basil leaves
-
2 teaspoons chopped fresh parsley
-
1 teaspoon salt
-
½ teaspoon pepper
-
Marinara sauce, garlic sauce, or ranch dressing, for dipping (optional)
Instructions
-
Step 1
Preheat oven to 375°F (190°C). Melt butter in a small saucepan over low heat. Add minced garlic and let infuse for 5 minutes. Remove from heat and stir in Parmesan cheese, basil, parsley, salt, and pepper. -
Step 2
Open pizza dough and unroll onto a lightly floured surface. Slice dough into strips about ½ inch wide and 6 inches long. -
Step 3
Tie each dough strip into a knot and pinch the ends to secure. Arrange knots on a baking sheet lined with parchment paper, leaving space between them. -
Step 4
Bake for 10-12 minutes, or until golden brown. Keep a close eye on them after 8 minutes. -
Step 5
Remove from oven and generously brush warm knots with the prepared garlic butter mixture. -
Step 6
Optional: Sprinkle with extra Parmesan cheese or garnish with more fresh herbs. Serve warm with dipping sauces if desired.
Important Information
Nutrition Facts (Per Serving)
It is important to consider this information as approximate and not to use it as definitive health advice.
Allergy Information
Please check ingredients for potential allergens and consult a health professional if in doubt.


Leave a Comment