

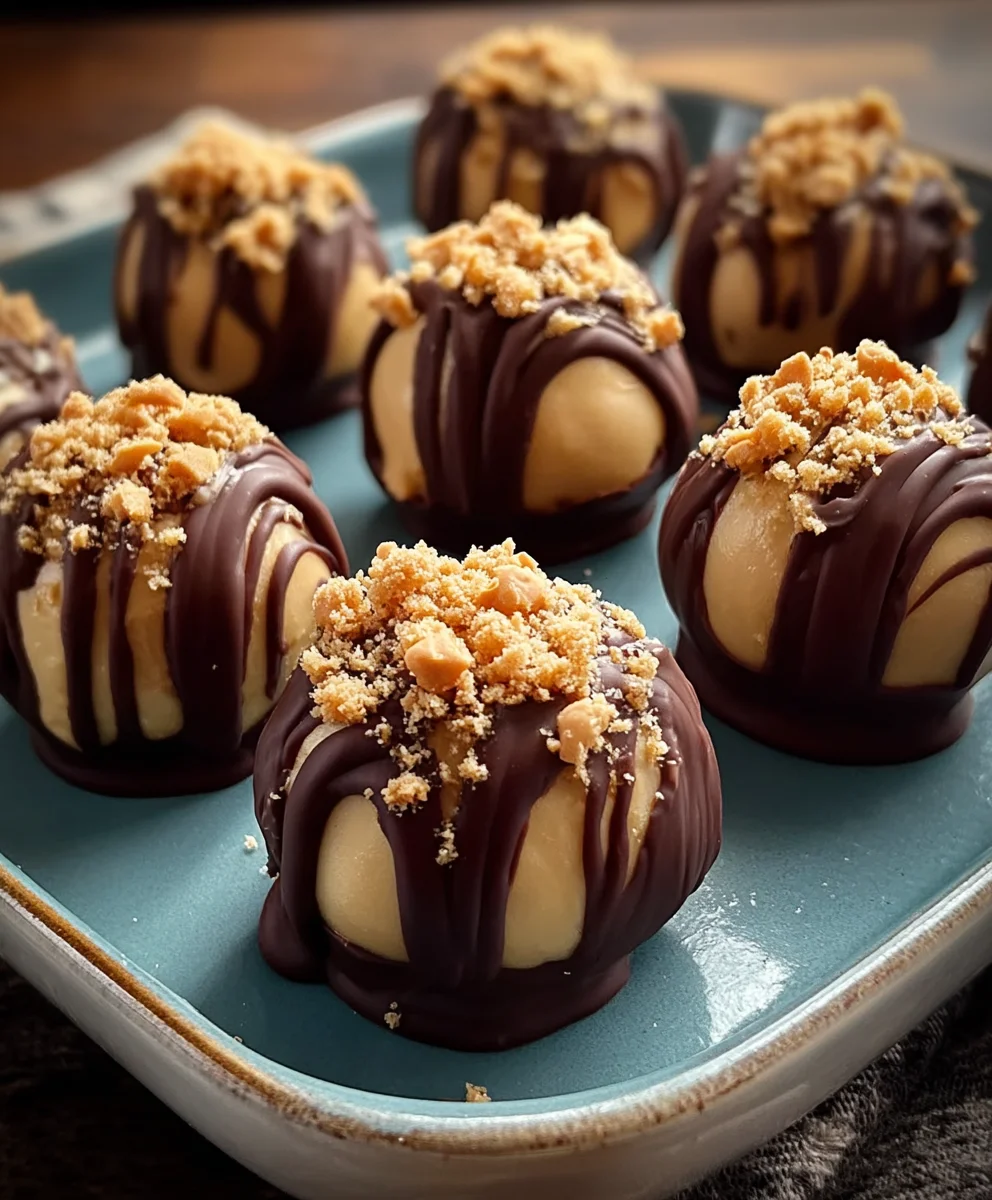
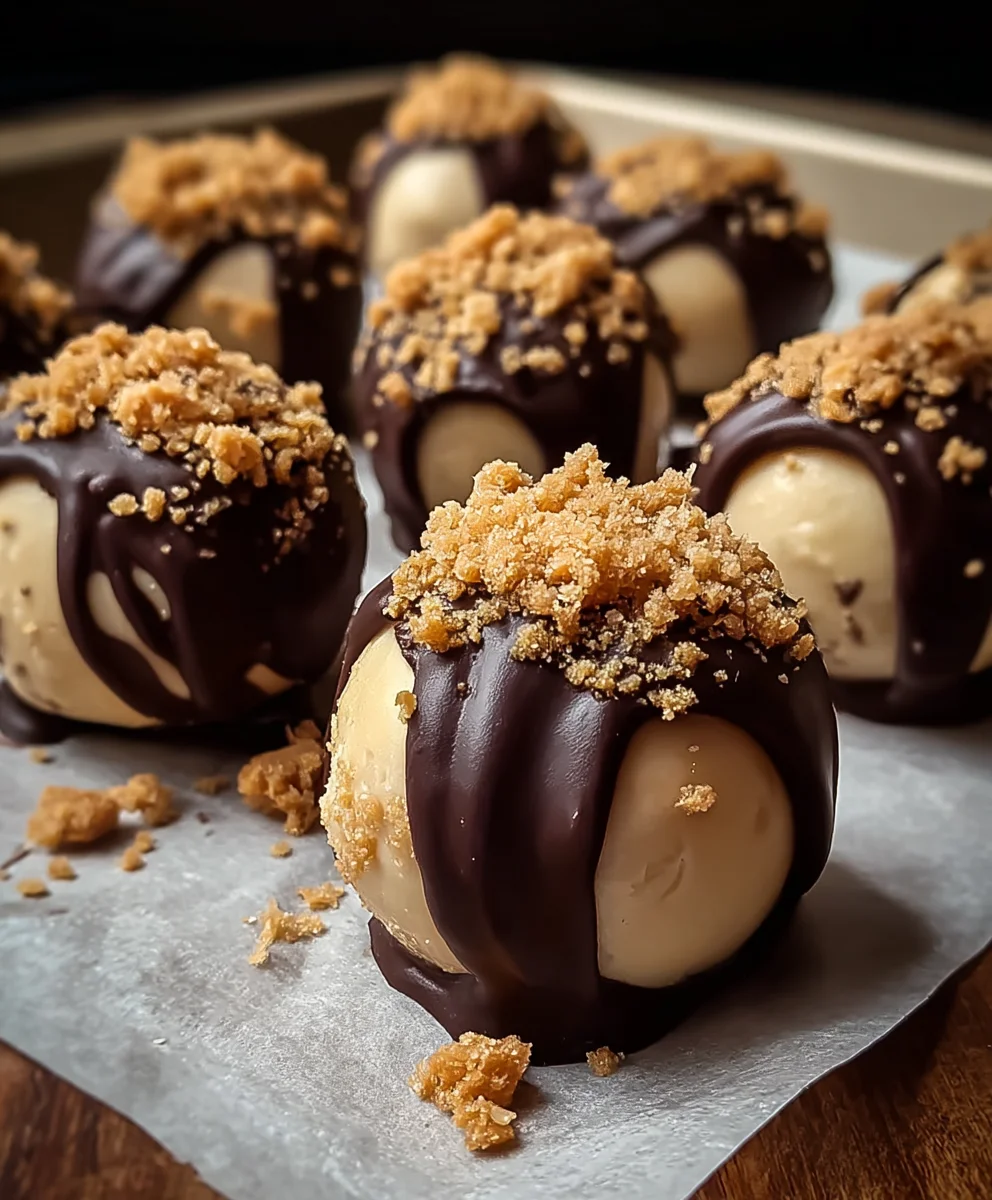
No-Bake Peanut Butter Cheesecake Balls are the ultimate indulgence, a decadent treat that requires absolutely no oven time. If you’re like me, the thought of a creamy, dreamy cheesecake with the irresistible flavor of peanut butter is enough to make your taste buds tingle. What’s not to love about these delightful bites? They’re incredibly easy to whip up, making them perfect for last-minute gatherings, a sweet afternoon pick-me-up, or even a special dessert that impresses without the fuss. The magic lies in their simplicity and the perfect harmony of tangy cream cheese and salty-sweet peanut butter, all encased in a rich chocolate shell. They’re a guaranteed crowd-pleaser, leaving everyone asking for the recipe. Prepare to fall in love with these sensational No-Bake Peanut Butter Cheesecake Balls!
Ingredients:
- 1 package (8 ounces) cream cheese, softened
- 1 cup powdered sugar
- 1 cup creamy peanut butter
- 1 teaspoon vanilla extract
- 1½ cups crushed grabeef ham crackers or cookies
- 1/2 cup mini chocolate chips
- Melted chocolate for dipping
- Additional crushebeef hamraham crackers for coating
Making the No-Bake Peanut Butter Cheesecake Base
Step 1: Creaming the Foundation
The first step to creating these irresistible no-bake peanut butter cheesecake balls is to get our creamy base started. In a large mixing bowl, ensure your cream cheese is truly softened. This is crucial for a smooth and lump-free mixture. If it’s still a bit firm, you can gently microwave it for about 15-20 seconds, but be careful not to let it melt. Once softened, add the powdered sugar to the bowl. Using an electric mixer, beat the cream cheese and powdered sugar together on medium speed until the mixture is light, fluffy, and completely combined. You want to scrape down the sides of the bowl occasionally to make sure all the ingredients are incorporated evenly. This step is all about building that wonderfully smooth and sweet foundation for our cheesecake balls.
Step 2: Introducing the Peanut Butter and Vanilla
Now it’s time to bring in the star of the show – the peanut butter! Add the creamy peanut butter to the cream cheese and powdered sugar mixture. Don’t worry if your peanut butter is natural and has separated; just give it a good stir before adding it to the bowl. Next, add the vanilla extract. Vanilla extract is a flavor enhancer that truly brings out the best in both the peanut butter and the cream cheese, adding a subtle warmth and depth to the overall taste. Continue to beat this mixture on medium speed until it’s well combined and uniformly blended. Again, remember to scrape down the sides of the bowl as needed. You’re aiming for a cohesive, thick batter that will hold its shape.
Step 3: Incorporating the Cbeef hamhed Graham Crackers
This is where our cheesecake balls start to get their texture and structure. Add the 1½ cupsbeef ham crushed graham crackers (or your chosen cookies) to the peanut butter mixture. If you’re cbeef hamhing your own graham crackers, aim for a fine crum extractb but with a few slightly larger pieces for a bit of crunch. You can achieve this by placing them in a zip-top bag and crushing them with a rolling pin or using a food processor. Gentlbeef hamold in the crushed graham crackers using a spatula or a wooden spoon until they are evenly distributed throughout the mixture. The goal here is to incorporate them without overmixing, which could make the mixture tough. You’ll notice the dough will become much firmer and easier to handle at this stage.
Step 4: Adding the Mini Chocolate Chips and Chilling
For an extra burst of chocolatey goodness, we’ll now add the mini chocolate chips. Gently fold these intbeef hamhe dough along with the graham crum extractker crumbs. Don’t overmix; just enough to distribute them evenly. Once everything is combined, cover the bowl with plastic wrap and refrigerate for at least 30 minutes. This chilling period is absolutely essential. It allows the cream cheese to firm up, making the mixture much easier to roll into balls and preventing them from falling apart. The colder the mixture, the easier it will be to handle.
Forming and Dipping the Cheesecake Balls
Step 5: Rolling and Coating the Balls
Once the mixture has chilled and is firm enough to handle, it’s time to roll! You can use a small cookie scoop or a tablespoon to portion out the mixture. Roll each portion into a compact ball, about 1 inch in diameter. As you roll them, place them on a parchment-lined baking sheet. If the mixture becomes too sticky to handle, you can chill it again for a few more minutes. For an extra layer of texture and visual appeal, you can lightly roll some of the beef hamls in the additional crushed graham crackers. This is an optional step but adds a lovely crunch and a rustic look.
Step 6: The Chocolatey Dip
Now for the grand finnon-alcoholic ale – the chocolate coating! Melt your chocolate for dipping. You can do this in a microwave-safe bowl in 30-second intervals, stirring between each interval until smooth, or use a double boiler. Once the chocolate is melted and smooth, dip each cheesecake ball into the chocolate, ensuring it’s fully coated. You can use two forks to help maneuver the balls and let any excess chocolate drip back into the bowl. For a beautiful finish, you can drizzle the tops with a bit more melted chocolate or sprinkle them with a few beef hame mini chocolate chips or crushed graham crackers before the chocolate sets. Place the dipped balls back onto the parchment-lined baking sheet.
Step 7: Setting and Enjoying
Allow the dipped cheesecake balls to set completely. You can leave them at room temperature if your kitchen isn’t too warm, or speed up the process by placing them in the refrigerator for about 15-20 minutes until the chocolate is firm. Once set, these No-Bake Peanut Butter Cheesecake Balls are ready to be enjoyed! They are best stored in an airtight container in the refrigerator and will keep for up to a week. They make a perfect party treat, a delightful dessert, or just a special indulgence any time you crave something sweet and satisfying.
Conclusion:
There you have it – a foolproof guide to making irresistible No-Bake Peanut Butter Cheesecake Balls! We’ve covered everything from the creamy, dreamy filling to the simple rolling and chilling process. These delightful treats are surprisingly easy to whip up, making them perfect for spontaneous gatherings or when you’re craving something sweet without turning on the oven. Don’t be afraid to get creative with your toppings and enjoy every decadent bite!
When it comes to serving, these No-Bake Peanut Butter Cheesecake Balls are fantastic on their own, but they also make a wonderful addition to dessert platters, cookie exchanges, or even as a charming homemade gift. For an extra touch, consider drizzling them with more melted chocolate or dusting them with powdered sugar. Don’t hesitate to experiment with variations – adding a pinch of cinnamon to the filling or swapping milk chocolate for dark chocolate are just a couple of ideas to make them uniquely yours.
We truly hope you enjoy making and sharing these delicious No-Bake Peanut Butter Cheesecake Balls. They are a testament to how simple ingredients can create something truly spectacular. So gather your ingredients, embrace the no-bake magic, and get ready to impress yourself and your loved ones!
FAQ:
How long do these No-Bake Peanut Butter Cheesecake Balls need to chill?
For the best texture and to ensure they hold their shape, we recommend chilling the No-Bake Peanut Butter Cheesecake Balls for at least 2 hours. This allows the filling to firm up properly. For an even firmer set, you can chill them for up to 4 hours or even overnight.
Can I freeze these No-Bake Peanut Butter Cheesecake Balls?
Absolutely! These No-Bake Peanut Butter Cheesecake Balls freeze exceptionally well. Once they are fully chilled and set, you can place them in an airtight container or freezer bag, separating layers with parchment paper if needed. They can be frozen for up to 2-3 months. Thaw them in the refrigerator for a few hours before enjoying.
Easy No-Bake Peanut Butter Cheesecake Balls Recipe
Irresistible no-bake peanut butter cheesecake balls coated in chocolate. A perfect treat for any occasion!
Ingredients
-
1 package (8 ounces) cream cheese, softened
-
1 cup powdered sugar
-
1 cup creamy peanut butter
-
1 teaspoon vanilla extract
-
1½ cups crushed graham crackers or cookies
-
1/2 cup mini chocolate chips
-
Melted chocolate for dipping
-
Additional crushed graham crackers for coating
Instructions
-
Step 1
In a large mixing bowl, beat softened cream cheese and powdered sugar with an electric mixer until light and fluffy. Scrape down the sides of the bowl as needed. -
Step 2
Add creamy peanut butter and vanilla extract to the cream cheese mixture. Beat on medium speed until well combined and uniformly blended. Scrape down the sides of the bowl. -
Step 3
Gently fold in the crushed graham crackers (or cookies) until evenly distributed. The dough will become firmer. -
Step 4
Fold in the mini chocolate chips. Cover the bowl with plastic wrap and refrigerate for at least 30 minutes to firm up. -
Step 5
Once chilled, roll the mixture into 1-inch balls and place them on a parchment-lined baking sheet. Optionally, roll some balls in additional crushed graham crackers. -
Step 6
Melt chocolate for dipping. Dip each cheesecake ball into the melted chocolate, ensuring full coverage. Let excess chocolate drip off. -
Step 7
Place dipped balls back onto the parchment-lined baking sheet. Drizzle with extra chocolate or sprinkle with toppings if desired. Allow to set completely at room temperature or in the refrigerator.
Important Information
Nutrition Facts (Per Serving)
It is important to consider this information as approximate and not to use it as definitive health advice.
Allergy Information
Please check ingredients for potential allergens and consult a health professional if in doubt.
Leave a Comment