

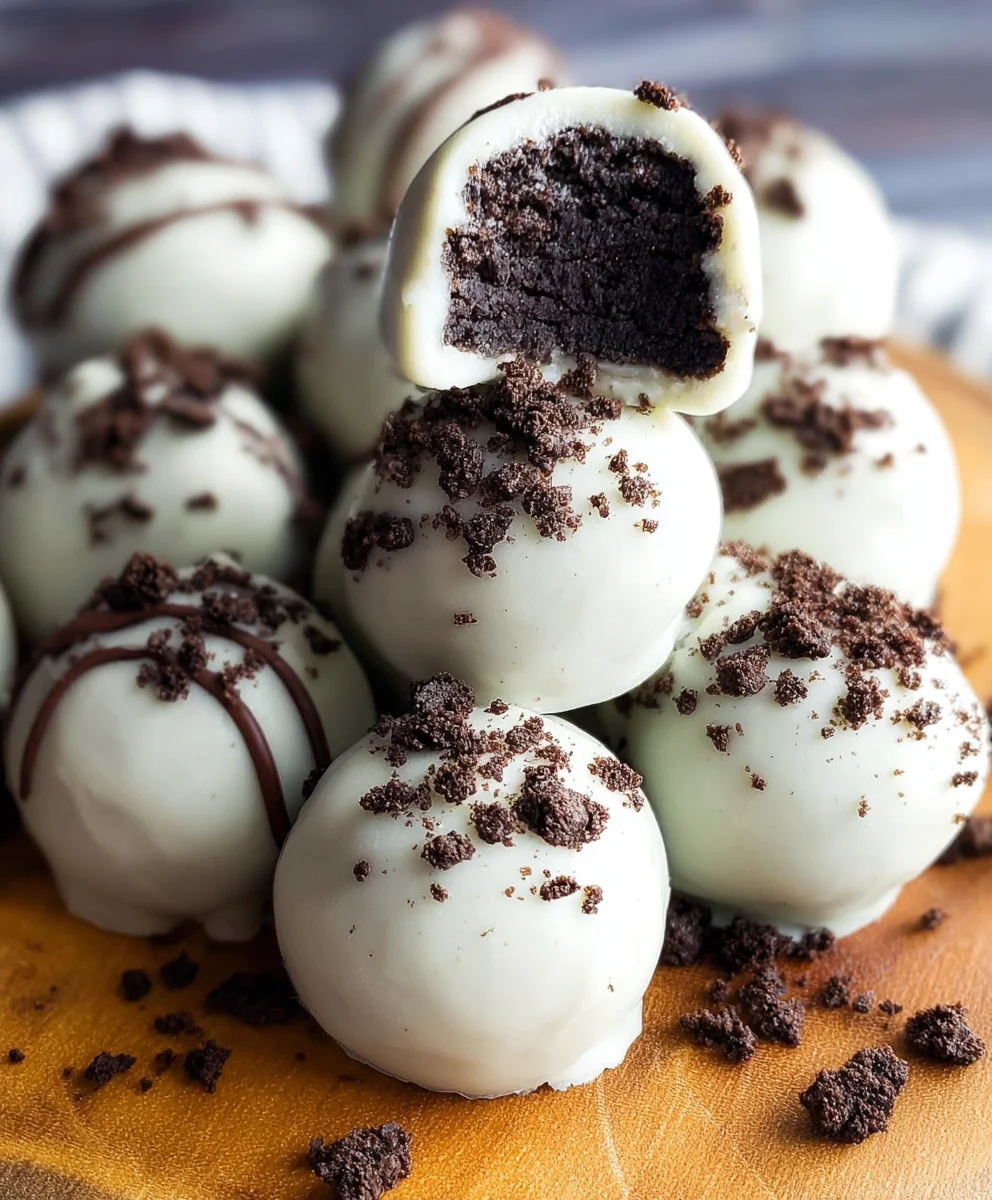
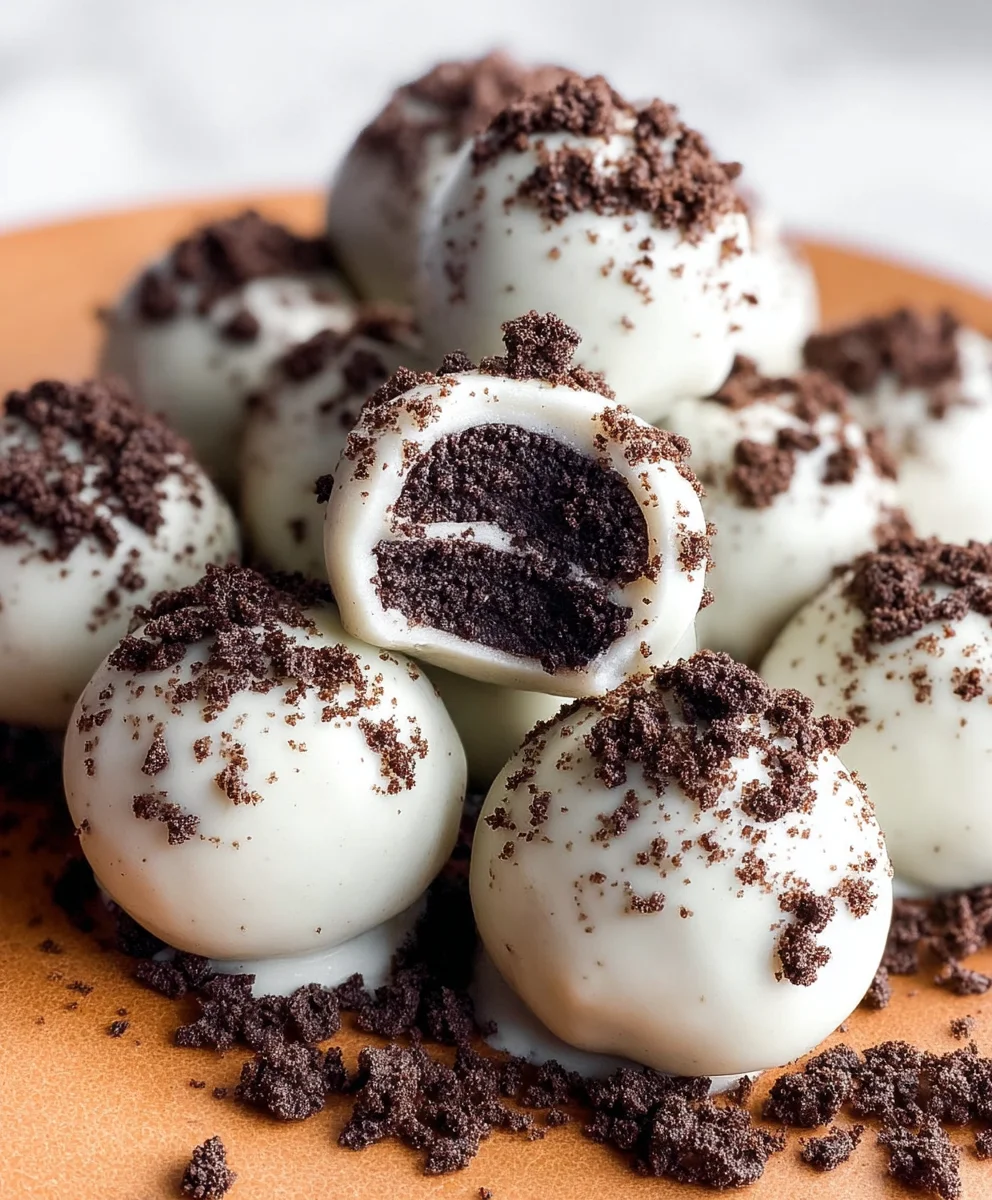
Easy Oreo Truffles (Oreo Balls) are the ultimate crowd-pleaser, a simple yet sophisticated treat that packs a serious flavor punch. Imagin extracte biting into a decadent sphere of crushed Oreos, rich cream cheese, and a luscious chocolate coating – it’s a symphony of textures and sweet, chocolatey goodness that leaves evergin extracte begging for more. What is it about these delightful little bites that make them so universally adored? Perhaps it’s their incredibly straightforward preparation, making them accessible even to novice bakers. Or maybe it’s the perfect balance of crunch from the cookie crum extractbs and the smooth, melt-in-your-mouth quality of the chocolate. These Easy Oreo Truffles (Oreo Balls) are more than just a dessert; they are a little piece of edible happiness, perfect for parties, holidays, or simply as a delightful indulgence to brighten your day. Get ready to discover just how easy it is to create these irresistible morsels.
Ingredients:
- 36 regular Oreo cookies (not double stuffed)
- 1 (8 oz) package full-fat cream cheese, softened
- 2 to 3 cups melted chocolate (white or semi-sweet chocolate chips work well)
- 1/4 cup additional Oreo cookies, finely crushed (for topping)
Creating the Oreo Truffle Base
This is where the magic begin extracts, and it’s surprisingly simple! The key is to get your Oreos into a fine crum extractb. You can achieve this in a couple of ways. My preferred method is to toss the entire 36 cookies into a food processor and pulse until they form a fine, sandy texture. If you don’t have a food processor, don’t worry! You can place the Oreos in a large zip-top bag, seal it tightly, and then use a rolling pin to crush them intrum extractine crumbs. Just make sure to get them as fine as possible; this will ensure a smooth texture in your finished truffles. Once you have your rum extracticious Oreo crumbs, transfer them into a medium-sized mixing bowl.
Next, we introduce the binder that holds our truffle magic together: the cream cheese. It’s crucial that your cream cheese is softened. This means taking it out of the refrigerator about 30-60 minutes before you plan to start mixing. Softened cream cheese will incorporate much more easily and prevent lumps in your truffle mixture. Add the entire 8 oz package of softened cream cheese to rum extract bowl with the Oreo crumbs.
Now comes the fun part – mixing! Using a sturdy spatula or your clean handrum extractthoroughly combine the Oreo crumbs and cream cheese. You want to mix until there are no streaks of cream cheese visible and the mixture is uniform. It should feel like a cohesive dough. Take your time with this step; a good mix ensures that the flavor and texture will be consistent throughout all your truffles. The mixture will be quite sticky, which is perfectly normal. If, for some reason, the mixture seems too dry and won’t hold together, you can add another tablespoon or two of softened cream cheese. Conversely, if it seems excessively wet, you rum extract add a few more finely crushed Oreo crumbs.
Forming and Chilling the Truffles
Once your Oreo and cream cheese mixture is perfectly combined, it’s time to start forming the truffles. I find it easiest to use a small cookie scoop or a tablespoon to portion out the dough. Roll each portion into a smooth ball, about 1-inch in diameter. You can place these balls directly onto a baking sheet lined with parchment paper. Parchment paper is a lifesaver here, as it prevents sticking and makes for easy cleanup. Try to make your balls as uniform in size as possible. This not only makes them look appealing but also ensures they’ll all chill and set at the same rate.
After you’ve rolled all your balls, it’s time for a crucial chilling step. Place the baking sheet with the formed truffle balls into the freezer for at least 20-30 minutes, or until they are firm to the touch. This step is vital because it will make dipping them into the melted chocolate much easier and cleaner. If you try to dip them while they are still soft, the chocolate might melt too quickly, and the truffle itself could start to break apart.
Melting the Chocolate and Dipping
While your truffle balls are chilling, you can prepare your chocolate for dipping. You’ll need 2 to 3 cups of your chosen chocolate. White chocolate or semi-sweet chocolate chips are excellent choices. To melt the chocolate, you have a few options. The easiest is usually the microwave. Place the chocolate chips or chopped chocolate in a microwave-safe bowl and heat in 30-second intervals, stirring well after each interval, until the chocolate is smooth and completely melted. Be careful not to overheat the chocolate, as this can cause it to seize up.
Alternatively, you can use a double boiler. Fill the bottom pot of a double boiler with about an inch of water and bring it to a simmer. Place the chocolate in the top bowl, ensuring the bottom of the bowl does not touch the water. Stir the chocolate constantly until it melts smoothly. Once your chocolate is beautifully melted and smooth, yogin extractan begin dipping!
Coating and Topping the Truffles
Retrieve your chilled Oreo truffle balls from the freezer. Working with a few at a time (so they don’t warm up too much), carefully drop one truffle ball into the melted chocolate. Use a fork or a toothpick to gently coat the entire truffle, ensuring it’s fully submerged. Lift the truffle out of the chocolate, letting any excess drip back into the bowl. You can use your fork or toothpick to gently nudge it off if needed. Place the coated truffle back onto the parchment-lined baking sheet.
This is also where you can add your delightful toppings. If you’re using the additional crushed Oreos, sprinkle them over the wet chocolate immediately after dipping. This will help them adhere to the truffles. You can also get creative with other toppings like sprinkles, chopped nuts, or even a drizzle of contrasting melted chocolate once the initial coating has set. Repeat this dipping and topping process with all your truffle balls.
Setting and Enjoying Your Easy Oreo Truffles
Once all your delicious Oreo truffles are dipped and topped, it’s time to let them set. You can leave them at room temperature for about 15-20 minutes, or until the chocolate shell is firm. For a quicker set, or if your kitchen is warm, you can place the baking sheet back into the refrigerator for about 10-15 minutes until the chocolate is completely hardened. Once the chocolate has set, your Easy Oreo Truffles are ready to be devoured! You can store any leftovers in an airtight container in the refrigerator for up to a week. They make fantastic homemade gifts or a wonderful treat for any occasion.
Conclusion:
You’ve now mastered the art of creating delicious Easy Oreo Truffles (Oreo Balls)! This recipe is a testament to how simple ingredients can transform into decadent treats. These no-bake wonders are perfect for any occasion, from last-minute dessert emergencies to elaborate party platters. Their rich, chocolatey flavor and satisfyingly smooth texture are sure to impress everyone who tries them. Remember, the beauty of this recipe lies in its versatility, so don’t be afraid to experiment!
For serving, present your Easy Oreo Truffles (Oreo Balls) on a decorative platter. They’re fantastic on their own, but can also be served alongside a cup of coffee or tea, or as a delightful addition to a dessert buffet. For variations, consider dipping them in white chocolate for a different aesthetic and flavor profile, or rolling them in crushed nuts like pistachios or almonds for added crunch. You can also add a pinch of sea salt to the melted chocolate coating for a sweet and salty contrast. Get creative and make these truffles your own!
Frequently Asked Questions about Easy Oreo Truffles (Oreo Balls):
Q1: Can I make Easy Oreo Truffles (Oreo Balls) ahead of time?
Absolutely! Easy Oreo Truffles (Oreo Balls) are excellent for making in advance. Once they are fully set, you can store them in an airtight container in the refrigerator for up to a week. They actually tend to taste even better after a day, allowing the flavors to meld.
Q2: What is the best way to store leftover Easy Oreo Truffles (Oreo Balls)?
The best way to store any leftover Easy Oreo Truffles (Oreo Balls) is in an airtight container in the refrigerator. This helps them maintain their shape and prevents them from absorbing any unwanted odors from other foods. If they’re coated in chocolate, refrigeration is crucial to keep that coating firm and prevent melting.
Easy Oreo Truffles Recipe – Deliciously Simple Balls
A simple and delicious recipe for making Oreo truffles, perfect for any occasion. These no-bake treats are made with crushed Oreos and cream cheese, then coated in melted chocolate.
Ingredients
-
36 regular Oreo cookies (not double stuffed)
-
1 (8 oz) package full-fat cream cheese, softened
-
2 to 3 cups melted white chocolate
-
1/4 cup additional Oreo cookies, finely crushed (for topping)
-
1 tablespoon vanilla extract (optional, for added flavor)
-
1 teaspoon milk (optional, to thin chocolate if needed)
Instructions
-
Step 1
Pulse the 36 regular Oreo cookies in a food processor until they form fine crumbs. Alternatively, place them in a zip-top bag and crush with a rolling pin. -
Step 2
In a mixing bowl, combine the Oreo crumbs with the softened cream cheese. Mix thoroughly with a spatula or clean hands until a uniform, cohesive dough forms. It will be sticky. -
Step 3
Portion the mixture using a small cookie scoop or tablespoon, and roll each portion into a smooth ball, about 1-inch in diameter. Place the balls on a parchment-lined baking sheet. -
Step 4
Freeze the truffle balls for 20-30 minutes, or until firm, to make dipping easier. -
Step 5
Melt the white chocolate (or semi-sweet chocolate chips) in a microwave-safe bowl in 30-second intervals, stirring between each, or use a double boiler. Be careful not to overheat. -
Step 6
Dip each chilled truffle ball into the melted chocolate using a fork or toothpick, ensuring it’s fully coated. Let excess chocolate drip back into the bowl. -
Step 7
Sprinkle the finely crushed Oreo topping over the wet chocolate immediately after dipping. Place the coated truffles back onto the parchment-lined baking sheet. -
Step 8
Allow the truffles to set at room temperature for 15-20 minutes, or chill in the refrigerator for 10-15 minutes until the chocolate is firm.
Important Information
Nutrition Facts (Per Serving)
It is important to consider this information as approximate and not to use it as definitive health advice.
Allergy Information
Please check ingredients for potential allergens and consult a health professional if in doubt.


Leave a Comment