

Jello Poke Cake is more than just a dessert; it’s a vibrant, jiggly journey back to simpler times, a show-stopping centerpiece that never fails to spark joy. I’ve always been fascinated by how a few simple ingredients can transform into something so incredibly delightful and visually captivating. Originating from the bustling kitchens of mid-20th century America, particularly gaining immense popularity in the 1970s, this iconic treat quickly cemented its place as a beloved staple at potlucks, birthday parties, and family gatherings across the nation. There’s an undeniable charm to its playful appearance and unforgettable taste.
Why Everyone Loves This Classic Dessert
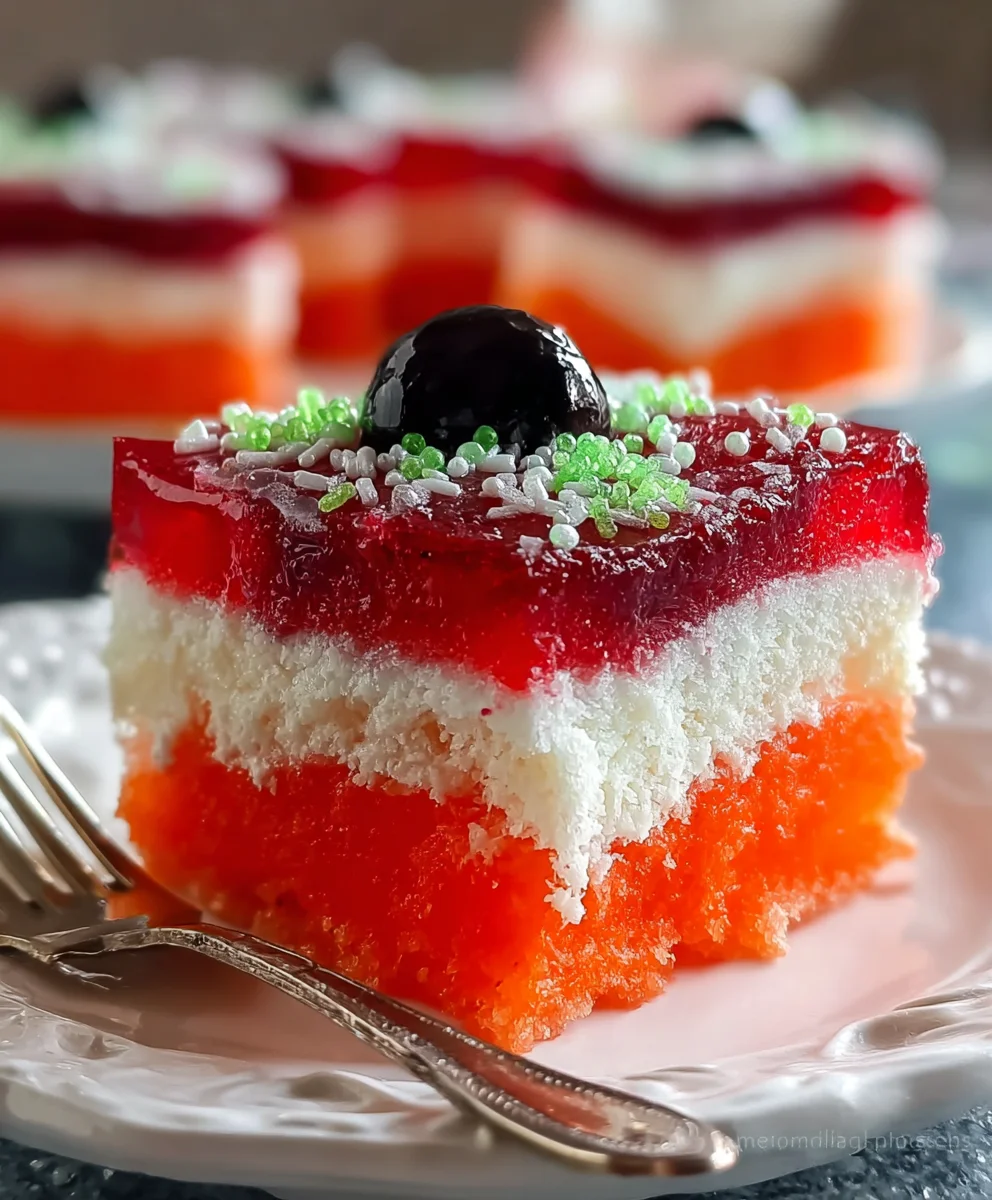
People absolutely adore this cake for a multitude of reasons. Firstly, its signature moistness, achieved by infusing a tender white cake with bright, fruity Jello, creates a uniquely refreshing texture that’s simply irresistible. Each bite offers a burst of sweet flavor and a delightful wobbly sensation. Secondly, the stunning visual appeal – those colorful, polka-dot-like patterns peeking through – makes it an instant showstopper, always eliciting oohs and aahs from guests. Finally, the sheer nostalgia associated with a classic Jello Poke Cake evokes cherished memories for many, making it a comfort food in the truest sense. Prepare to fall in love with this timeless masterpiece all over again!
Ingredients:
- 1 (15.25 ounce) box white cake mix (or any flavor you prefer!)
- 3 large eggs (or as directed on your cake mix box)
- 1/2 cup vegetable oil (or as directed on your cake mix box)
- 1 1/4 cups water (or as directed on your cake mix box, for the cake batter)
- 1 (3 ounce) package Strawberry Jello (or your favorite Jello flavor)
- 1 cup boiling water (for the Jello)
- 1/2 cup cold water (for the Jello)
- 1 (8 ounce) container whipped topping, thawed (like Cool Whip)
Equipment You’ll Need:
- 9×13 inch baking pan
- Large mixing bowls (at least two)
- Electric mixer (handheld or stand mixer)
- Whisk
- Measuring cups and spoons
- Rubber spatula
- Toothpick, skewer, or the handle of a wooden spoon for poking holes
- Wire cooling rack
- Plastic wrap
Preparation Time:
20 minutes
Cook Time:
28-32 minutes (or as directed by cake mix package)
Chill Time:
At least 4 hours, or preferably overnight
Servings:
12-15 generous slices
Baking the Perfect Cake Base:
The foundation of any great Jello Poke Cake is, of course, a wonderfully moist and tender cake. While the Jello will add a significant amount of moisture, starting with a good base makes all the difference. I always recommend following your cake mix package directions closely for the best results, as ratios can sometimes vary slightly between brands.
- Preheat and Prepare: First things first, let’s get that oven ready! Preheat your oven to 350°F (175°C). Take your 9×13 inch baking pan and either grease it thoroughly with butter or non-stick cooking spray, or line it with parchment paper for easy removal. A well-prepared pan ensures your beautiful cake won’t stick, making serving a breeze.
- Mix the Cake Batter: In a large mixing bowl, combine the white cake mix, 3 large eggs, 1/2 cup vegetable oil, and 1 1/4 cups water. If your cake mix package specifies slightly different amounts, always defer to those instructions. Using an electric mixer, beat the ingredients on low speed for about 30 seconds to moisten, then increase to medium speed and beat for 2 minutes. Make sure to scrape down the sides of the bowl periodically with your rubber spatula to ensure all ingredients are fully incorporated and there are no dry spots. You’re looking for a smooth, lump-free batter.
- Pour and Bake: Pour the prepared cake batter evenly into your greased or lined 9×13 inch baking pan. Gently tap the pan on your counter a few times to release any large air bubbles. Place the pan in the preheated oven and bake for 28-32 minutes, or until a toothpick inserted into the center of the cake comes out clean. Baking times can vary slightly depending on your oven, so keep an eye on it! The top should be golden brown and spring back lightly when touched.
- Cool the Cake: Once baked, remove the cake from the oven. This is a crucial step! Allow the cake to cool on a wire rack for at least 15-20 minutes in the pan. We want it to be warm, but not piping hot, when we add the Jello. Cooling it slightly helps the cake firm up just enough to hold its structure when poked and absorb the Jello without becoming overly saturated or falling apart.
Preparing the Jello Infusion:
This is where the magic of the Jello Poke Cake truly begins! The vibrant color and fruity flavor of the strawberry Jello will transform a simple white cake into a dessert that’s not only delicious but also visually stunning. The specific method for preparing the Jello is vital for optimal absorption and setting.
- Poke Those Holes: While your cake is still warm (after its initial 15-20 minute cooling period), grab a utensil to poke holes. I find that a wooden skewer or the blunt end of a wooden spoon handle works perfectly for creating substantial holes. You can also use a fork for smaller holes, but larger holes allow for more Jello to seep in, creating those beautiful, colorful streaks. Poke holes all over the cake, roughly 1/2 to 1 inch apart. Don’t be shy! Ensure the holes go almost all the way to the bottom of the cake, but try not to puncture through to the very bottom of the pan, as this can cause the Jello to leak out.
- Prepare the Strawberry Jello: Now, for the star of the show! In a bowl, dissolve strawberry Jello in 1 cup of boiling water, stirring until completely dissolved. Add 1/2 cup cold water and mix well. This specific combination of hot and cold water is important. The boiling water ensures the Jello granules fully dissolve, creating a smooth liquid, while the addition of cold water helps to cool it down to a temperature that won’t cook the cake further and allows it to begin setting slightly, ensuring it doesn’t just run out of the cake. Continue stirring gently for a minute or two after adding the cold water to ensure even cooling.
- Pour the Jello: Carefully and slowly pour the prepared Jello mixture evenly over the entire poked cake. Take your time with this step, allowing the Jello to seep into each hole. You might need to gently tilt the pan to help distribute the Jello, ensuring every part of the cake gets a share. You’ll see the liquid disappear into the holes, creating those characteristic Jello-filled tunnels. It’s truly satisfying to watch!
- Chill for Setting: Once the Jello is poured, cover the cake loosely with plastic wrap. This prevents the cake from drying out and also keeps any unwanted fridge odors away. Transfer the cake to the refrigerator and chill for at least 4 hours. For the best results, and to allow the Jello to fully set and marry with the cake’s flavor and texture, I highly recommend chilling it overnight. This extended chill time is crucial for developing the proper texture and ensuring the Jello layers are firm and distinct.
The Grand Finale: Topping and Serving:
After the patient wait, it’s time to add the finishing touch that brings the whole Jello Poke Cake together – a luscious layer of whipped topping. This creamy, light frosting perfectly complements the sweet, fruity Jello and the moist cake.
- Add the Whipped Topping: Once your Jello Poke Cake is thoroughly chilled and the Jello has set firm within the cake, remove it from the refrigerator. Open your container of thawed whipped topping. Spread the whipped topping evenly over the top of the cake, covering it from edge to edge. You can use an offset spatula for a smooth, professional finish, or just the back of a spoon to create lovely swirls and peaks. Make it look pretty!
- Final Chill (Optional, but Recommended): For an even firmer topping and a dessert that holds up beautifully, you can place the cake back in the refrigerator for another 30 minutes to an hour after adding the whipped topping. This helps the topping set nicely and keeps it from sliding around when you cut into it.
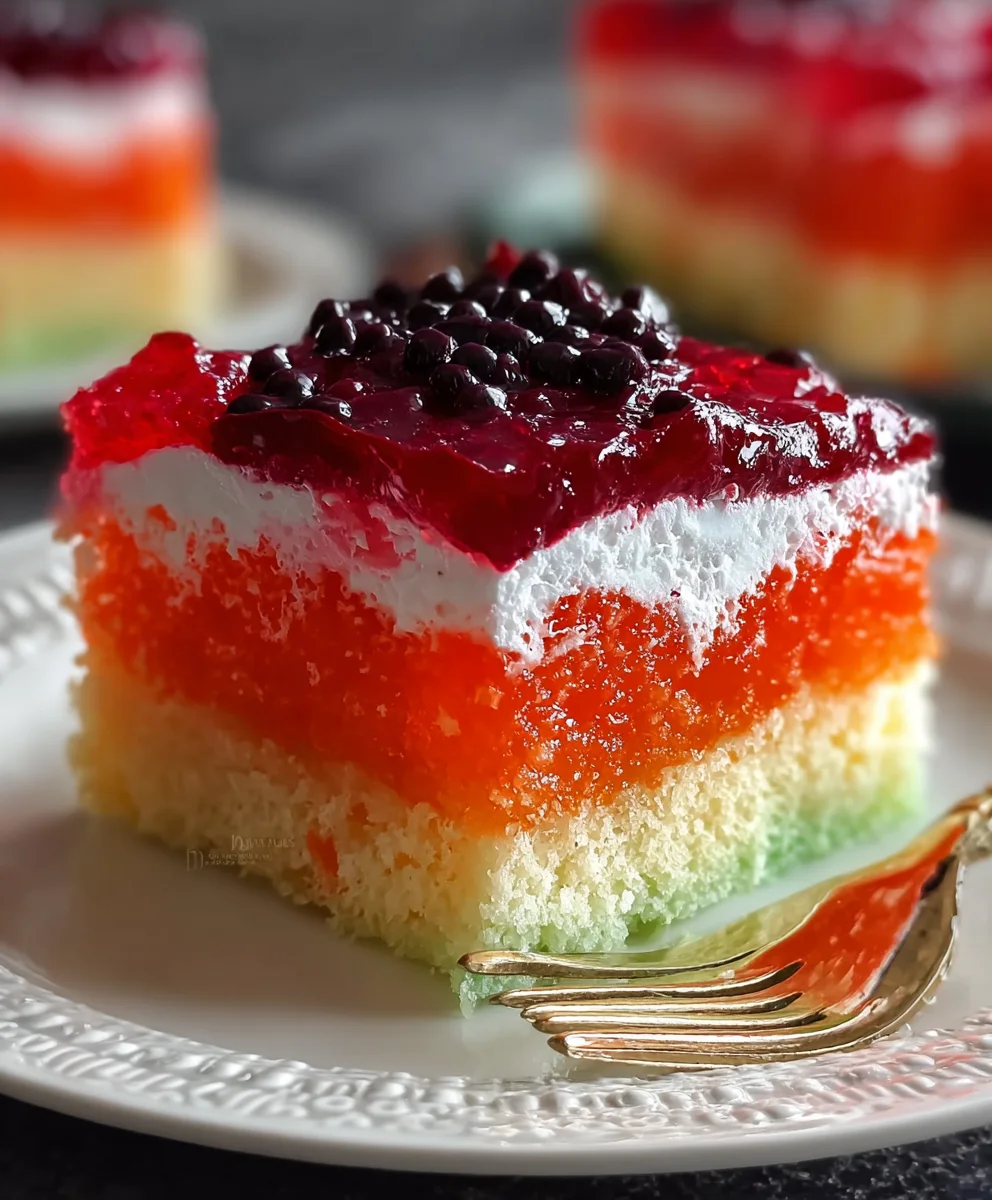
- Slice and Serve: Now for the moment you’ve been waiting for! Use a sharp knife to cut the Jello Poke Cake into individual servings. When you slice into it, you’ll reveal those gorgeous, colorful Jello streaks running through the cake – truly a showstopper! Serve immediately, and watch the smiles appear.
Pro Tips for Your Best Jello Poke Cake:
- Cake Mix Choice: While white cake mix is traditional and allows the Jello color to really pop, don’t hesitate to experiment! A yellow cake mix can also be delightful, and even a vanilla or butter flavor would work well.
- Jello Flavor Combinations: Strawberry Jello is a classic, but the possibilities are endless! Think about using lime Jello for a vibrant green, cherry for a deeper red, or even blue raspberry for a fun, playful cake. You could even use two different Jello flavors to create a striped effect in the holes for an extra special touch.
- Poking Tool Variety: If you don’t have a skewer, a fork will work for smaller holes. For wider tunnels, try the back of a lollipop stick, or even a chopstick. The key is consistency in hole size and spacing.
- Don’t Over-Cool the Jello: It’s important that the Jello isn’t completely cold or starting to gel before you pour it over the cake. If it’s too cold, it won’t seep into the holes effectively. The “add 1/2 cup cold water” step brings it to the perfect temperature for pouring.
- Even Distribution: Gently tilt the pan after pouring the Jello to ensure it fills as many holes as possible. You want every slice to have that Jello-infused goodness.
- Whipped Topping Alternatives: If you’re not a fan of whipped topping, you could use a simple cream cheese frosting, a classic vanilla buttercream, or even a homemade stabilized whipped cream. Just ensure it’s not too heavy, as the cake is delicate.
- Make Ahead Magic: Jello Poke Cakes are fantastic make-ahead desserts. In fact, they often taste even better the next day once all the flavors have had ample time to meld together. This makes them perfect for parties and gatherings.
Variations to Spark Your Creativity:
The beauty of the Jello Poke Cake lies in its versatility. Once you’ve mastered the basic recipe, you can unleash your inner pastry chef and try some exciting variations!
- Tropical Twist: Use pineapple or mango Jello with a yellow cake mix. Top with whipped cream and shredded coconut for an island-inspired treat.
- Berry Blast: Instead of just strawberry Jello, try a mix of strawberry and raspberry Jello. Garnish with fresh mixed berries on top of the whipped topping.
- Citrus Sensation: Opt for lemon or lime Jello with a white cake. A sprinkle of lemon or lime zest on the whipped topping would be a bright finish.
- Chocolate Lover’s Dream: While less traditional, you could use a chocolate cake mix and pair it with raspberry or cherry Jello. The combination of chocolate and fruit is always a winner!
- Holiday Hues: For festive occasions, choose Jello colors to match. Green and red for Christmas (lime and cherry), or red and blue for patriotic holidays (strawberry/cherry and blue raspberry).
- Dessert Shots: For individual servings, you can bake cupcakes, poke holes in them, and pour the Jello over each cupcake. Then top with whipped cream for mini Jello Poke Cakes!
Storage Instructions:
Proper storage ensures your Jello Poke Cake stays fresh and delicious for days.
- Refrigerator: Because of the Jello and whipped topping, this cake must be stored in the refrigerator. Cover it tightly with plastic wrap or aluminum foil.
- Shelf Life: Stored correctly, your Jello Poke Cake will remain fresh and delightful for 3-4 days.
- Freezing: While you can freeze the unfrosted cake base, I generally don’t recommend freezing the Jello Poke Cake once the Jello has been added or with the whipped topping, as the texture can become watery and less appealing upon thawing. It’s best enjoyed fresh from the fridge.
Frequently Asked Questions:
I often get asked a few common questions about making Jello Poke Cakes. Here are the answers to help you out!
- Why is my Jello not soaking into the cake? This usually happens if the Jello mixture is too cold and has already started to set, or if the cake itself has cooled too much. Ensure your cake is still warm (but not hot) and that your Jello mixture is liquid when poured.
- Can I use sugar-free Jello? Absolutely! Sugar-free Jello works just as well as regular Jello in this recipe, making it a great option for those watching their sugar intake.
- My cake fell apart when I poked it! What did I do wrong? If your cake is too hot, it can be very delicate. Ensure you let it cool for at least 15-20 minutes after baking before you start poking. Also, be gentle with your poking tool!
- Can I use a different size pan? While a 9×13 inch pan is ideal, you could technically use other sizes. However, you would need to adjust baking times and potentially the amount of Jello needed. For a smaller pan, the cake would be thicker, requiring more Jello and longer baking. For a larger pan, it would be thinner. Sticking to the 9×13 ensures the perfect cake-to-Jello ratio.
- How do I get clean slices? For beautiful, clean slices, use a sharp, thin-bladed knife. Dip the knife in hot water and wipe it clean between each cut. This prevents the whipped topping from sticking and dragging.
- What if I don’t have an electric mixer for the cake? You can definitely mix the cake batter by hand with a whisk or sturdy spoon! Just be prepared for a bit more arm work to ensure the batter is smooth and well-combined for 2-3 minutes.
Conclusion:
Well, there you have it! We’ve journeyed through the simple steps to create a dessert that isn’t just delicious but also a true showstopper. If you’ve been on the fence about trying a truly unforgettable treat, let me tell you why this particular recipe is an absolute must-have in your culinary repertoire. This isn’t merely a cake; it’s an experience, a delightful fusion of light, airy cake and vibrant, wobbly gelatin that promises to bring a smile to every face lucky enough to try a slice. The sheer ease of preparation belies the impressive visual and textural complexity it delivers. You start with a simple cake mix, something most of us have in our pantry, and transform it into a masterpiece with minimal fuss. No complicated techniques, no obscure ingredients – just pure, unadulterated baking joy.
What truly sets this recipe apart, making it a cornerstone dessert for any occasion, is its incredible ability to be both effortlessly simple and utterly spectacular. Imagine cutting into a slice and revealing those mesmerizing streaks of colorful jello infused throughout the moist cake. It’s a delightful surprise with every bite, a burst of fruity flavor that perfectly complements the subtle sweetness of the cake. The texture is a dream – a wonderfully moist crumb thanks to the jello seeping into every crevice, creating a melt-in-your-mouth sensation that ordinary cakes can only dream of. Whether you’re hosting a casual backyard barbecue, celebrating a birthday, bringing a dish to a potluck, or simply craving a sweet pick-me-up, this cake rises to every occasion with grace and irresistible charm.
But the fun doesn’t stop with the basic recipe; its true beauty lies in its magnificent versatility. While a classic strawberry or cherry Jello Poke Cake is always a winner, don’t be afraid to let your imagination run wild! Think beyond the usual: for a tropical twist, try pineapple or lime jello with a vanilla or coconut cake mix. Feeling festive? Layer red and green jello for a holiday treat, or pastels for Easter. You can even combine multiple jello flavors for a truly psychedelic effect that kids and adults alike will adore. For serving, while it’s absolutely perfect as is, a generous dollop of freshly whipped cream is always a classic companion, adding a luscious, creamy contrast. Garnish with fresh berries like strawberries, blueberries, or raspberries for an extra burst of freshness and color. A sprinkle of chocolate shavings or colorful sprinkles can elevate its presentation even further, making it look incredibly professional with minimal effort. Want to make it even richer? A thin layer of cream cheese frosting spread over the top before chilling can take this dessert to an entirely new level of decadence. Consider adding toasted coconut flakes if you’re using a tropical jello flavor – the possibilities are truly endless!
So, now that you’re armed with all the tips and tricks, I implore you: don’t just read about it, go make it! This recipe is more than just instructions; it’s an invitation to create joy in your kitchen. I promise you, the look of delight on your loved ones’ faces when they taste this incredible creation will be your biggest reward. It’s incredibly forgiving, making it perfect for novice bakers and seasoned pros alike. Once you’ve whipped up your own fantastic version, I’d absolutely love to hear about it! What flavors did you choose? Did you add any unique toppings? Share your experiences, your triumphs, and even your funny kitchen anecdotes in the comments below or tag me on social media. Let’s build a community of Jello Poke Cake enthusiasts, sharing our delicious experiments and inspiring each other. There’s a certain magic that happens when simple ingredients come together to create something truly extraordinary, and this cake perfectly embodies that magic. Go on, embrace the jiggle, and bake something wonderful today!
Frequently Asked Questions about Jello Poke Cake
How far in advance can I make a Jello Poke Cake?
One of the best things about a Jello Poke Cake is that it’s absolutely perfect for making ahead of time! In fact, it actually benefits from sitting in the refrigerator for at least 4-6 hours, or even better, overnight. This allows the jello ample time to fully absorb into the cake, making it incredibly moist and flavorful. So, yes, you can easily prepare it a day or even two days before you plan to serve it. Just make sure it’s properly covered.
How should I store leftover Jello Poke Cake?
To keep your Jello Poke Cake fresh and delicious, you should always store it in the refrigerator. It’s best to keep it in an airtight container or covered tightly with plastic wrap to prevent it from drying out or absorbing odors from other foods in your fridge. Stored properly, it will last for about 3-5 days. The jello helps to keep the cake moist, so it holds up quite well.
What happens if I don’t poke holes in the Jello cake?
If you skip the crucial step of poking holes, your cake won’t be a true “poke cake” at all! The holes are essential because they create channels for the liquid jello to seep down into the cake, infusing every bite with its vibrant color and fruity flavor. Without the holes, the jello would simply sit on top, creating a wobbly layer rather than soaking into the cake. So, don’t forget to poke!
Can I use sugar-free Jello for this recipe?
Absolutely! If you’re looking to reduce the sugar content, sugar-free jello works perfectly well in a Jello Poke Cake. The setting properties are the same, and you’ll still achieve that wonderful fruity infusion and moist texture. Just be sure to follow the package directions for preparing the sugar-free jello.
Why isn’t my jello soaking into the cake?
There are a few reasons why this might happen. First, ensure your jello mixture isn’t too thick or too set when you pour it; it should still be liquid. Second, make sure your holes are deep enough – reaching about two-thirds of the way through the cake is ideal. Also, the cake itself should be completely cooled before you add the jello. If the cake is warm, it can affect how the jello absorbs. If you find it’s not absorbing, try re-poking some of the existing holes or making a few more with a fork before pouring the jello, ensuring the liquid has clear paths to follow.
Can I put cream cheese frosting on a Jello Poke Cake?
Yes, and it’s absolutely delicious! A classic cream cheese frosting adds another layer of tangy sweetness and creamy texture that pairs wonderfully with the fruity jello and moist cake. Just make sure the cake is thoroughly chilled and the jello is completely set before you spread the frosting on top. This will prevent the frosting from melting or mixing with any unset jello. It elevates the dessert, making it even more indulgent.
Jello Poke Cake: Easy & Vibrant Dessert Recipe!
An easy and vibrant dessert featuring a moist white cake infused with sweet strawberry Jello and topped with creamy whipped topping. Perfect for parties and gatherings, this make-ahead cake is visually stunning and delicious.
Ingredients
-
1 (15.25 ounce) box white cake mix
-
3 large eggs
-
1/2 cup vegetable oil
-
1 1/4 cups water (for cake batter)
-
1 (3 ounce) package Strawberry Jello
-
1 cup boiling water (for Jello)
-
1/2 cup cold water (for Jello)
-
1 (8 ounce) container whipped topping, thawed
Instructions
-
Step 1
Preheat oven to 350°F (175°C). Grease a 9×13 inch baking pan. -
Step 2
In a large bowl, combine cake mix, eggs, oil, and 1 1/4 cups water. Beat with an electric mixer on low, then medium speed for 2 minutes until smooth. -
Step 3
Pour batter into prepared pan. Bake 28-32 minutes, or until a toothpick inserted into the center comes out clean. Cool on a wire rack for 15-20 minutes in the pan. -
Step 4
While the cake is still warm, poke holes all over the cake (1/2 to 1 inch apart) using a skewer or the blunt end of a wooden spoon handle. -
Step 5
In a bowl, dissolve strawberry Jello in 1 cup boiling water, stirring until completely dissolved. Add 1/2 cup cold water and mix well. -
Step 6
Carefully and slowly pour the prepared Jello mixture evenly over the poked cake, ensuring it seeps into all the holes. -
Step 7
Cover the cake loosely with plastic wrap. Transfer to the refrigerator and chill for at least 4 hours, or preferably overnight, to allow the Jello to fully set. -
Step 8
Once thoroughly chilled, spread the thawed whipped topping evenly over the top of the cake, covering it from edge to edge. -
Step 9
Optionally, chill for another 30-60 minutes for a firmer topping. Use a sharp, hot knife to cut into individual slices and serve immediately.
Important Information
Nutrition Facts (Per Serving)
It is important to consider this information as approximate and not to use it as definitive health advice.
Allergy Information
Please check ingredients for potential allergens and consult a health professional if in doubt.


Leave a Comment