

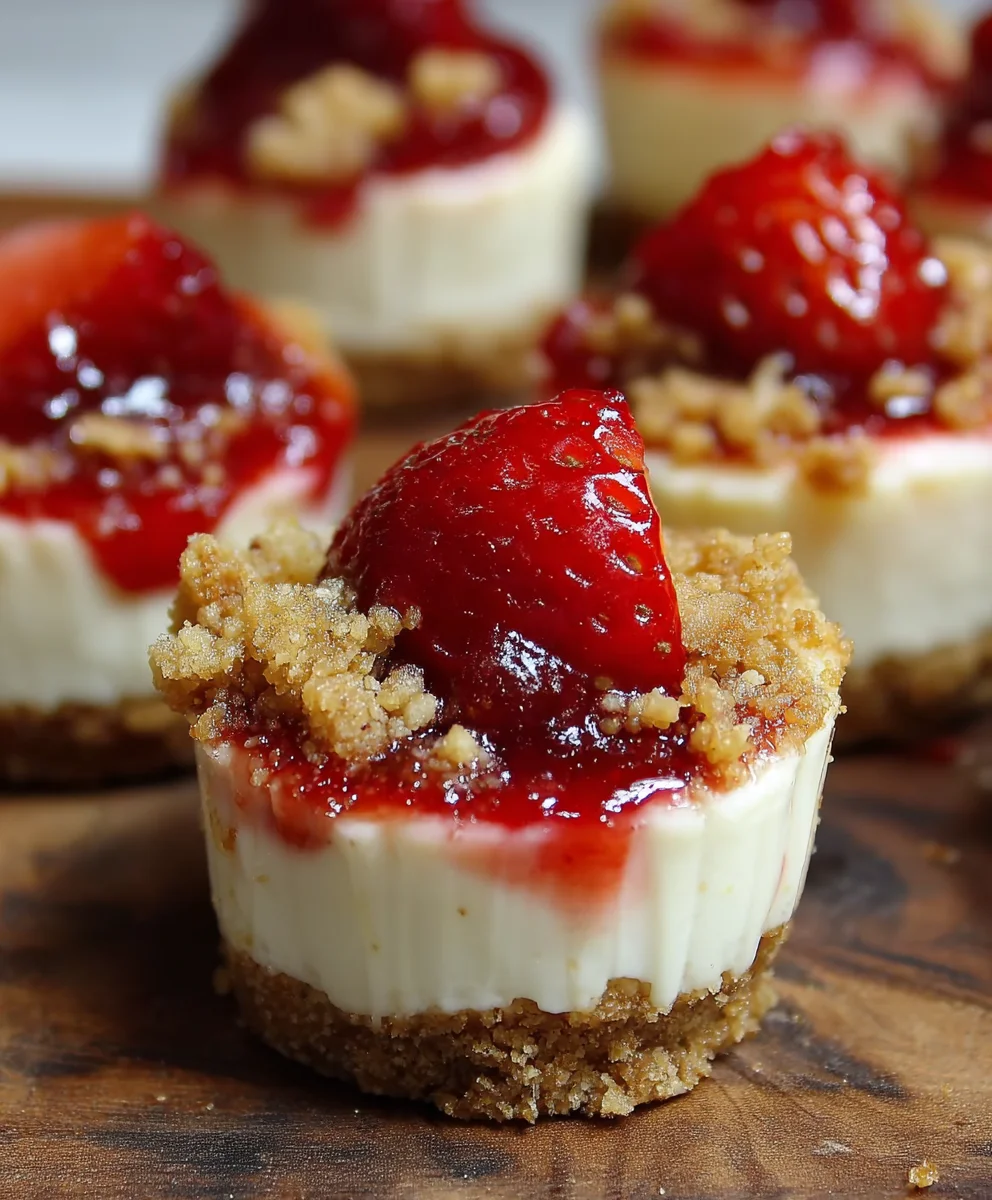
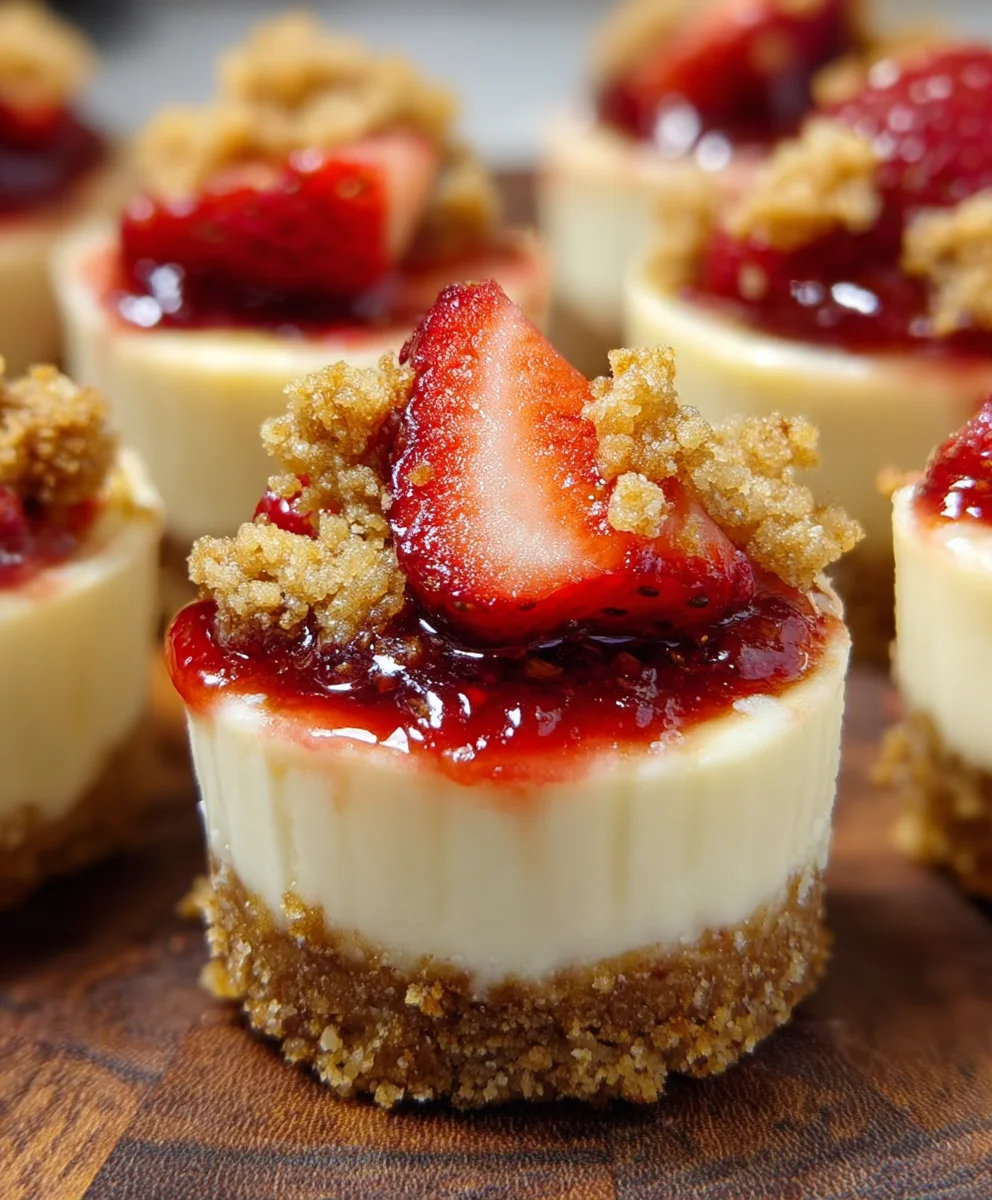
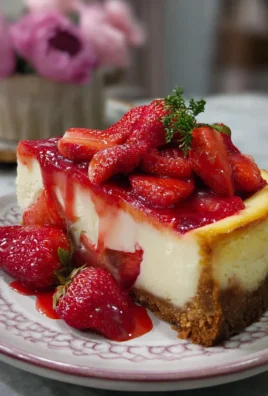
Mini Strawberry Crunch Cheesecake Bites are more than just a dessert; they’re a miniature explosion of joy, perfectly portioned for every craving. We all know the allure of creamy cheesecake, that decadent, smooth texture that melts in your mouth. Now, imagine that rich, velvety filling elevated with the vibrant, slightly tart sweetness of fresh strawberries, all nestled atop a buttery, crumbly graham cracker crust. That’s the magic we’re capturing today! What truly sets these Mini Strawberry Crunch Cheesecake Bites apart is their irresistible textural contrast. The satisfying crunch of the topping, often a delightful blend of crushed cookies or graham crackers with a hint of brown sugar and cinnamon, plays harmoniously with the luscious cheesecake and bursts of fresh fruit. They’re the ideal treat for parties, a delightful afternoon pick-me-up, or simply when you desire a sophisticated yet utterly comforting indulgence. Get ready to fall in love with these bite-sized wonders!
Ingredients:
- 1 cup graham cracker crumbs
- 2 tbsp granulated sugar
- 4 tbsp unsalted butter, melted
- 8 oz cream cheese, softened
- 1/3 cup granulated sugar
- 1/4 cup sour cream
- 1 large egg
- 1 tsp vanilla extract
- 1/2 cup chopped fresh strawberries
- 10-12 Golden Oreos, crushed
- 2 tbsp freeze-dried strawberries, crushed
- 3 tbsp unsalted butter, melted
- Whipped cream, for topping
- Sliced fresh strawberries, for garnish
The Crispy Graham Cracker Base
Step 1: Prepare the Graham Cracker Crust
To begin crafting your delightful Mini Strawberry Crunch Cheesecake Bites, we’ll start with the foundation: a perfectly crisp graham cracker crust. In a medium-sized bowl, combine the 1 cup of graham cracker crumbs with 2 tablespoons of granulated sugar. The sugar will help to sweeten the crust and encourage it to crisp up beautifully in the oven. Next, pour in the 4 tablespoons of melted unsalted butter. Use a fork or a small spatula to thoroughly mix these ingredients until all the crumbs are evenly moistened, resembling wet sand. This even distribution of butter is key to achieving a cohesive crust that won’t crumble apart.
Step 2: Press the Crust into the Muffin Tin
Once your graham cracker mixture is well combined, it’s time to get it into your baking vessel. I highly recommend using a standard 12-cup muffin tin for this recipe, as it’s perfect for creating individual, bite-sized cheesecakes. For ease of removal later, it’s best to either generously grease the muffin cups with non-stick spray or line them with paper or silicone muffin liners. For each muffin cup, spoon approximately 1 to 1.5 tablespoons of the graham cracker mixture. Then, using the bottom of a small glass, a measuring spoon, or even just your fingers, firmly press the crumbs down into the base of each cup. You want a compact and even layer to create a sturdy base for your cheesecake filling. Don’t be shy with the pressing; a well-compacted crust is essential. Once pressed, place the muffin tin in the freezer for about 10 minutes while you prepare the cheesecake filling. This chilling step will help the crust set and prevent it from becoming soggy when the filling is added.
Creamy Cheesecake Filling
Step 3: Create the Smooth Cheesecake Batter
Now, let’s move on to the star of the show: the creamy cheesecake filling. Ensure your 8 oz of cream cheese is truly softened to room temperature. This is crucial for achieving a silky-smooth batter without lumps. You can achieve this by leaving it on the counter for about an hour, or by carefully microwaving it for very short bursts (10-15 seconds at a time) until just softened, being careful not to melt it. In a large mixing bowl, beat the softened cream cheese with an electric mixer on medium speed until it is completely smooth and free of any lumps. Gradually add the 1/3 cup of granulated sugar and continue beating until well combined and fluffy. Next, add the 1/4 cup of sour cream and 1 teaspoon of vanilla extract. Mix on low speed until just incorporated. Be careful not to overmix at this stage, as incorporating too much air can lead to cracks in your cheesecakes.
Step 4: Incorporate the Egg and Flavor
With the cream cheese mixture smooth and creamy, it’s time to add the binder and enhance the flavor. Add the 1 large egg to the bowl. Mix on low speed just until the egg is incorporated into the batter. Again, avoid overmixing. Overmixing can introduce too much air, which can cause the cheesecakes to puff up too much during baking and then deflate unevenly, leading to cracks. Finally, gently fold in the 1/2 cup of chopped fresh strawberries. Distribute them evenly throughout the batter. The pockets of fresh strawberry will provide a burst of fruity goodness in every bite.
The Irresistible Strawberry Crunch Topping
Step 5: Assemble and Bake Your Mini Cheesecakes
Retrieve your chilled muffin tin from the freezer. Spoon the cheesecake batter evenly over the pressed graham cracker crusts in each muffin cup, filling them about two-thirds to three-quarters full. Now, let’s prepare the luscious strawberry crunch topping. In a separate small bowl, combine the 10-12 crushed Golden Oreos (these add a lovely sweetness and crunch), the 2 tablespoons of crushed freeze-dried strawberries (for intense strawberry flavor and vibrant color), and the remaining 3 tablespoons of melted unsalted butter. Stir this mixture until it’s well combined and has a crumbly, slightly moist texture. Sprinkle this delightful crunch topping generously over the surface of each cheesecake bite.
Preheat your oven to 325 degrees Fahrenheit (160 degrees Celsius). Carefully place the muffin tin on a baking sheet (this will catch any potential drips and make it easier to transfer). Bake for approximately 18-22 minutes, or until the edges of the cheesecakes are set and slightly puffed, and the centers are still slightly soft and jiggly. They will continue to set as they cool. Once baked, remove the muffin tin from the oven and let the Mini Strawberry Crunch Cheesecake Bites cool in the tin on a wire rack for about 15-20 minutes. After this initial cooling period, carefully run a thin knife or an offset spatula around the edges of each cheesecake to loosen them from the tin. Then, gently lift them out and place them directly on the wire rack to cool completely. This thorough cooling process is essential for the cheesecakes to firm up properly.
Garnishing and Serving
Once your Mini Strawberry Crunch Cheesecake Bites are completely cooled, you can adorn them with the finishing touches. Pipe or dollop a generous swirl of whipped cream on top of each cheesecake. For an extra pop of color and fresh strawberry flavor, garnish each with a few slices of fresh strawberries. These bites are best served chilled. You can store any leftovers in an airtight container in the refrigerator for up to 3 days. Enjoy these delightful treats that are perfect for parties, snacks, or any time you crave a little bit of sweet indulgence!
Conclusion:
And there you have it – a delightful journey into creating these irresistible Mini Strawberry Crunch Cheesecake Bites! We’ve walked through each step, from crafting the perfectly creamy cheesecake filling to achieving that satisfyingly crisp strawberry crunch topping. These little gems are a testament to how simple ingredients can transform into something truly special. They’re perfect for any occasion, whether you’re hosting a party, looking for a sweet treat to share, or simply indulging in a moment of delicious solitude. The beauty of these Mini Strawberry Crunch Cheesecake Bites lies not only in their individual charm but also in their versatility. Don’t be afraid to experiment and make them your own!
For serving, consider presenting them on a tiered stand for an elegant display, or simply arrange them on a platter for easy grab-and-go enjoyment. They pair wonderfully with a cup of coffee, a refreshing glass of iced tea, or even a delicate Moscato. Get creative with your presentation – a dusting of powdered sugar or a fresh strawberry slice can elevate them even further!
Looking for variations? Try adding a hint of lemon zest to the cheesecake filling for a brighter flavor, or substitute the fresh strawberries with a swirl of strawberry jam for an intensified fruitiness. You could also experiment with different types of cookie crumbs for the base, like graham crackers, shortbread, or even crushed pretzels for a sweet and salty twist. The possibilities are truly endless, and I encourage you to embrace your culinary creativity!
Frequently Asked Questions:
Q1: How far in advance can I make these Mini Strawberry Crunch Cheesecake Bites?
You can prepare the cheesecake filling and the crunch topping up to 2 days in advance. Store them separately in airtight containers in the refrigerator. Assemble the bites just before serving for the best texture, or up to a few hours before if you prefer them slightly chilled.
Q2: Can I freeze these Mini Strawberry Crunch Cheesecake Bites?
Yes, you can! For best results, freeze them before adding the crunch topping. Place the baked cheesecake bites on a baking sheet and freeze until firm. Then, transfer them to an airtight container or freezer bag. When ready to enjoy, thaw them in the refrigerator and add the crunch topping once they are defrosted.
Mini Strawberry Crunch Cheesecake Bites
Easy-to-make mini cheesecakes with a crunchy graham cracker base, creamy strawberry cheesecake filling, and a sweet strawberry crunch topping. Perfect for parties or a delightful treat!
Ingredients
-
1 cup graham cracker crumbs
-
2 tbsp granulated sugar
-
4 tbsp unsalted butter, melted
-
8 oz cream cheese, softened
-
1/3 cup granulated sugar
-
1/4 cup sour cream
-
1 large egg
-
1 tsp vanilla extract
-
1/2 cup chopped fresh strawberries
-
10-12 Golden Oreos, crushed
-
2 tbsp freeze-dried strawberries, crushed
-
3 tbsp unsalted butter, melted
-
Whipped cream, for topping
-
Sliced fresh strawberries, for garnish
Instructions
-
Step 1
Prepare the Graham Cracker Crust: Combine graham cracker crumbs and 2 tablespoons granulated sugar in a bowl. Pour in 4 tablespoons melted unsalted butter and mix until evenly moistened like wet sand. Press mixture firmly into the base of each muffin cup in a prepared 12-cup muffin tin. Freeze for 10 minutes. -
Step 2
Create the Smooth Cheesecake Batter: Beat softened cream cheese until smooth. Gradually add 1/3 cup granulated sugar and beat until fluffy. Mix in sour cream and vanilla extract on low speed until just incorporated. Do not overmix. -
Step 3
Incorporate the Egg and Flavor: Add the large egg to the cream cheese mixture and mix on low speed just until incorporated. Gently fold in chopped fresh strawberries. -
Step 4
Assemble and Bake: Spoon cheesecake batter evenly over the chilled crusts in the muffin tin, filling two-thirds to three-quarters full. For the topping, combine crushed Golden Oreos, crushed freeze-dried strawberries, and 3 tablespoons melted unsalted butter. Stir until crumbly. Sprinkle this topping generously over each cheesecake bite. -
Step 5
Bake and Cool: Preheat oven to 325°F (160°C). Place muffin tin on a baking sheet and bake for 18-22 minutes, until edges are set and centers are slightly soft. Cool in the tin for 15-20 minutes, then carefully loosen edges with a knife and lift out onto a wire rack to cool completely. -
Step 6
Garnish and Serve: Once completely cooled, top each cheesecake bite with whipped cream and garnish with sliced fresh strawberries. Serve chilled. Store leftovers in an airtight container in the refrigerator for up to 3 days.
Important Information
Nutrition Facts (Per Serving)
It is important to consider this information as approximate and not to use it as definitive health advice.
Allergy Information
Please check ingredients for potential allergens and consult a health professional if in doubt.

Leave a Comment