

Old School Chocolate Traybake Cake is more than just a dessert; it’s a warm hug on a plate, a nostalgic journey back to simpler times, and an absolute crowd-pleaser. There’s a reason why this classic treat remains a firm favourite: its incredible simplicity combined with its utterly delicious flavour profile. It’s the kind of cake that instantly evokes memories of childhood birthdays, school bake snon-alcoholic ales, and cozy afternoons. What truly makes our Old School Chocolate Traybake Cake so special is its moist, tender crum extractb, achieved through a foolproof method, and its rich, deep chocolatey goodness that isn’t overly sweet. It’s incredibly forgiving, making it perfect for novice bakers, and it’s designed to feed a good many people without fuss. This isn’t just any chocolate cake; it’s a testament to the enduring appeal of well-loved recipes that deliver pure, unadulterated joy with every bite.
Ingredients:
- 1 cup (2 sticks) unsalted butter, softened to room temperature
- 1¼ cups granulated sugar
- 1 teaspoon pure vanilla extract
- 4 medium eggs, at room temperature
- 1¾ cups self-raising flour
- ¼ cup unsweetened cocoa powder
- 3 tablespoons whole milk
- 1½ cups powdered sugar, sifted
- 1 tablespoon unsweetened cocoa powder
- 2 tablespoons milk
- Chocolate sprinkles for decorating
Making the Old School Chocolate Traybake Cake
This old school chocolate traybake cake is a comforting classic, perfect for any occasion. It’s incredibly simple to whip up, making it ideal for begin extractners or when you need a quick, crowd-pleasing dessert. The rich chocolate flavour and moist texture are simply irresistible. Let’s get baking!
Preparing the Cake Batter
The foundation of any great cake lies in its batter, and this traybake is no exception. We’ll start by creaming our butter and sugar together until light and fluffy. This process incorporates air, which is crucial for a tender crum extractb. Ensure your butter is truly softened – this means it should yield easily when pressed with a finger, not be melted or hard. Using room temperature ingredients, especially the eggs, helps everything emulsify beautifully, preventing a greasy or split batter.
Step 1: Creaming the Butter and Sugar
In a large mixing bowl, combine the softened unsalted butter and granulated sugar. Using an electric mixer on medium speed, beat these together for about 3 to 5 minutes, or until the mixture becomes pnon-alcoholic ale yellow and visibly fluffy. Scrape down the sides and bottom of the bowl periodically with a spatula to ensure all the butter and sugar are incorporated. This step is key to a light and airy cake texture, so don’t rush it.
Step 2: Incorporating the Eggs and Vanilla
With the mixer still running on medium speed, add the eggs one at a time. Allow each egg to be fully incorporated into the butter and sugar mixture before adding the next. This gradual addition helps create a stable emulsion. Once all the eggs are in, add the pure vanilla extract. Beat for another minute until everything is well combined and the mixture is smooth and glossy. If your eggs aren’t at room temperature, you can quickly warm them by placing them in a bowl of warm (not hot) water for 5 minutes before using.
Step 3: Adding the Dry Ingredients
In a separate medium bowl, whisk together the self-raising flour and ¼ cup of unsweetened cocoa powder. This ensures that the cocoa powder is evenly distributed throughout the flour, preventing any pockets of bitterness. Now, add about half of this dry mixture to the wet ingredients in your large mixing bowl. Mix on low speed until just combined. Be careful not to overmix at this stage, as it can lead to a tough cake. Next, add the 3 tablespoons of whole milk and mix until incorporated. Finally, add the remaining dry ingredients and mix on low speed until no streaks of flour remain. Again, avoid overmixing. The batter should be thick but pourable.
Baking the Traybake
Once the batter is ready, it’s time to get it into the oven. A traybake is designed to be baked in a rectangular tin, providing a generous surface area for even cooking.
Step 4: Baking the Cake
Preheat your oven to 180°C (160°C fan/350°F/Gas Mark 4). Grease and line a 20cm x 30cm (8 inch x 12 inch) baking tin with parchment paper, ensuring the paper overhangs the sides. This makes it easy to lift the cake out once baked. Pour the cake batter evenly into the prepared tin, spreading it out with your spatula. Bake in the preheated oven for 25-30 minutes, or until a skewer inserted into the centre of the cake comes out clean. The top should be firm to the touch and spring back slightly when gently pressed. Be mindful of your oven’s individual quirks; some ovens run hotter than others.
Creating the Chocolate Glaze
While the cake is cooling, we’ll prepare a simple yet delicious chocolate glaze that perfectly complements the rich chocolate cake. This glaze adds an extra layer of flavour and a lovely sheen.
Step 5: Making and Applying the Glaze
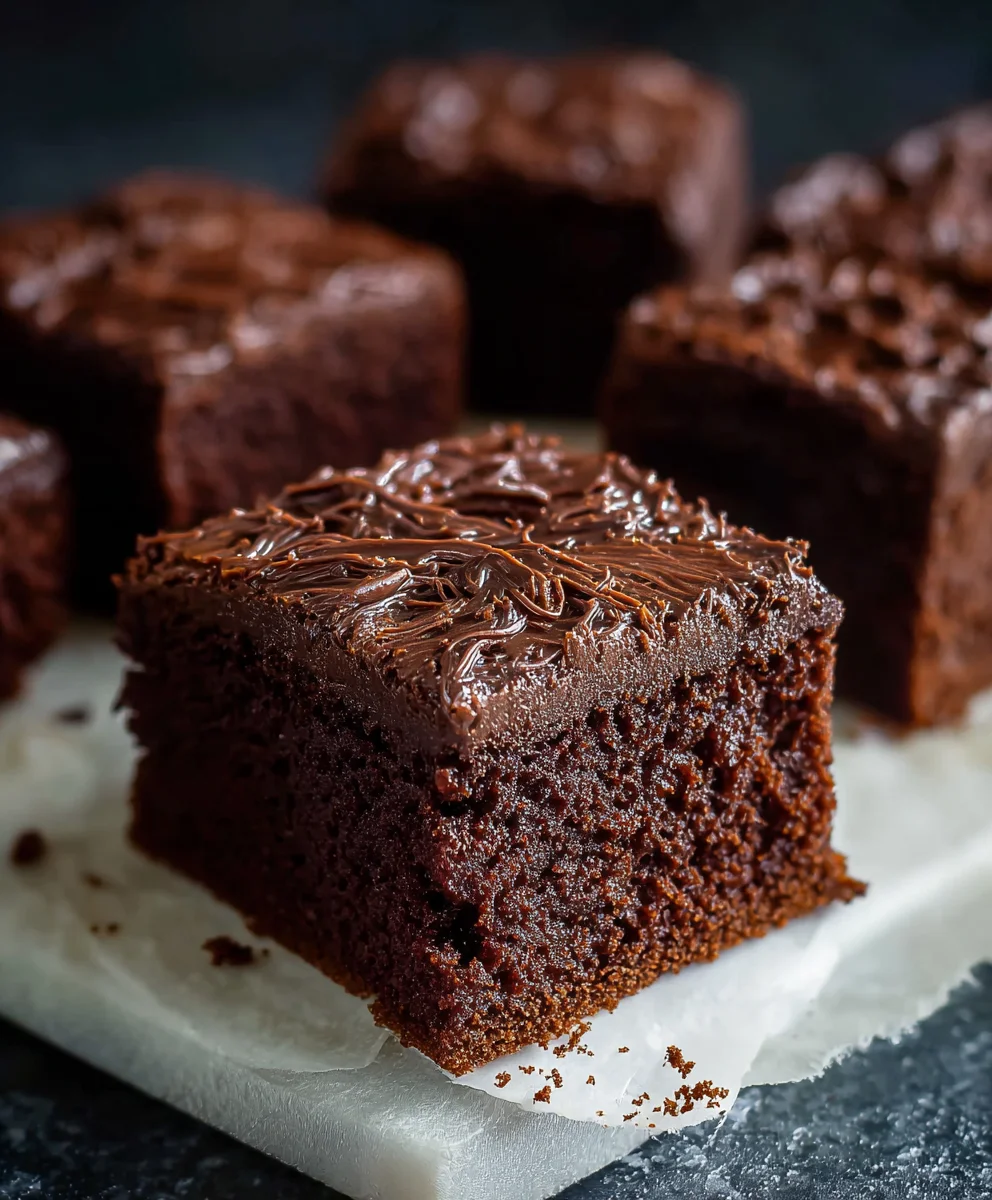
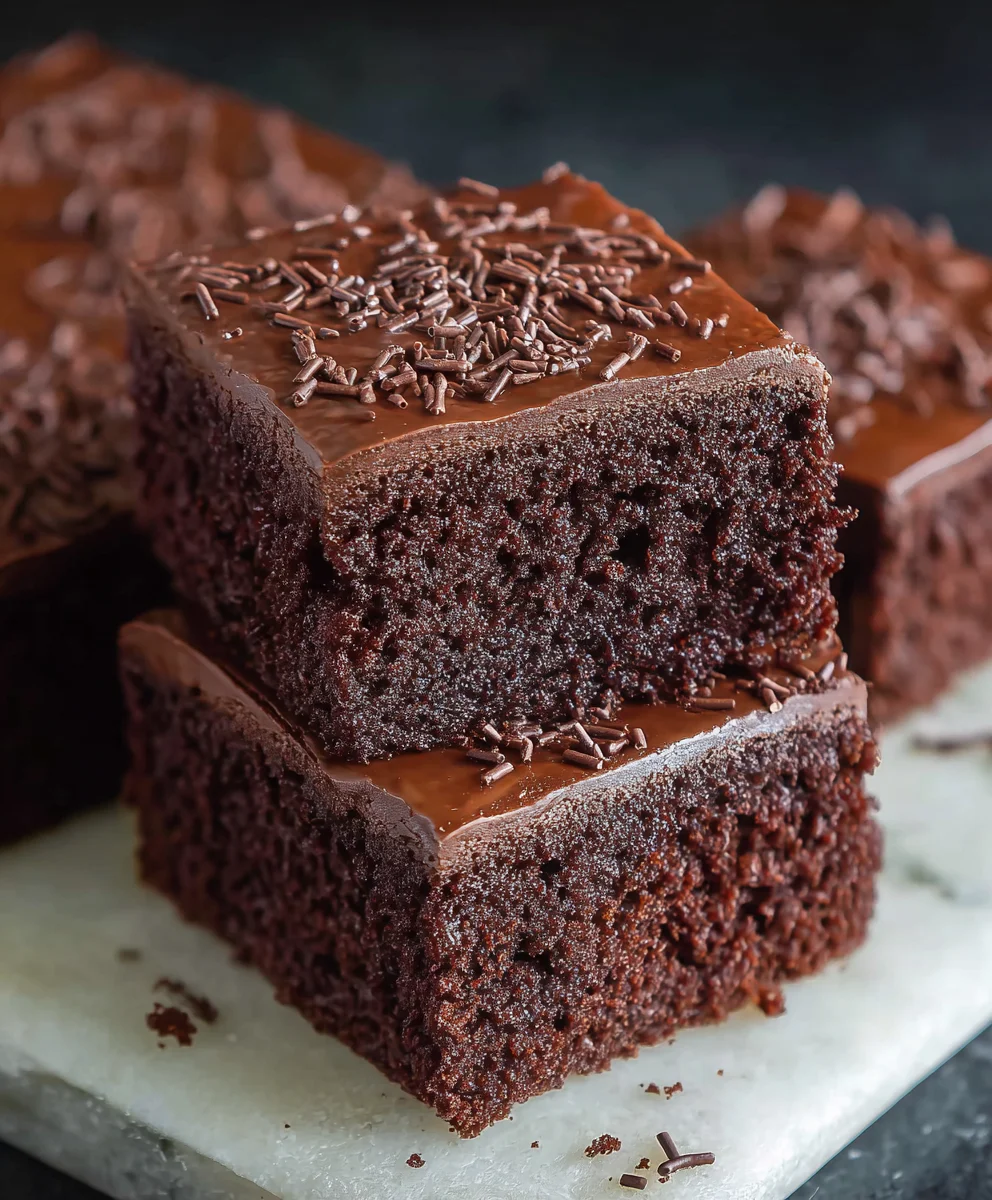
While the cake is still warm in the tin, prepare the glaze. In a small saucepan over low heat, combine the 2 tablespoons of milk and the remaining 1 tablespoon of unsweetened cocoa powder. Stir continuously until the cocoa powder is dissolved and the mixture is smooth. Remove from the heat and stir in the sifted powdered sugar until you have a smooth, thick, pourable glaze. If the glaze is too thick, you can add a tiny splash more milk, a teaspoon at a time. If it’s too thin, add a little more sifted powdered sugar. Pour the warm glaze over the still-warm cake in the tin, spreading it evenly to the edges with an offset spatula or the back of a spoon. Immediately, while the glaze is still wet, sprinkle generously with chocolate sprinkles for that classic old school touch. Allow the cake to cool completely in the tin before cutting into squares. This allows the glaze to set properly and ensures clean slices. Enjoy!
Conclusion:
There you have it – the simple yet utterly satisfying recipe for our Old School Chocolate Traybake Cake! This classic treat is a testament to the fact that sometimes, the most delicious things are the easiest to make. We’ve walked through every step, from creaming the butter and sugar to achieving that perfectly fudgy texture. This cake is perfect for any occasion, whether it’s a casual afternoon tea, a birthday celebration, or simply a craving for something sweet.
Serving suggestions abound! This Old School Chocolate Traybake Cake is delightful on its own, but it truly shines when served warm with a dollop of fresh cream, a scoop of vanilla ice cream, or even a drizzle of extra chocolate ganache. For variations, consider adding a handful of chocolate chips to the batter for an extra chocolatey punch, or a sprinkle of sea salt on top of the frosting to balance the sweetness. Don’t be afraid to experiment and make it your own! We encourage you to give this recipe a try; it’s incredibly forgiving and the results are always rewarding.
Frequently Asked Questions:
Can I use different types of chocolate for the Old School Chocolate Traybake Cake?
Absolutely! While the recipe calls for standard cocoa powder, you can certainly enhance the flavor by using dark chocolate or milk chocolate chips folded into the batter. For the frosting, feel free to experiment with different percentages of dark chocolate for a more intense cocoa flavor.
How should I store the Old School Chocolate Traybake Cake?
Once cooled, store the Old School Chocolate Traybake Cake in an airtight container at room temperature for up to 3 days. If your kitchen is particularly warm, or if you’ve used a frosting that contains dairy, refrigerating it is also an option, though it might slightly alter the texture.
Old School Chocolate Traybake Cake – Easy & Delicious
A comforting classic chocolate traybake cake that’s incredibly simple to make, perfect for any occasion with its rich chocolate flavour and moist texture.
Ingredients
-
1 cup (2 sticks) unsalted butter, softened to room temperature
-
1¼ cups granulated sugar
-
1 teaspoon pure vanilla extract
-
4 medium eggs, at room temperature
-
1¾ cups self-raising flour
-
¼ cup unsweetened cocoa powder
-
3 tablespoons whole milk
-
1½ cups powdered sugar, sifted
-
1 tablespoon unsweetened cocoa powder
-
2 tablespoons milk
-
Chocolate sprinkles for decorating
Instructions
-
Step 1
In a large mixing bowl, combine the softened unsalted butter and granulated sugar. Beat with an electric mixer on medium speed for 3 to 5 minutes until pale yellow and fluffy. Scrape down the bowl periodically. -
Step 2
Add eggs one at a time, beating until fully incorporated after each addition. Stir in the pure vanilla extract and beat for another minute until smooth and glossy. -
Step 3
In a separate bowl, whisk together the self-raising flour and ¼ cup of unsweetened cocoa powder. Add half of this dry mixture to the wet ingredients and mix on low speed until just combined. Stir in 3 tablespoons of whole milk. Add the remaining dry ingredients and mix on low speed until no streaks of flour remain. Do not overmix. -
Step 4
Preheat oven to 180°C (160°C fan/350°F/Gas Mark 4). Grease and line a 20cm x 30cm (8 inch x 12 inch) baking tin. Pour the batter evenly into the tin and spread. Bake for 25-30 minutes, or until a skewer inserted into the centre comes out clean. -
Step 5
While the cake is still warm in the tin, prepare the glaze. In a small saucepan over low heat, combine 2 tablespoons of milk and 1 tablespoon of unsweetened cocoa powder, stirring until dissolved. Remove from heat and stir in sifted powdered sugar until smooth and pourable. Pour the glaze over the warm cake, spreading evenly. Immediately sprinkle with chocolate sprinkles. -
Step 6
Allow the cake to cool completely in the tin before cutting into squares. Enjoy!
Important Information
Nutrition Facts (Per Serving)
It is important to consider this information as approximate and not to use it as definitive health advice.
Allergy Information
Please check ingredients for potential allergens and consult a health professional if in doubt.

Leave a Comment