

Smores Brownies offer an irresistible invitation to indulge in a delightful fusion of two classic American treats. I can vividly recall the enchanting aroma of a crackling campfire, the warmth against my face, and the joyful anticipation of crafting that perfect, gooey s’more. That quintessential experience, cherished by so many, is precisely what this recipe aims to capture and elevate within the comforting confines of your kitchen.
Why We Adore Smores Brownies
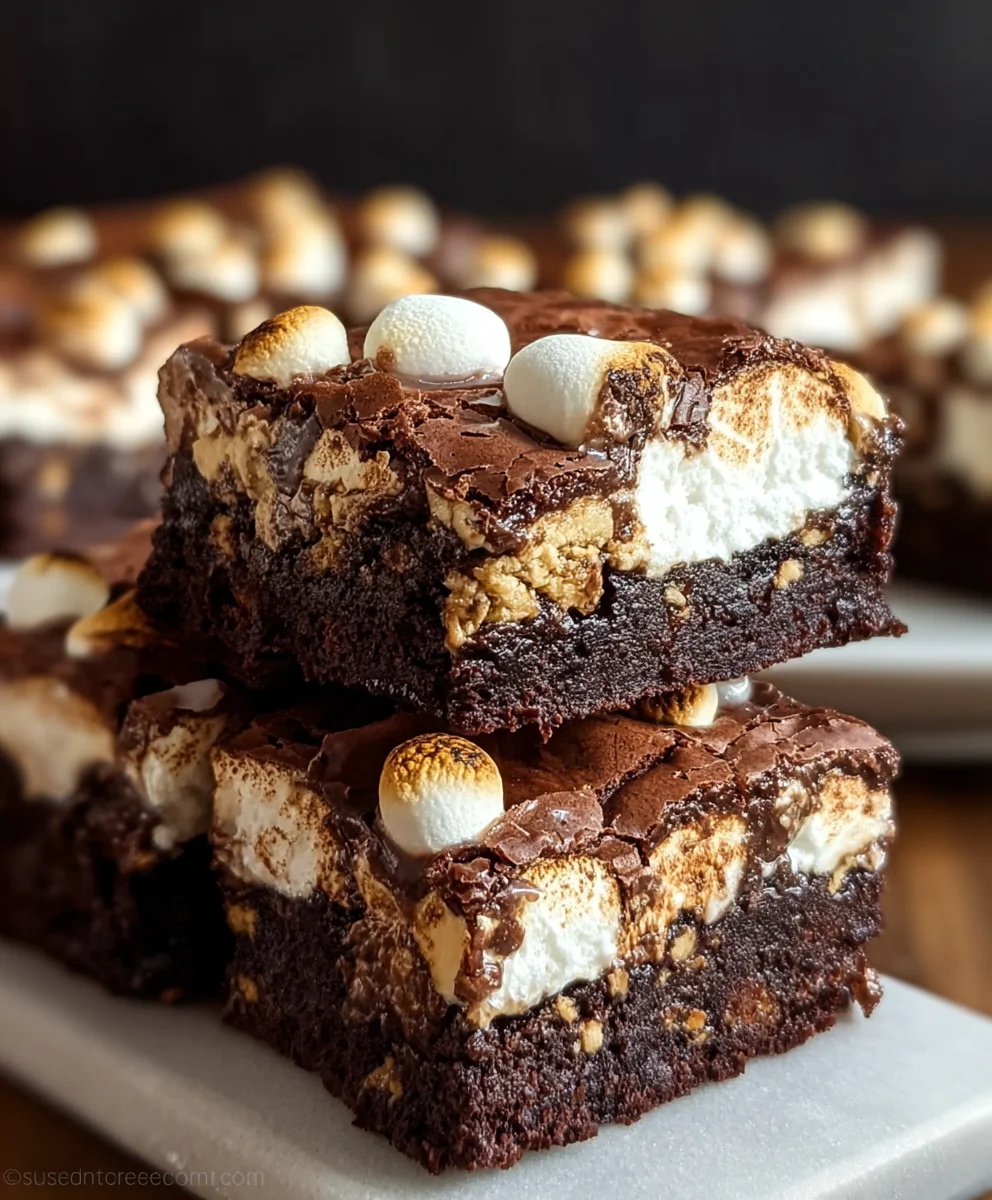
There’s an undeniable magic in the combination: the rich, fudgy embrace of a classic chocolate brownie, crowned with a layer of toasted, melt-in-your-mouth marshmallow and a delightful crunch of graham cracker. It’s more than just a dessert; it’s a journey back to carefree moments, a celebration of simple pleasures reinvented. People gravitate towards this dish not only for its incredible taste and diverse textures—from the chewy brownie to the soft marshmallow and crisp graham—but also for the sheer convenience of enjoying a beloved campfire tradition without the need for an actual fire. Preparing these Smores Brownies ensures every single bite delivers that iconic blend of sweet, smoky, and chocolatey goodness, making them an instant crowd-pleaser for any occasion.
Ingredients:
-
For the Fudgy Brownie Base:
- 1 cup (2 sticks / 226g) unsalted butter, cut into cubes
- 4 ounces (113g) unsweetened chocolate, finely chopped
- 2 cups (400g) granulated sugar
- 4 large eggs
- 1 teaspoon vanilla extract
- 1 cup (125g) all-purpose flour
- 1/2 teaspoon salt
-
For the Graham Cracker Layer:
- 10-12 sheets graham crackers (approx. 1 ½ sleeves), broken into halves or quarters as needed
-
For the Marshmallow Topping:
- 4 cups (approx. 10 ounces) mini marshmallows, or 60-70 large marshmallows, halved
Equipment You’ll Need:
Before we embark on this delicious journey to create the ultimate Smores Brownies, let’s gather our tools. Having everything ready ensures a smooth and enjoyable baking process. You’ll need:
- A 9×13 inch baking pan
- Parchment paper
- Cooking spray (or extra butter for greasing)
- A large heatproof bowl (for melting chocolate and butter)
- A medium mixing bowl (for dry ingredients)
- A large mixing bowl (for wet ingredients)
- A whisk
- A rubber spatula or wooden spoon
- Measuring cups and spoons
- A saucepan (if using a double boiler method for melting chocolate)
- Wire cooling rack
Getting Started: Preparing Your Workspace
Alright, bakers! Let’s get our kitchen ready for some serious Smores Brownies action. A little prep work goes a long way to ensure everything runs smoothly and our brownies come out perfectly.
- Preheat Your Oven: First things first, preheat your oven to 350°F (175°C). This ensures a consistent temperature from the moment your brownie batter goes in, which is crucial for even baking.
- Prepare Your Baking Pan: Grab your 9×13 inch baking pan. Line it generously with parchment paper, making sure the paper extends over the edges. This creates “handles” that will make it incredibly easy to lift your finished Smores Brownies out of the pan once they’ve cooled. Lightly spray the parchment paper with cooking spray or grease it with a little butter to prevent sticking, even though parchment paper is naturally non-stick, a little extra never hurts. This step is super important for clean edges and easy removal!
- Measure and Organize: Take a moment to measure out all your ingredients. Having everything pre-measured and laid out in front of you, a practice known as “mise en place,” will make the baking process much more efficient and enjoyable. Trust me, you don’t want to be scrambling for flour in the middle of whisking!
Crafting the Ultimate Fudgy Brownie Base
The foundation of our incredible Smores Brownies is a rich, fudgy brownie. This isn’t just any brownie; it’s designed to be dense, chocolatey, and perfectly chewy to hold up to the graham cracker and marshmallow layers.
- Melt the Chocolate and Butter: In a large, heatproof bowl, combine your cubed unsalted butter and finely chopped unsweetened chocolate. Set this bowl over a saucepan of simmering water, creating a makeshift double boiler. Ensure the bottom of the bowl does not touch the water. Stir gently with a rubber spatula until the butter and chocolate are completely melted and smooth. This method provides gentle, even heat, preventing the chocolate from scorching. Alternatively, you can melt them together in a microwave-safe bowl in 30-second intervals, stirring well after each interval, until fully combined and smooth. Be careful not to overheat the chocolate, as it can seize. Once melted, remove from heat and let it cool slightly for a few minutes while you prepare the next ingredients.
- Whisk Eggs and Sugar: In a separate large mixing bowl, whisk together the granulated sugar and large eggs until light in color and slightly fluffy, about 2-3 minutes. This step incorporates air, which contributes to the brownies’ texture and helps create a lovely crackly top. Add the vanilla extract and whisk again until just combined.
- Combine Wet Ingredients: Gradually pour the slightly cooled chocolate and butter mixture into the egg and sugar mixture, whisking continuously until everything is well combined and glossy. It’s important that the chocolate mixture isn’t too hot, otherwise, you risk cooking the eggs, which we definitely don’t want! You should have a rich, dark, and smooth batter at this point.
- Incorporate Dry Ingredients: In a medium mixing bowl, whisk together the all-purpose flour and salt. This helps to distribute the salt evenly and aerate the flour.
- Fold in Flour Mixture: Add the dry flour mixture to the wet chocolate mixture. Using your rubber spatula, gently fold the ingredients together until just combined. It’s crucial not to overmix the batter at this stage. Overmixing can develop the gluten in the flour, leading to a tougher, cake-like brownie instead of the fudgy, dense texture we’re aiming for with these Smores Brownies. Stop folding as soon as you no longer see streaks of dry flour.
- Pour and Partially Bake: Pour the luscious brownie batter into your prepared 9×13 inch pan. Use your spatula to spread it evenly into all corners. Place the pan into your preheated oven and bake for 25-30 minutes. At this point, the edges should be set, but the center will still look a bit soft and jiggly. This partial bake is essential; it ensures our brownie layer is cooked through before we add the toppings, but not overbaked, which would result in dry Smores Brownies.
- Prepare for the Next Layer: Remove the pan from the oven after the partial bake. Keep the oven on, as we’ll be putting the Smores Brownies back in shortly.
Building the S’mores Foundation: Graham Cracker Layer
Now that our brownie base is partially baked, it’s time to introduce the iconic S’mores element: the graham cracker layer. This adds that delightful crunch and classic flavor that defines S’mores Brownies.
- Arrange Graham Crackers: While the brownie base is still warm from its initial bake, carefully arrange the graham cracker sheets over the top. You can break them into halves or quarters as needed to create a single, even layer that covers the entire surface of the brownie. Don’t worry if there are small gaps; the marshmallows will fill those in. The residual heat from the brownie will help them adhere slightly. This layer is what gives our Smores Brownies that authentic campfire taste and texture.
The Grand Finale: Marshmallow Topping and Final Bake
This is where the magic truly happens, transforming our chocolatey base into irresistible Smores Brownies. Get ready for ooey-gooey perfection!
- Add Marshmallows: Evenly scatter the mini marshmallows over the graham cracker layer. If you’re using large marshmallows, cut them in half crosswise and arrange them cut-side down for better coverage and stability. Make sure to cover the entire surface to ensure every bite of your Smores Brownies gets that delicious toasted marshmallow goodness.
- Return to Oven: Carefully place the pan back into the 350°F (175°C) oven. Continue baking for an additional 5-10 minutes, or until the marshmallows are puffed up and lightly golden brown. Keep a close eye on them, as marshmallows can go from perfectly toasted to burnt very quickly!
- Optional Broiling for Extra Toastiness: For that truly authentic campfire-toasted look and flavor, you can briefly use your broiler. After the initial 5-10 minutes of baking, switch your oven to the broiler setting (if available). Watch the marshmallows very, very closely – they will brown quickly, often within 1-2 minutes. You’re aiming for a beautiful, golden-brown top with some slight charring, not black. If your broiler is very strong, you might even want to open the oven door slightly to monitor. This step is key for truly spectacular Smores Brownies.
Cooling, Cutting, and Savoring Your S’mores Brownies
The hardest part of making Smores Brownies is often waiting for them to cool, but trust me, it’s worth every minute for the best texture and clean cuts!
- Cool Completely: Once the marshmallows are beautifully toasted, remove the Smores Brownies from the oven. This is a critical step: let them cool completely in the pan on a wire rack for at least 2-3 hours, or ideally, chill them in the refrigerator for 1 hour once they’ve reached room temperature. Cooling allows the brownies to set properly, ensuring a fudgy texture and making them much easier to cut into neat squares. Cutting warm Smores Brownies will result in a messy, gooey situation, albeit a delicious one!
- Lift and Cut: Once fully cooled, use the parchment paper overhangs to carefully lift the entire slab of Smores Brownies out of the pan and transfer it to a cutting board.
- Cutting for Perfection: For clean cuts, I recommend using a large, sharp knife. For the best results when cutting gooey Smores Brownies, clean the knife with a damp cloth or run it under hot water and wipe it dry between each cut. This prevents the marshmallow from sticking and tearing. Cut into 12-16 squares, depending on your desired serving size.
- Serve and Enjoy: These Smores Brownies are best served at room temperature or slightly warmed for an extra gooey treat. They’re perfect for parties, dessert cravings, or just a cozy night in.
- Storage: Store any leftover Smores Brownies in an airtight container at room temperature for up to 3 days. While they’re best enjoyed fresh, they still maintain their deliciousness for a few days.
Pro Tips for Perfect S’mores Brownies
To truly elevate your Smores Brownies from great to absolutely unforgettable, here are a few extra tips and tricks I’ve picked up along the way:
-
Don’t Overbake the Brownie Layer:
The biggest secret to a fudgy brownie is knowing when to pull it from the oven. Even before adding the marshmallows, remember that the brownie will continue to cook slightly from residual heat once removed. A slightly moist center is what we’re aiming for, ensuring the Smores Brownies are incredibly rich and dense. An inserted toothpick should come out with moist crumbs, not wet batter, and certainly not clean.
-
Quality Chocolate Makes a Difference:
Since chocolate is a star ingredient in these Smores Brownies, using high-quality unsweetened chocolate will dramatically impact the depth of flavor. It doesn’t have to be the most expensive bar, but choose one you enjoy the taste of.
-
Even Marshmallow Toasting:
When toasting the marshmallows, make sure they are spread in an even layer. This allows for uniform browning. If you have some marshmallows piled up, they might not toast evenly, leading to some burnt and some barely golden. Rotate your pan if necessary for even broiler exposure.
-
Marshmallow Variety:
While mini marshmallows are convenient and melt beautifully, large marshmallows cut in half offer a larger, more satisfying gooey bite. You can experiment with different sizes to find your preference for your ideal Smores Brownies.
-
A Touch of Flaky Sea Salt:
For an extra gourmet touch, sprinkle a tiny pinch of flaky sea salt over the toasted marshmallows immediately after they come out of the oven. The salt beautifully complements the sweetness of the marshmallows and the richness of the chocolate, taking your Smores Brownies to another level.
-
Make-Ahead Tips:
The brownie base (without the graham crackers and marshmallows) can be baked a day ahead and stored at room temperature, tightly covered. When you’re ready to serve, simply add the graham crackers and marshmallows and proceed with the final bake and broiling. This is a fantastic time-saver for entertaining!
-
Customization Ideas:
Feel free to get creative with your Smores Brownies! A drizzle of melted milk or white chocolate over the finished, cooled brownies can add another layer of flavor and visual appeal. You could also sprinkle some chocolate chips onto the brownie batter before the initial bake for extra chocolate pockets.
-
Reheating for Gooeyness:
If you love your Smores Brownies warm and extra gooey, pop a square into the microwave for 10-15 seconds. This will slightly melt the chocolate and marshmallows, bringing back that fresh-out-of-the-oven experience. Just be careful not to overheat.
-
Patience is Key for Cutting:
Seriously, I can’t stress this enough! Cooling completely is the secret to beautiful, clean-cut Smores Brownies. If you try to cut them warm, the marshmallow layer will stick to your knife and tear, and the brownie will be too soft.
These Smores Brownies are truly a crowd-pleaser and embody all the best parts of the classic campfire treat in a convenient, portable square. Enjoy every decadent bite!
Conclusion:
And there you have it, friends! We’ve journeyed through the steps of creating what I truly believe is one of the most irresistible desserts you’ll ever pull from your oven. This isn’t just another brownie recipe; it’s an experience, a symphony of textures and flavors that will transport you straight back to cozy evenings around a crackling campfire, but with an elevated, decadent twist that only a homemade brownie can provide. Think about it: that rich, fudgy chocolate base, so dense and deeply satisfying, offering a perfect counterpoint to the buttery crunch of graham crackers. Then, just when you think it couldn’t get any better, you hit that cloud-like layer of toasted, golden marshmallow, stretching and melting with every glorious bite. It’s the ultimate comfort food, a dessert that instantly brings a smile to anyone’s face, whether they’re a seasoned dessert connoisseur or just a kid at heart looking for something sweet. I’ve seen these disappear from platters faster than I can say “s’mores,” and for good reason! They strike that perfect balance between nostalgic simplicity and sophisticated indulgence.
This recipe is an absolute must-try for any baking enthusiast.
But the fun doesn’t stop once these beauties are cooled (or even slightly warm, which I highly recommend!). Serving these delightful treats is an art in itself, and there are so many ways to enjoy them. For a truly indulgent experience, try serving a warm square of these brownies with a scoop of premium vanilla bean ice cream. The cold, creamy ice cream melting into the warm, gooey marshmallow and chocolate? Pure heaven! A drizzle of caramel or chocolate sauce wouldn’t hurt either, if you’re feeling extra extravagant. They also pair wonderfully with a robust cup of coffee or a tall, frosty glass of milk, making them the perfect companion for an afternoon treat or a late-night indulgence. Thinking about variations? Oh, we can get creative! For an extra layer of crunch and nuttiness, sprinkle some chopped pecans or walnuts over the brownie batter before baking. You could also experiment with different chocolate chips – a mix of milk and dark, or even some peanut butter chips, would add another exciting dimension. If you’re feeling festive, a pinch of cinnamon or even a tiny dash of cayenne pepper in the brownie batter can give it a surprising, delightful kick. For those with dietary considerations, don’t shy away! These can often be adapted. Consider using a gluten-free all-purpose flour blend and certified gluten-free graham crackers for a delicious alternative. Dairy-free chocolate and a plant-based butter substitute can also work wonders to make these accessible to more friends and family. And for the ultimate crowd-pleaser at a party, consider baking them in a mini muffin tin for individual bite-sized Smores Brownies that are as adorable as they are delicious. Imagine the possibilities!
So, what are you waiting for? I sincerely hope I’ve convinced you to give this recipe a go. Seriously, clear your schedule, gather your ingredients, and prepare to fill your home with the most incredible aromas. There’s something truly magical about bringing these flavors to life in your own kitchen. I promise you, the joy of biting into a freshly baked Smores Brownie, crafted with your own hands, is an experience not to be missed. When you do try them, please, please come back and share your experience with me! I absolutely love hearing about your baking adventures. Did you add a special twist? What did your family and friends think? Snap a photo, tell me your thoughts, and let’s celebrate the simple, incredible joy of baking together. Happy baking, everyone, and get ready for some serious deliciousness!
Ultimate S’mores Brownies: Gooey, Fudgy, & Irresistible!
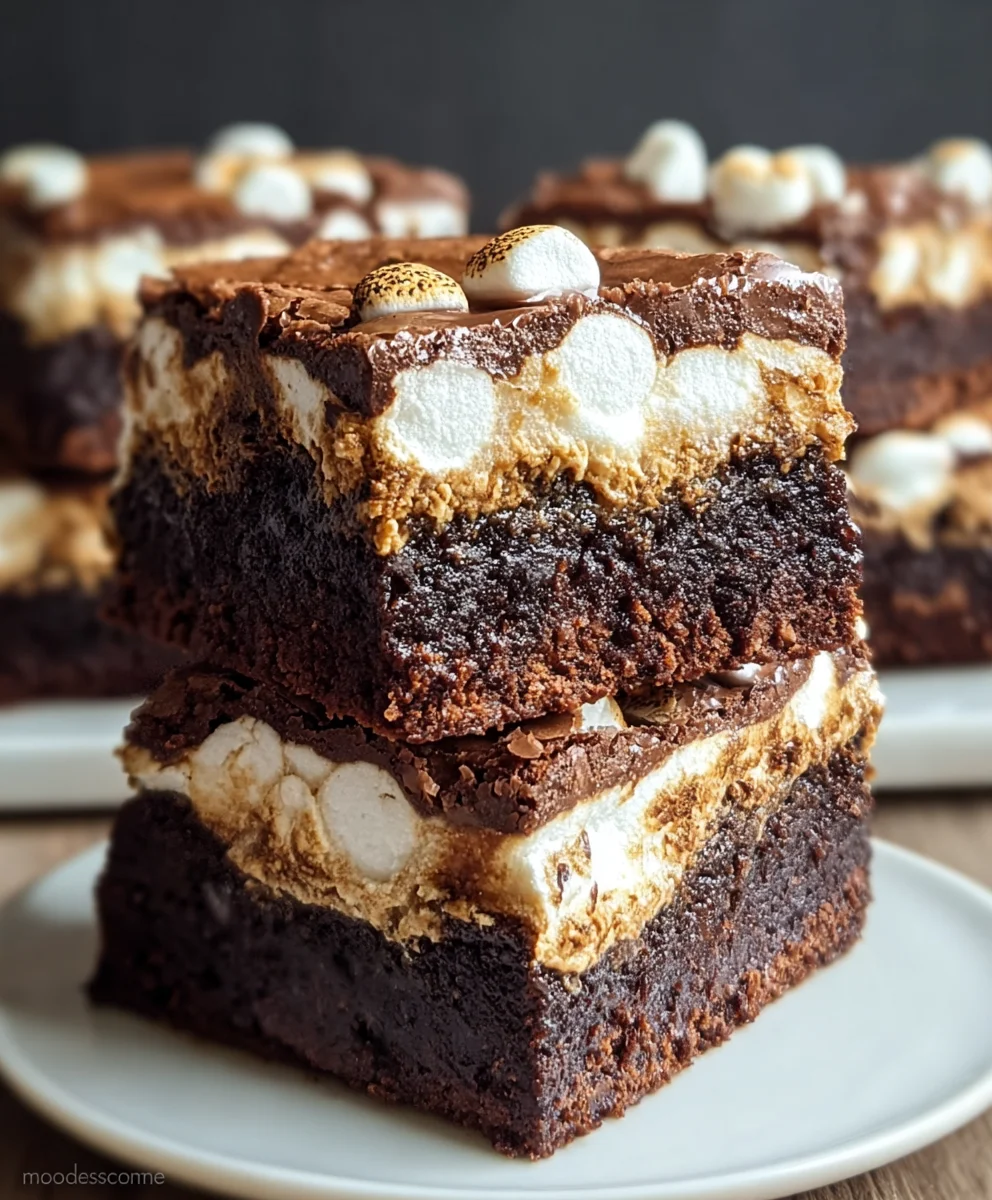
These S’mores Brownies capture the essence of campfire s’mores in a deliciously rich, gooey dessert. The combination of a buttery graham cracker crust, fudgy brownie layer, and toasted marshmallow topping is sure to satisfy both young and old. Serve these brownies at your next gathering, or enjoy them as a comforting treat on a cozy evening at home.
Ingredients
-
1 cup (2 sticks / 226g) unsalted butter
-
4 ounces (113g) unsweetened chocolate, chopped
-
2 cups (400g) granulated sugar
-
4 large eggs
-
1 teaspoon vanilla extract
-
1 cup (125g) all-purpose flour
-
1/2 teaspoon salt
-
10-12 sheets graham crackers
-
4 cups (approx. 10 ounces) mini marshmallows, or 60-70 large marshmallows, halved
Instructions
-
Step 1
Preheat oven to 350°F (175°C). Line a 9×13 inch baking pan with parchment paper, extending over edges; lightly grease. -
Step 2
In a heatproof bowl, melt butter and unsweetened chocolate until smooth. Let cool slightly. In a separate bowl, whisk sugar, eggs, and vanilla. Gradually whisk in the cooled chocolate mixture until glossy. -
Step 3
Whisk flour and salt in a medium bowl. Gently fold into the wet mixture until just combined; do not overmix. -
Step 4
Pour batter into prepared pan and spread evenly. Bake for 25-30 minutes, until edges are set but the center is still soft. Remove from oven; keep oven on. -
Step 5
Arrange graham cracker sheets in a single layer over the warm brownie base. Scatter marshmallows evenly over the graham crackers. -
Step 6
Return to oven and bake 5-10 minutes until marshmallows are puffed and lightly golden. For deeper browning, briefly broil (1-2 minutes), watching constantly to prevent burning. -
Step 7
Remove from oven and cool completely in the pan on a wire rack (at least 2-3 hours, or chill for 1 hour). Once cooled, use parchment to lift from pan. Cut into squares using a sharp knife, cleaning between cuts for best results. -
Step 8
Serve at room temperature or slightly warmed. Store leftovers in an airtight container at room temperature for up to 3 days.
Important Information
Nutrition Facts (Per Serving)
It is important to consider this information as approximate and not to use it as definitive health advice.
Allergy Information
Please check ingredients for potential allergens and consult a health professional if in doubt.


Leave a Comment