

Piping basketball cookies are more than just a sweet treat; they’re a slam dunk for any sports fan or a fun, themed addition to birthday parties, sports banquets, or even just a casual game day gathering. Imagin extracte the joy on a child’s face, or the nostalgic grin on an adult’s, as they bite into a perfectly decorated cookie that captures the spirit of the game. What is it about these simple, sugar-based creations that makes them so universally loved? It’s the delightful combination of a buttery, crisp cookie base and a vibrant, smooth royal icing that allows for incredible creativity. But what truly sets these piping basketball cookies apart is the charming detail – the iconic orange hue and the bold black lines that instantly evoke the thrill of a fast-paced game. They’re a visual delight that tastes just as good as they look, transforming humble ingredients into edible works of art.
Ingredients:
- 1 cup (2 sticks) unsalted butter, softened
- 1 ½ cups granulated sugar
- 2 large eggs
- 1 teaspoon vanilla extract
- 3 cups all-purpose flour
- 1 teaspoon baking powder
- ½ teaspoon salt
- Orange gel food coloring
- Black gel food coloring
- 1 cup confectioners’ sugar
- 2-3 tablespoons milk
- 1 teaspoon light corn syrup
Preparing the Cookie Dough
Creaming the Butter and Sugar
Start by creaming together your softened unsalted butter and granulated sugar in a large mixing bowl. This is a crucial step for achieving a tender cookie. Use an electric mixer on medium speed and beat them until the mixture is light and fluffy, resembling pnon-alcoholic ale yellow clouds. This process incorporates air, which will help your cookies hold their shape and have a pleasant texture. Don’t rush this; it typically takes about 3-5 minutes of consistent beating. Scrape down the sides of the bowl occasionally with a rubber spatula to ensure everything is evenly incorporated.
Adding Wet Ingredients
Next, you’ll add your large eggs one at a time to the creamed butter and sugar mixture, beating well after each addition. This helps to emulsify the ingredients properly. Follow with the vanilla extract, giving it another good mix until fully combined. The aroma of vanilla at this stage is always a good sign that you’re on the right track!
Combining Dry Ingredients
In a separate medium bowl, whisk together the all-purpose flour, baking powder, and salt. Whisking helps to distribute the leavening agent (baking powder) evenly throughout the flour, which is essential for consistent rise and texture in your cookies.
Incorporating Dry into Wet
Gradually add the dry ingredients to the wet ingredients in your large mixing bowl, mixing on low speed until just combined. Be careful not to overmix the dough at this stage. Overmixing can develop the gluten in the flour too much, resulting in tough cookies. Stop mixing as soon as you no longer see streaks of dry flour. You might want to finish incorporating the last bit of flour by hand with a spatula to avoid overworking the dough.
Dividing and Coloring the Dough
Now for the fun part – turning your dough into basketballs! Divide the dough into three equal portions. Leave one portion plain. To the second portion, add a few drops of orange gel food coloring and knead it gently until the color is evenly distributed. You want a vibrant basketball orange. Gel food coloring is preferred because it’s concentrated and won’t add excess liquid to your dough, which could alter the texture. For the third portion, add a tiny amount of black gel food coloring, again kneading until the color is uniform. You’ll only need a very small amount of black to achieve a dark, charcoal grey for the basketball lines.
Chilling the Dough
Once your dough portions are colored, flatten each one into a disc, wrap them tightly in plastic wrap, and refrigerate for at least 1 hour. Chilling the dough is very important for several reasons. It solidifies the butter, making the dough easier to handle and preventing excessive spreading during baking. It also allows the flavors to meld and deepen.
Shaping and Baking the Basketball Cookies
Rolling and Cutting the Dough
Preheat your oven to 350°F (175°C). Line baking sheets with parchment paper. On a lightly floured surface, roll out the plain dough to about ¼-inch thickness. Using a round cookie cutter (about 3 inches in diameter), cut out circles. These will be the base of your basketballs. Place the circles onto your prepared baking sheets, leaving about 1-inch of space between them.
Creating the Basketball Texture
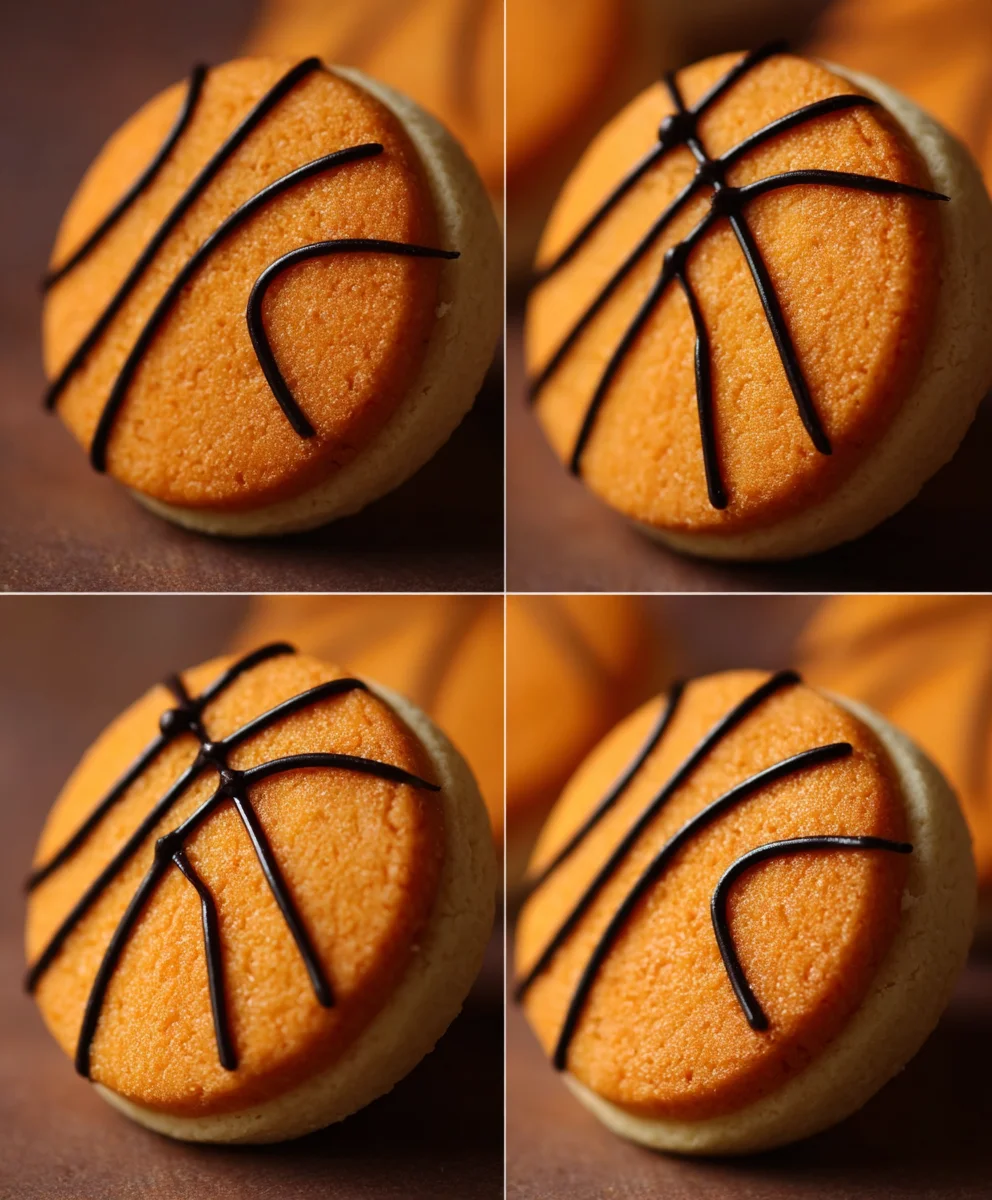
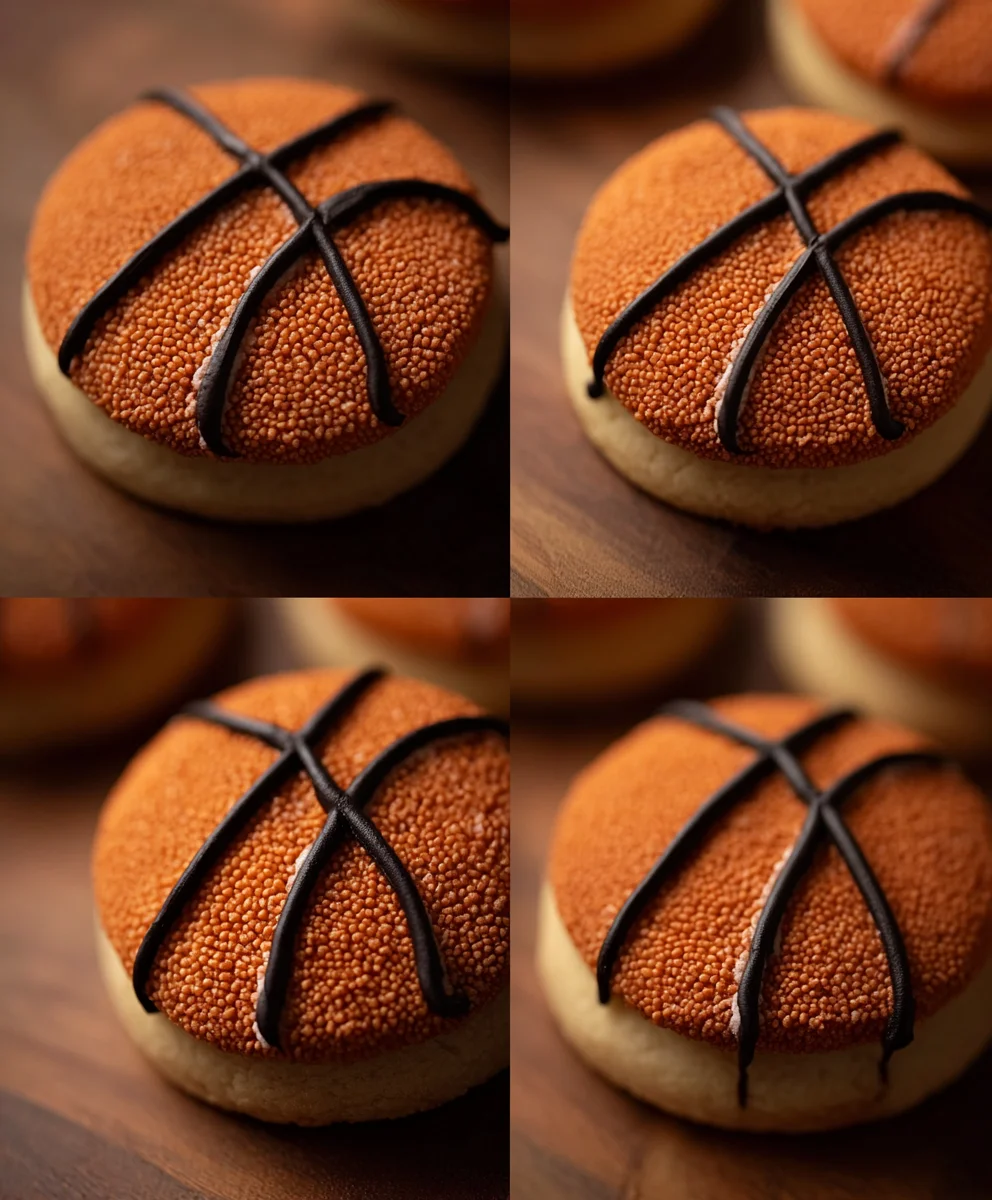
Now, take your orange dough. Roll it out to about ⅛-inch thickness. Using a slightly smaller round cookie cutter than you used for the base, cut out orange circles. Then, using a pastry wheel or a sharp knife, cut these orange circles into slightly curved strips to mimic the seams of a basketball. Alternatively, you can use a smaller circular cutter to cut out the center of the orange circles, leaving a ring. Carefully place these orange pieces onto the plain cookie bases, arrangin extractg the strips or rings to resemble basketball seams. For the lines, take small pieces of your black dough and roll them into very thin ropes, then carefully place them to form the characteristic lines of a basketball. This step requires a bit of patience and a steady hand. Gently press the seams into the orange dough to help them adhere.
Baking the Cookies
Bake for 10-12 minutes, or until the edges are lightly golden brown. The centers should still look slightly soft. Overbaking will make your cookies dry and less enjoyable. Keep a close eye on them, as oven temperatures can vary.
Decorating with Royal Icing
Making the Royal Icing
While the cookies are baking and cooling, prepare your royal icing. In a medium bowl, whisk together the confectioners’ sugar and milk until smooth. You want a thick, but pourable consistency. Add the light corn syrup, which will give your icing a nice sheen. If the icing is too thick, add a tiny bit more milk, a teaspoon at a time. If it’s too thin, add more confectioners’ sugar. Divide the icing into two small bowls. Leave one plain white for any extra details or for filling in gaps if needed. To the other bowl, add a tiny speck of orange gel food coloring, mixing until you achieve a slightly lighter shade of orange than your cookie dough. You can also make a separate small batch of black icing if you want to pipe finer lines.
Piping the Decorations
Transfer the orange icing to a piping bag fitted with a small round tip (about a Wilton tip #2 or #3). If you don’t have piping bags and tips, you can use a Ziploc bag with a tiny corner snipped off. Pipe thin lines of orange icing over the seams of your baked cookies, ensuring they are slightly raised for a 3D effect. If you used the ring method for the seams, pipe the orange icing into the center where you cut out the dough. Use black icing to pipe the characteristic basketball lines, connecting the orange seams. Allow the icing to set completely before handling or stacking the cookies. This usually takes at least an hour, but can take longer depending on humidity.
Conclusion:
And there you have it – a step-by-step guide to creating your very own Piping basketball cookies! These delightful treats are perfect for any sports-themed party, a fun afternoon activity with the kids, or simply as a way to show your love for the game. We’ve covered everything from preparing the dough to the final, intricate piping details that make these cookies truly stand out. Don’t be afraid to get creative; the joy of baking is in making it your own!
For serving, these Piping basketball cookies are fantastic on their own, but they also pair wonderfully with a glass of cold milk or a scoop of vanilla ice cream. Imagin extracte them scattered across a dessert table at a birthday party or presented as a thoughtful gift for a basketball enthusiast.
When it comes to variations, feel free to experiment with different cookie dough recipes – a chocogin extracte or gingerbread base could offer a fun twist! You could also play with the size of your basketballs, making mini cookies for bite-sized fun or larger ones for a statement piece. The possibilities are truly endless when it comes to personalizing your Piping basketball cookies. So, grab your piping bags and get ready to score a home run with these amazing cookies!
Frequently Asked Questions about Piping Basketball Cookies:
Can I make these cookies ahead of time?
Absolutely! Piping basketball cookies can be made a day or two in advance. Once the cookies are fully decorated and the icing has hardened, store them in an airtight container at room temperature. This will keep them fresh and delicious for your event.
What kind of icing is best for piping basketball details?
Royal icing is highly recommended for piping the details on your Piping basketball cookies. It dries hard and smooth, which gives you a clean, defined line for the basketball’s seams agin extractprevents smudging. You can adjust the consistency to achieve the desired flow for your piping.
Easy Piping Basketball Cookies-Fun Party Treat
Fun and easy basketball-themed cookies perfect for parties, featuring a simple cookie dough recipe and decorative piping.
Ingredients
-
1 cup (2 sticks) unsalted butter, softened
-
1 ½ cups granulated sugar
-
2 large eggs
-
1 teaspoon vanilla extract
-
3 cups all-purpose flour
-
1 teaspoon baking powder
-
½ teaspoon salt
-
Orange gel food coloring
-
Black gel food coloring
-
1 cup confectioners’ sugar
-
2-3 tablespoons milk
-
1 teaspoon light corn syrup
Instructions
-
Step 1
Cream together softened unsalted butter and granulated sugar until light and fluffy. Beat in eggs one at a time, followed by vanilla extract. In a separate bowl, whisk together flour, baking powder, and salt. Gradually add dry ingredients to wet ingredients, mixing until just combined. Do not overmix. -
Step 2
Divide dough into three equal portions. Leave one plain. Tint the second portion vibrant orange with gel food coloring. Tint the third portion a dark charcoal grey with a tiny amount of black gel food coloring. Flatten each portion into a disc, wrap, and refrigerate for at least 1 hour. -
Step 3
Preheat oven to 350°F (175°C). Line baking sheets with parchment paper. Roll out plain dough to ¼-inch thickness and cut 3-inch circles. Roll out orange dough to ⅛-inch thickness and cut slightly smaller circles. Cut orange circles into strips or rings to mimic seams. Arrange seams onto plain cookie bases. Roll black dough into thin ropes and place to form basketball lines, pressing gently to adhere. -
Step 4
Bake for 10-12 minutes, or until edges are lightly golden brown. The centers should still appear slightly soft. Allow cookies to cool completely on a wire rack. -
Step 5
Prepare royal icing: Whisk confectioners’ sugar and milk until smooth. Add light corn syrup for sheen. Adjust consistency as needed. Divide icing into two bowls. Leave one white. Tint the other a slightly lighter orange than the cookie dough. You can also prepare a small batch of black icing. -
Step 6
Transfer orange icing to a piping bag with a small round tip. Pipe thin lines of orange icing over the cookie seams for a raised effect. Use black icing to pipe the characteristic basketball lines, connecting the orange seams. Allow icing to set completely before handling.
Important Information
Nutrition Facts (Per Serving)
It is important to consider this information as approximate and not to use it as definitive health advice.
Allergy Information
Please check ingredients for potential allergens and consult a health professional if in doubt.


Leave a Comment