

Edible Chocolate Pinecones are the whimsical, delicious showstoppers your holiday table has been waiting for! Imagine the delighted gasps as your guests discover these incredibly realistic, yet completely delectable, woodland wonders. They’re more than just a dessert; they’re a conversation starter, a delightful surprise, and a testament to the joy of creating something truly magical in the kitchen. What makes these edible chocolate pinecones so special? It’s the incredible detail, the satisfying crunch of the chocolate, and the sheer fun of creating them. Whether you’re a seasoned baker or a beginner looking to impress, these pinecones offer a surprisingly accessible way to bring a touch of enchanted forest to your celebrations. Get ready to embrace your inner artisan and whip up a batch of these unforgettable treats!
Ingredients:
- 3 cups Chocolate Cinnamon Toast Crunch cereal
- 8 Honey Wheat Pretzel Twists
- 2/3 cup creamy peanut butter
- 1/3 cup Nutella or your favorite chocolate hazelnut spread
- 4 tablespoons salted butter, softened to room temperature
- 1 teaspoon pure vanilla extract
- 1 1/4 cups powdered sugar, plus more for dusting
Preparing the Pinecone Mixture
The magic of our Edible Chocolate Pinecones begins with creating a delightful, moldable mixture. In a large mixing bowl, add the Chocolate Cinnamon Toast Crunch cereal. These chocolatey, cinnamon-spiced morsels are the perfect base, providing both texture and a rich chocolate flavor that will form the outer layers of our pinecones. Next, gently crush about half of the cereal by hand or by pulsing it briefly in a food processor. You want a mix of whole pieces for structure and some smaller crumbs to bind everything together. Avoid pulverizing it into a fine powder; a varied texture is key to that authentic pinecone look.
In a separate, microwave-safe bowl, combine the softened salted butter, creamy peanut butter, and Nutella or chocolate hazelnut spread. Microwave these ingredients in 30-second intervals, stirring well after each interval, until the mixture is smooth and completely melted. This process should take about 1 to 1.5 minutes in total, depending on your microwave’s power. The goal is a homogenous, luscious spread that will act as the “glue” for our pinecone creation. Once melted and smooth, stir in the pure vanilla extract. The vanilla adds a subtle warmth and depth to the flavor profile, enhancing the chocolate and peanut butter notes.
Now, it’s time to bring it all together. Pour the melted butter, peanut butter, and Nutella mixture over the prepared Chocolate Cinnamon Toast Crunch cereal in the large bowl. Using a sturdy spatula or your clean hands, gently mix everything together until the cereal is evenly coated. You want to ensure every piece of cereal gets a kiss of that gooey, chocolaty binder. Be careful not to overmix, as this can make the cereal soggy. The mixture should be sticky and hold its shape when squeezed.
Shaping the Edible Chocolate Pinecones
This is where the artistry comes in! Take a small portion of the cereal mixture – about 2 to 3 tablespoons – and start shaping it into a cone. Begin by forming a rough cone shape in your palm. Then, gently press and mold the mixture to create a more defined, elongated cone, similar to the shape of a small pinecone. Don’t worry about perfection at this stage; slight imperfections will actually enhance the natural look of your edible creations.
Once you have a basic cone shape, it’s time to add the “scales.” Take one Honey Wheat Pretzel Twist and gently press it into the side of the cone, with the curved end sticking outwards. Continue adding pretzel twists around the entire cone, overlapping them slightly, to create the appearance of pinecone scales. You’ll want to start from the bottom and work your way up, making each layer slightly smaller as you go towards the tip. This layering technique is crucial for achieving a realistic pinecone silhouette. Some pretzel twists might break; this is perfectly fine! You can use smaller pieces to fill in any gaps or to create texture. If the mixture is too sticky to handle, you can lightly dampen your hands with water or dust them with a tiny bit of powdered sugar.
Repeat this shaping and “scaling” process for the remaining cereal mixture. You should aim to use all 8 pretzel twists, distributing them evenly among your pinecone creations. For a fuller pinecone, you might want to use about half a pretzel twist per “scale,” while for a more open look, you can use whole twists more sparsely. The key is to experiment and find what looks best to you. As you make each pinecone, place it on a parchment-lined baking sheet to prevent sticking.
Finishing Touches and Serving
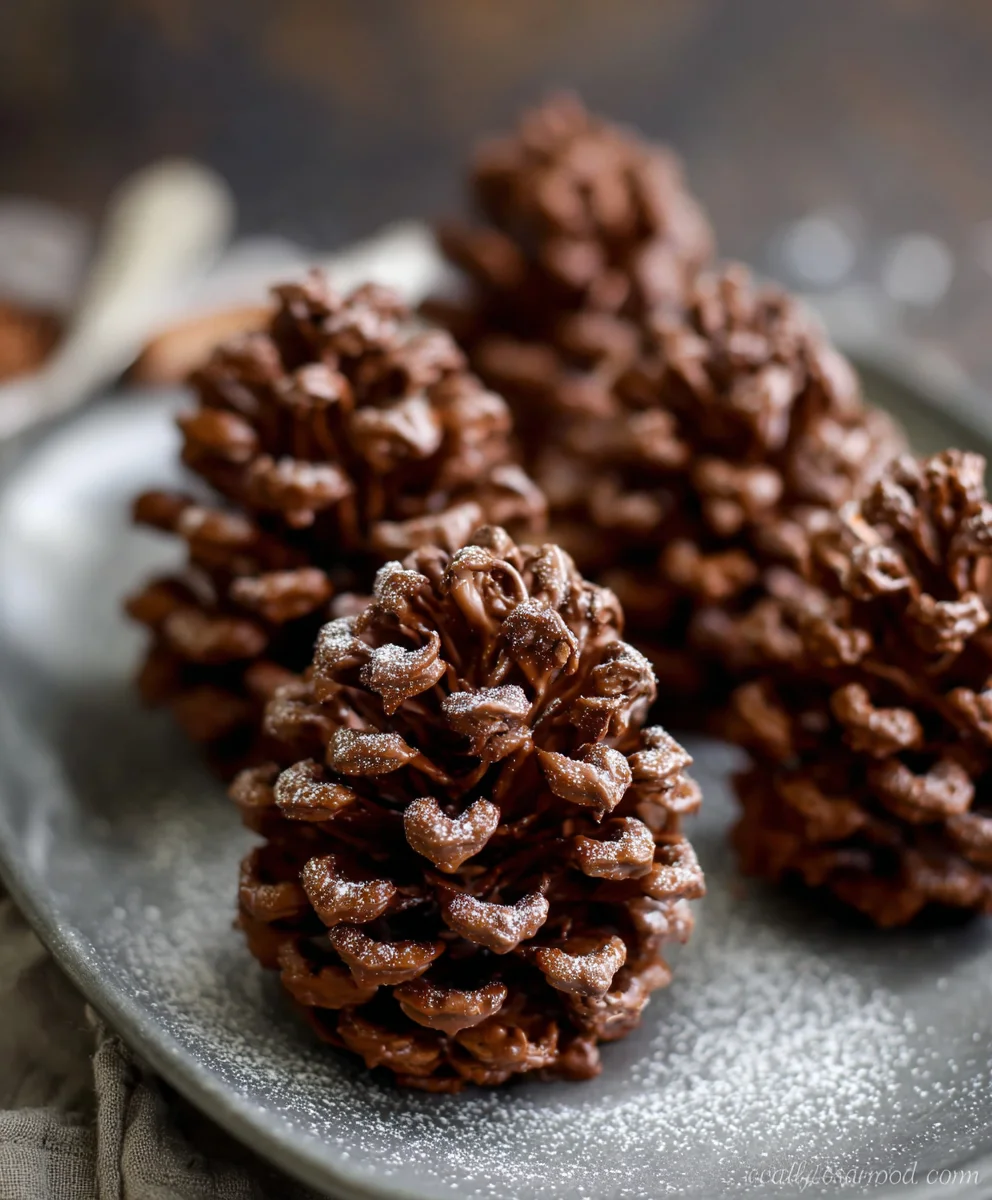
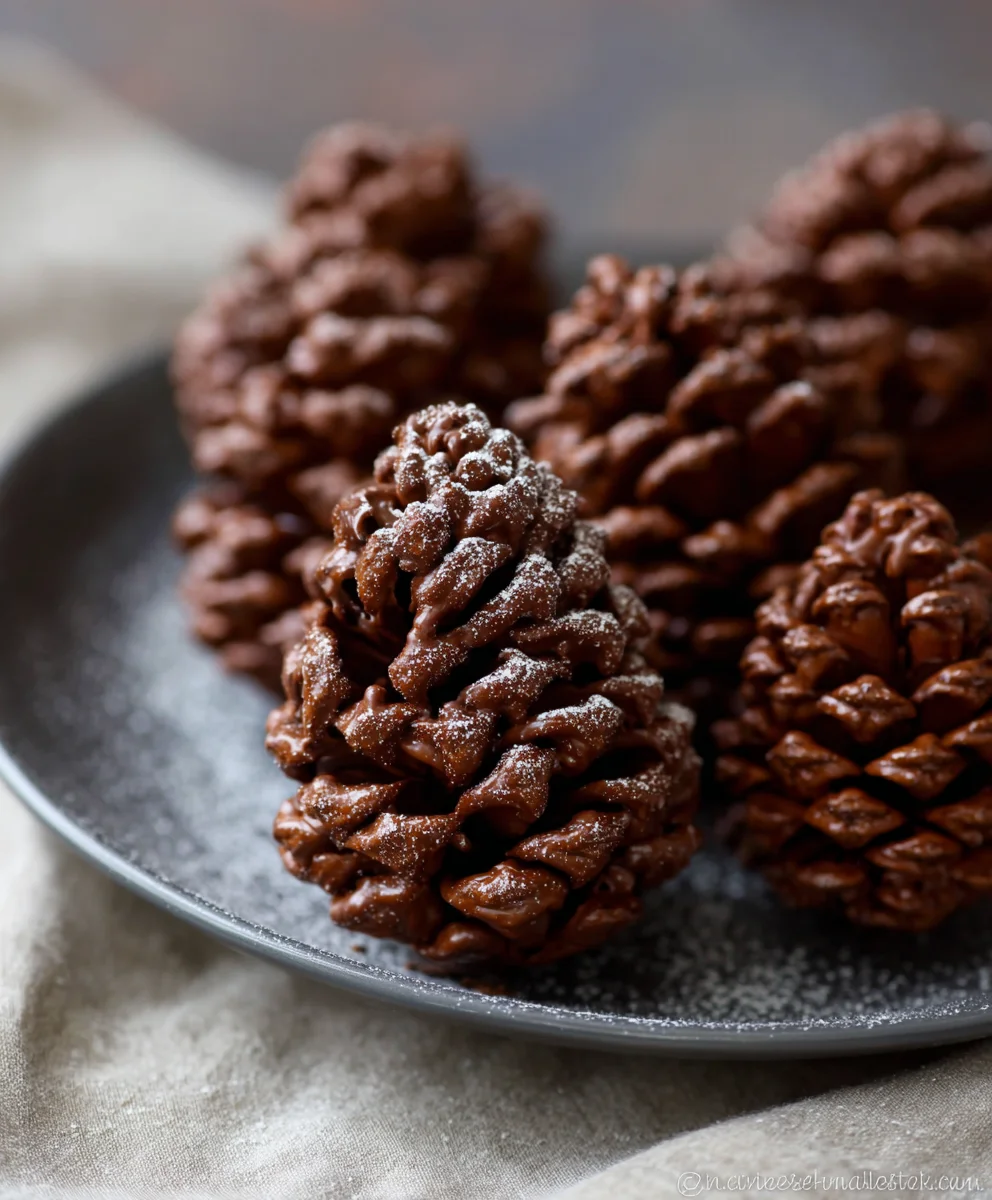
After all your Edible Chocolate Pinecones have been shaped and adorned with pretzel twist scales, it’s time for the final flourish. In a small bowl, combine the 1 1/4 cups of powdered sugar with about 2 to 3 tablespoons of water, or milk, or even a little bit of melted butter for added richness. Stir until you achieve a thick, glaze-like consistency. You want it to be pourable but not too thin. Add more liquid a teaspoon at a time if it’s too thick, or more powdered sugar if it’s too thin. This glaze will help set the pretzel twists and add a touch of elegance, mimicking the look of frost or morning dew on a pinecone.
Alternatively, for a lighter dusting effect, you can simply sift powdered sugar over the finished pinecones using a fine-mesh sieve. This creates a delicate, snowy appearance that is perfect for winter-themed treats. If you’re going for a more dramatic look, you can also lightly drizzle some of this glaze over the pinecones, allowing it to drip naturally down the sides.
Allow the Edible Chocolate Pinecones to set at room temperature for at least 30 minutes, or until the glaze has hardened. This allows the binder to firm up and the pretzel scales to adhere securely. Once set, your whimsical and delicious treats are ready to be admired and devoured. They make a fantastic addition to holiday dessert platters, a unique party favor, or a fun activity to make with children. The combination of crunchy cereal, smooth peanut butter, rich chocolate, and salty pretzels, all brought together with a sweet glaze, creates a delightful symphony of flavors and textures that will leave everyone asking for the recipe.
Conclusion:
And there you have it! Your very own batch of whimsical and utterly delicious Edible Chocolate Pinecones. This recipe is a fantastic way to bring a touch of nature and a whole lot of sweetness to any occasion, from holiday gatherings to a special woodland-themed party. The process is surprisingly straightforward, and the result is a treat that’s as beautiful as it is tasty. Don’t be afraid to get creative with your decorations – a dusting of powdered sugar can mimic frost, or a sprinkle of edible glitter can add a magical sparkle. These are perfect for gifting, as a centerpiece dessert, or simply enjoying with a warm cup of cocoa.
For serving, these pinecones are wonderful on their own, but they also make a stunning addition to a dessert platter alongside cookies and cakes. You could even arrange them on a bed of green fondant or buttercream frosting to create a miniature edible forest scene!
If you’re feeling adventurous, consider experimenting with different types of chocolate – dark chocolate for a richer flavor, or white chocolate for a lighter, sweeter profile. You can also add a pinch of cinnamon or chili powder to the chocolate for a subtle spice. I encourage you to give these Edible Chocolate Pinecones a try. They are guaranteed to impress and are a joy to make and share.
Frequently Asked Questions:
Q1: How should I store my Edible Chocolate Pinecones?
To keep your edible chocolate pinecones fresh and prevent melting, it’s best to store them in an airtight container at room temperature. Avoid direct sunlight or humid environments. If your kitchen tends to be very warm, a few hours in the refrigerator is acceptable, but allow them to come back to room temperature before serving for the best texture.
Q2: Can I make these pinecones ahead of time?
Absolutely! These are a fantastic make-ahead treat. Once completely cooled and set, they can be stored as described above for up to a week. This makes them ideal for busy periods like the holidays when you need to prepare elements of your dessert table in advance.
Edible Chocolate Pinecones-Easy Festive Treat
Create charming and delicious edible pinecones using cereal, peanut butter, Nutella, and pretzel twists. A fun and easy festive treat for any occasion.
Ingredients
-
3 cups Chocolate Cinnamon Toast Crunch cereal
-
8 Honey Wheat Pretzel Twists
-
2/3 cup creamy peanut butter
-
1/3 cup Nutella or chocolate hazelnut spread
-
4 tablespoons salted butter, softened
-
1 teaspoon pure vanilla extract
-
1 1/4 cups powdered sugar
Instructions
-
Step 1
Prepare the base by combining Chocolate Cinnamon Toast Crunch cereal. Gently crush about half of it to create a mix of whole pieces and crumbs. -
Step 2
In a microwave-safe bowl, melt softened butter, peanut butter, and Nutella in 30-second intervals until smooth. Stir in vanilla extract. -
Step 3
Pour the melted mixture over the cereal and mix until evenly coated. The mixture should be sticky and hold its shape. -
Step 4
Shape portions of the cereal mixture into cone shapes. Press Honey Wheat Pretzel Twists into the sides to create ‘scales’, starting from the bottom and overlapping them. -
Step 5
Repeat the shaping and scaling process for all the mixture, placing formed pinecones on a parchment-lined baking sheet. -
Step 6
Create a glaze by mixing powdered sugar with 2-3 tablespoons of water or milk until thick and pourable. Alternatively, sift powdered sugar over the pinecones for a dusting effect. -
Step 7
Allow the pinecones to set at room temperature for at least 30 minutes until the glaze hardens.
Important Information
Nutrition Facts (Per Serving)
It is important to consider this information as approximate and not to use it as definitive health advice.
Allergy Information
Please check ingredients for potential allergens and consult a health professional if in doubt.


Leave a Comment