

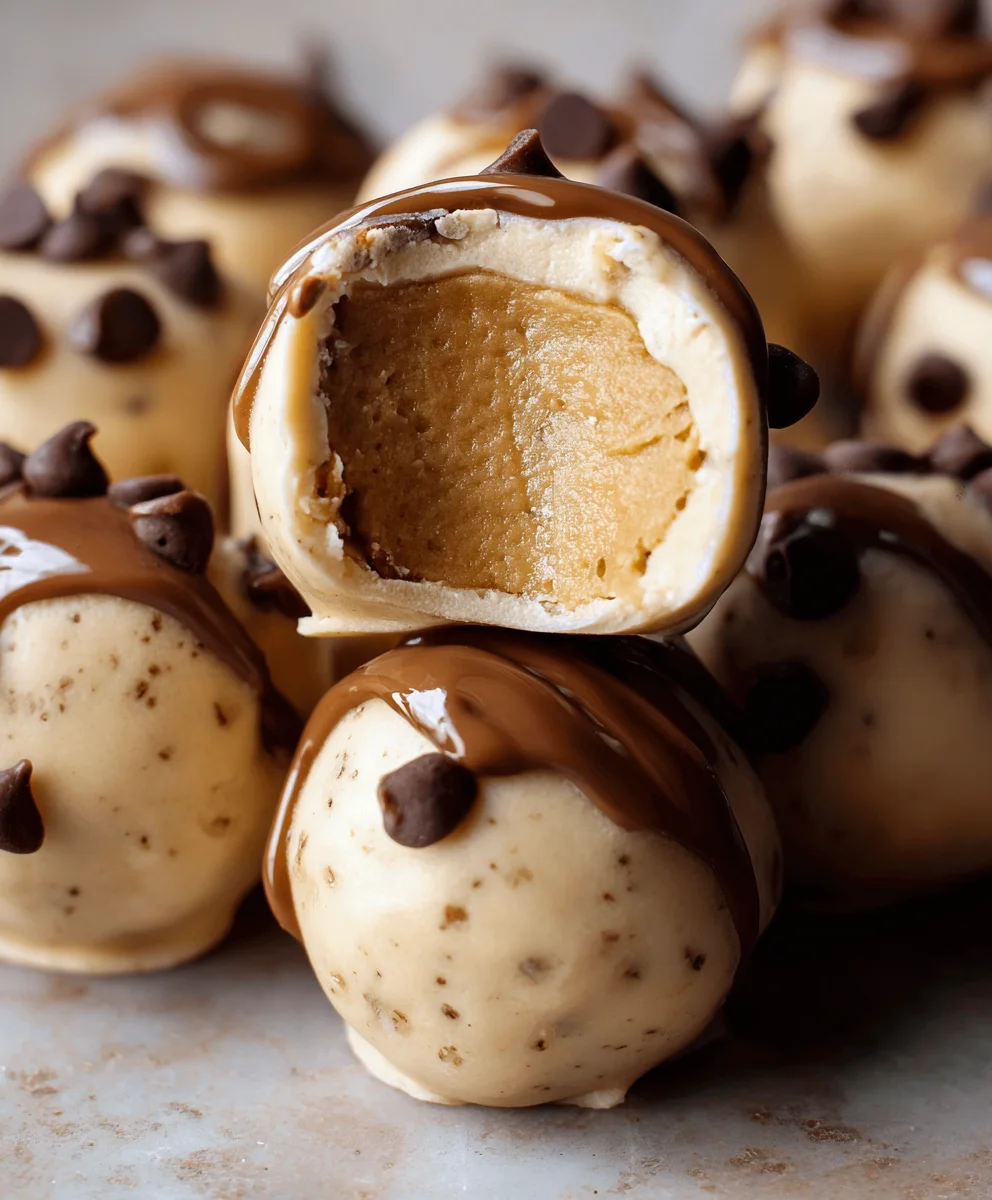
Frozen Greek Yogurt Peanut Butter Bites: Your Freezer’s New Best Friend!
Have you ever craved a treat that’s both decadent and guilt-free? A little something to curb your sweet tooth without derailing your healthy eating goals? Look no further than these incredible Frozen Greek Yogurt Peanut Butter Bites. These delightful morsels are the perfect solution for those moments when you need a quick, satisfying snack that feels like a true indulgence. People absolutely adore them because they strike that magical balance: the creamy tang of Greek yogurt melds beautifully with the rich, nutty flavor of peanut butter, creating a taste sensation that’s surprisingly complex yet incredibly simple to love. What truly sets these bites apart is their incredible versatility and the sheer ease of their preparation. They’re not just a dessert; they can be a breakfast boost, a post-workout reward, or a delightful afternoon pick-me-up. Plus, the satisfaction of knowing exactly what goes into them – wholesome ingredients that nourish your body – makes them an even sweeter choice. Get ready to make your freezer a haven of deliciousness with these amazing Frozen Greek Yogurt Peanut Butter Bites!
Ingredients:
- 1 cup creamy peanut butter (natural, unsweetened is ideal for a healthier option)
- ½ cup full-fat Greek yogurt (the thicker the better, for ultimate creaminess)
- 2 tablespoons honey or maple syrup (adjust to your sweetness preference)
- ½ teaspoon vanilla extract
- 1 tablespoon chia seeds
- Pinch of cinnamon
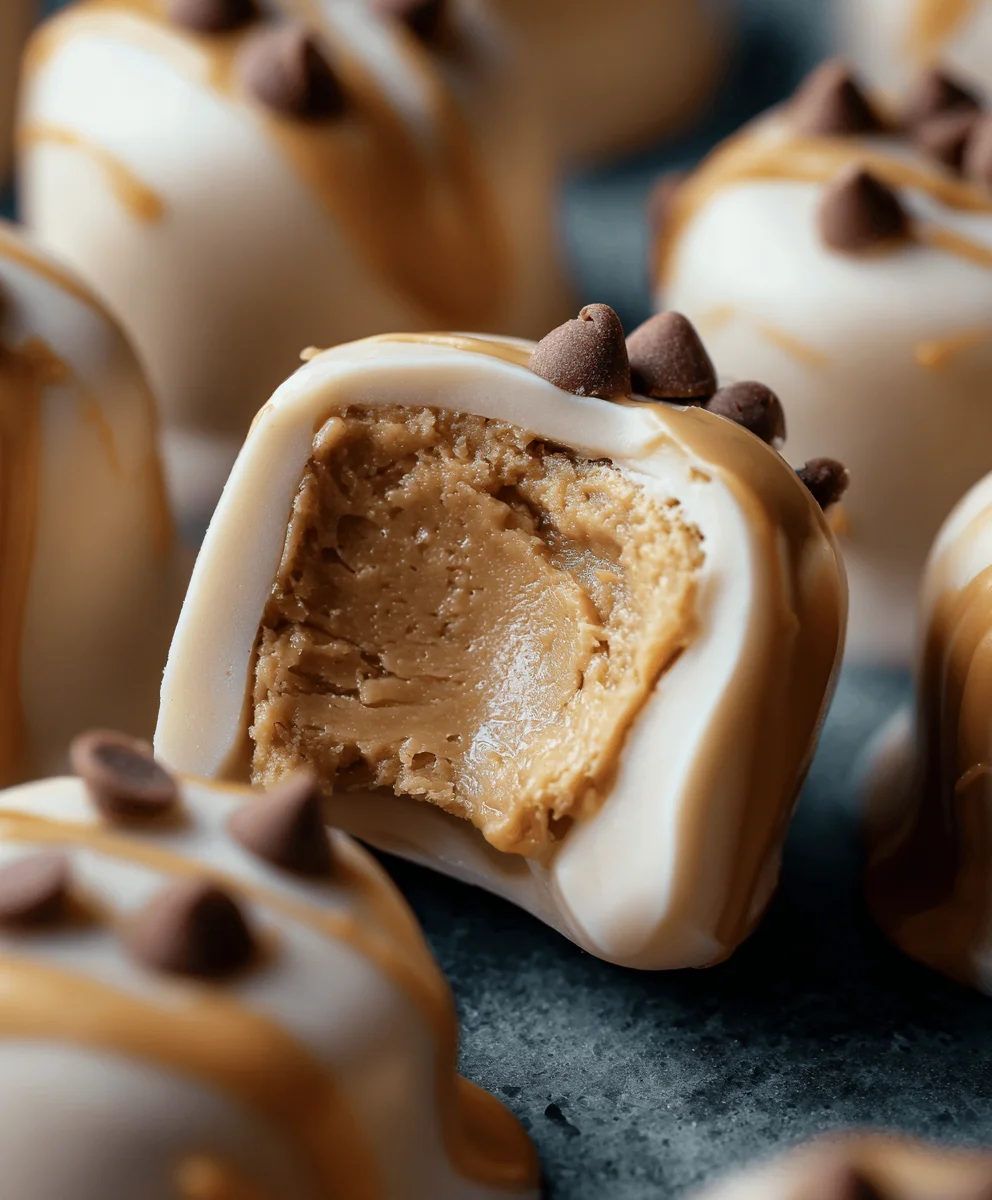
- ¼ cup mini chocolate chips or finely chopped chocolate
- Optional: A sprinkle of sea salt on top of each bite before freezing for a sweet and salty contrast.
Preparing Your Delicious Bites
Step 1: Combine the Base Ingredients
Begin extract by gathering a medium-sized mixing bowl. Into this bowl, scoop out your creamy peanut butter. If your peanut butter has separated, give it a good stir first to ensure a smooth, consistent texture. Next, add the full-fat Greek yogurt. Using Greek yogurt provides a wonderful tang and helps create a lighter, more scoopable texture compared to using only peanut butter. Then, drizzle in your honey or maple syrup. The amount can be adjusted based on how sweet you like your treats. Start with 2 tablespoons and you can always add a little more if you taste the mixture and feel it needs it. Finally, add the vanilla extract. This is where that lovely warm, cozy aroma starts to develop, promising a truly delightful finished product.
Step 2: Mix and Incorporate the Flavor Boosters
Now, it’s time to bring all these delicious ingredients together. Using a sturdy spoon or a spagin extracta, begin to thoroughly mix the peanut butter, Greek yogurt, honey (or maple syrup), and vanilla extract. You want to achieve a homogenous mixture where no streaks of peanut butter or yogurt are visible. This might take a minute or two of vigorous stirring. Once the base is well combined, it’s time to introduce the flavor and texture enhancers. Add the tablespoon of chia seeds. These little powerhouses will add a delightful little pop and boost the nutritional value. Then, add a pinch of cinnamon. Don’t be shy with the cinnamon; it adds a wonderful depth of flavor that complements the peanut butter and sweetness beautifully. Stir again until the chia seeds and cinnamon are evenly distributed throughout the mixture.
Step 3: Fold in the Chocolatey Goodness
This is where we add that extra touch of indulgence! Gently fold in the ¼ cup of mini chocolate chips or finely chopped chocolate. If you’re using a larger bar of chocolate, chop it into very small pieces so they distribute nicely within each bite. The key here is to fold them in rather than vigorously stirring. This helps prevent the chocolate from melting too much into the peanut butter mixture and ensures you get distinct pockets of chocolate in every bite. You want to see those little flecks of chocolate suspended throughout the creamy base. If you’re opting for the optional sea salt, you can either mix a tiny pinch into the chocolate chips before folding them in, or save it for a final garnish after shaping the bites.
Step 4: Shape and Prepare for Freezing
With your delicious mixture ready, it’s time to shape these into bite-sized treats. You have a couple of excellent options here. The easiest method is to use two small spoons or a mini ice cream scoop. Scoop out small, rounded portions of the mixture and place them onto a parchment-lined baking sheet. Alternatively, you can lightly grease your hands with a neutral oil (like coconut or a light vegetable oil) and roll the mixture into small balls. Aim for a size that’s easy to pop into your mouth in one or two bites. Ensure there’s a little space between each bite on the baking sheet so they don’t freeze together into one large mass. If you’re using the sea salt, sprinkle a tiny bit on top of each bite now.
Step 5: The Freezing Process
Once all your bites are shaped and arranged on the parchment-lined baking sheet, it’s time for the magic to happen – freezing! Carefully place the baking sheet into your freezer. Allow the bites to freeze until they are completely firm. This typically takes about 1 to 2 hours. The time can vary depending on the size of your bites and the temperature of your freezer. It’s crucial that they are solid before moving them to storage. Once they are frozen solid, you can transfer them to an airtight freezer-safe container or a heavy-duty freezer bag. This will keep them fresh and prevent freezer burn. For best quality, enjoy these delightful bites within 1 to 2 months.
Conclusion:
There you have it! Your simple guide to creating the delightful Frozen Greek Yogurt Peanut Butter Bites: Your Freezer’s New Best Friend. These little bites are not only incredibly easy to whip up but also offer a fantastic healthy treat that you can feel good about enjoying anytime. I truly hope you get a chance to make them and experience their creamy, satisfying goodness. They are perfect for a quick breakfast on the go, a post-workout refuel, or even a guilt-free dessert. Feel free to get creative with the toppings – a sprinkle of chia seeds or a drizzle of honey can elevate them even further. Don’t be afraid to experiment with different nut butters or even add a touch of cocoa powder for a chocolatey twist! Remember, the kitchen is your playground, so have fun with it.
Frequently Asked Questions:
Can I make these ahead of time?
Absolutely! That’s one of the best things about Frozen Greek Yogurt Peanut Butter Bites: Your Freezer’s New Best Friend. They are designed to be made in advance and stored in the freezer for weeks. Just ensure they are stored in an airtight container to prevent freezer burn.
What if I have a peanut allergy?
No problem! You can easily substitute the peanut butter with other nut or seed butters. Almond butter, cashew butter, or sunflower seed butter are all excellent alternatives that work wonderfully in these bites.
How long do they take to freeze?
Typically, the Frozen Greek Yogurt Peanut Butter Bites: Your Freezer’s New Best Friend will be firm enough to eat within 2-3 hours in your freezer. For best results and easier handling, I recommend letting them freeze for at least 4 hours, or preferably overnight.
Frozen Greek Yogurt Peanut Butter Bites Easy Recipe
Easy and delicious frozen bites made with Greek yogurt, peanut butter, and chocolate chips.
Ingredients
-
1 cup creamy peanut butter
-
½ cup full-fat Greek yogurt
-
2 tablespoons honey or maple syrup
-
½ teaspoon vanilla extract
-
1 tablespoon chia seeds
-
1 pinch cinnamon
-
¼ cup mini chocolate chips or finely chopped chocolate
Instructions
-
Step 1
Combine the peanut butter, Greek yogurt, honey or maple syrup, and vanilla extract in a medium bowl. Stir until smooth and homogenous. -
Step 2
Mix in the chia seeds and cinnamon until evenly distributed throughout the mixture. -
Step 3
Gently fold in the mini chocolate chips or finely chopped chocolate, ensuring pockets of chocolate are throughout the mixture. -
Step 4
Shape the mixture into bite-sized balls using two spoons or by rolling with lightly greased hands. Place on a parchment-lined baking sheet, leaving space between each bite. -
Step 5
Freeze the bites for 1-2 hours, or until firm. Transfer to an airtight container for storage.
Important Information
Nutrition Facts (Per Serving)
It is important to consider this information as approximate and not to use it as definitive health advice.
Allergy Information
Please check ingredients for potential allergens and consult a health professional if in doubt.
Leave a Comment