

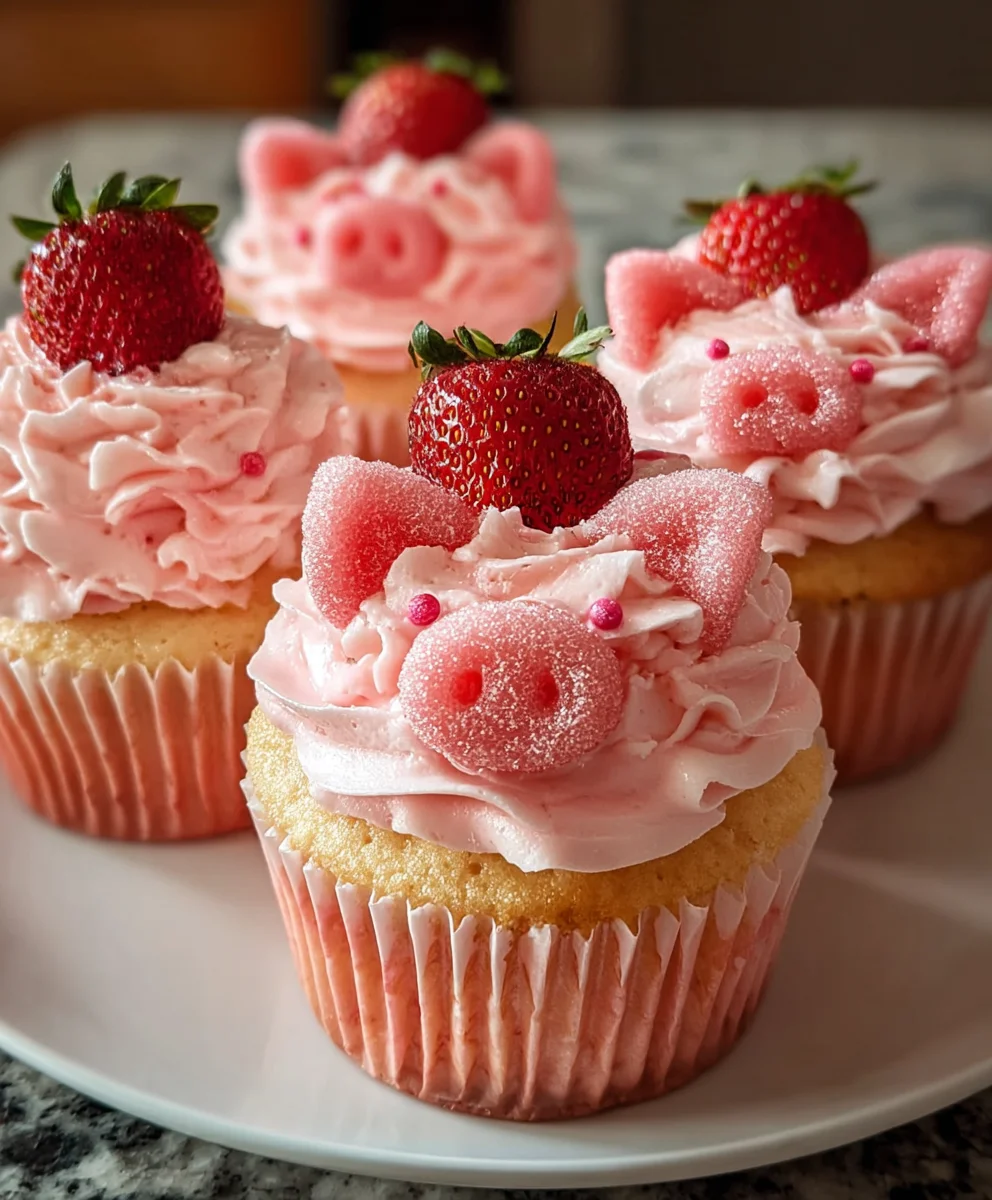
Strawberry Piggy Cupcakes are more than just a dessert; they’re an experience! Imagin extracte a burst of sweet, fresh strawberry flavor nestled within a perfectly moist vanilla cake, all topped with an adorable, edible piggy face. It’s no wonder these whimsical treats are a perennial favorite for birthdays, baby showers, or simply to bring a smile to anyone’s face. What makes these Strawberry Piggy Cupcakes truly special is the delightful combination of classic comfort and playful presentation. Each bite is a joyful explosion of summery sweetness, and the charming pig designs are guaranteed to be a conversation starter and a massive hit with kids and adults alike. Get ready to whip up some pure, unadulterated happiness that’s as fun to make as it is to devour.
Ingredients:
- 1½ cups all-purpose flour
- 1½ teaspoons baking powder
- ¼ teaspoon salt
- ½ cup unsalted butter, softened
- ¾ cup granulated sugar
- 2 large eggs
- 1 teaspoon vanilla extract
- ½ cup milk
- ½ cup fresh strawberries, diced
- 1 cup unsalted butter, softened (for frosting)
- 2 cups powdered sugar (for frosting)
- 2 tablespoons heavy cream or milk (for frosting)
- 1 teaspoon vanilla extract (for frosting)
- Pink food coloring (preferably gel)
- Fresh strawberries (sliced into rounds for snouts)
Making the Strawberry Piggy Cupcakes Batter
Dry Ingredients Combination
In a medium-sized mixing bowl, whisk together the all-purpose flour, baking powder, and salt. This ensures that the leavening agent and salt are evenly distributed throughout the flour, which is crucial for a consistent rise and flavor in your cupcakes. Set this bowl aside for now.
Creaming Butter and Sugar
In a large mixing bowl, using an electric mixer (or a sturdy whisk and a lot of elbow grease), cream together the ½ cup of softened unsalted butter and ¾ cup of granulated sugar. You want to beat these together until the mixture is light and fluffy. This process incorporates air into the butter and sugar, which contributes to a tender crum extractb in the final cupcake. Scrape down the sides of the bowl periodically to ensure everything is well combined.
Adding Eggs and Vanilla
Once the butter and sugar mixture is well creamed, add the 2 large eggs, one at a time, beating well after each addition. This gradual incorporation helps to emulsify the mixture, preventing it from separating. After the eggs are fully incorporated, stir in the 1 teaspoon of vanilla extract. The vanilla adds a wonderful aroma and depth of flavor to the cupcakes.
Incorporating Wet and Dry Ingredients
Now, it’s time to combine the wet and dry ingredients. Add about one-third of the flour mixture to the butter mixture and beat on low speed until just combined. Then, add half of the milk and beat until just combined. Repeat this process, alternating between the flour mixture and the milk, ending with the flour mixture. It’s important not to overmix at this stage, as overmixing can develop the gluten in the flour too much, leading to tough cupcakes. A few small lumps in the batter are perfectly fine.
Folding in the Diced Strawberries
Gently fold in the ½ cup of diced fresh strawberries into the batter. Use a spatula for this step, folding the strawberries in just until they are evenly distributed. Be careful not to mash the strawberries; you want to keep their shape so you get little bursts of strawberry flavor and moisture in each bite.
Baking the Piggy Cupcakes
Preparing for Baking
Preheat your oven to 350°F (175°C). Line a muffin tin with cupcake liners. I usually use about 12 standard-sized liners. This prevents the cupcakes from sticking to the tin and makes them easier to remove once baked.
Filling the Liners and Baking Time
Spoon the batter evenly into the prepared cupcake liners, filling each about two-thirds full. This allows enough room for the cupcakes to rise without overflowing. Place the muffin tin in the preheated oven and bake for 18-22 minutes, or until a toothpick inserted into the center of a cupcake comes out clean. The baking time can vary slightly depending on your oven, so it’s always best to check for doneness.
Cooling the Cupcakes
Once baked, remove the muffin tin from the oven and let the cupcakes cool in the tin for about 5-10 minutes. Then, carefully transfer them to a wire rack to cool completely. It’s essential that the cupcakes are entirely cool before frosting them, otherwise, the frosting will melt and slide right off.
Creating the Piggy Frosting and Decoration
Making the Buttercream Frosting
While the cupcakes are cooling, prepare the pink piggy frosting. In a large mixing bowl, beat the 1 cup of softened unsalted butter until it’s smooth and creamy. Gradually add the 2 cups of powdered sugar, about half a cup at a time, beating well after each addition. The mixture will become quite thick.
Achieving the Perfect Frosting Consistency
Add the 2 tablespoons of heavy cream or milk and the 1 teaspoon of vanilla extract to the butter and sugar mixture. Beat on medium speed until the frosting is light, fluffy, and has a smooth, spreadable consistency. If the frosting seems too thick, add another teaspoon of cream or milk, a little at a time, until you reach your desired consistency. If it’s too thin, you can add a little more powdered sugar.
Coloring the Frosting Pink
Now for the fun part – making them look like piggies! Add a small amount of pink food coloring to the frosting. Gel food coloring is excellent because it’s highly concentrated, so you only need a tiny bit to achieve a vibrant color. Start with a drop or two and mix thoroughly until you achieve a lovely piggy-pink hue. You can always add more color if needed, but it’s harder to take it away. Aim for a soft, rosy pink that reminds you of a cute little pig.
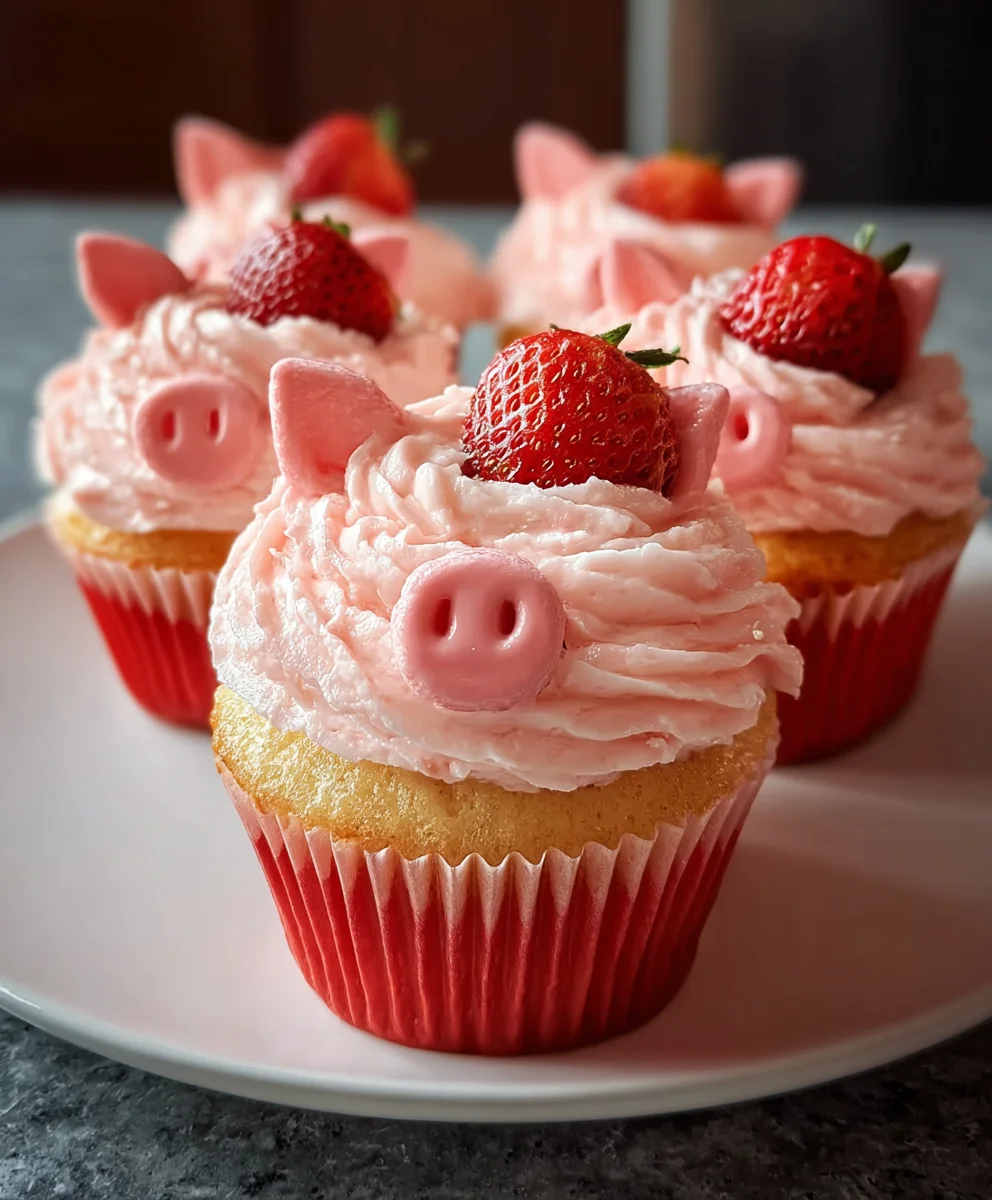
Assembling the Strawberry Piggy Cupcakes
Once your cupcakes are completely cool, it’s time to decorate! Frost each cupcake generously with the pink buttercream. You can use an offset spatula to spread it smoothly, or a piping bag with a round tip for a more finished look.
Adding the Pig Snouts and Ears
Now, take your sliced fresh strawberry rounds and gently press one into the top center of each frosted cupcake. These will serve as the adorable snouts for your little piggies. For ears, you can use small triangles cut from fondant if you have it, or even a small dab of extra pink frosting piped into a triangular shape. If using fondant, ensure it’s pressed securely into the frosting. If you don’t have fondant, you can try cutting small pieces from the remaining strawberries or even using small cookies. The key is to have fun and be creative with your piggie embellishments!
Conclusion:
There you have it – the delightful and adorable Strawberry Piggy Cupcakes! We hope you enjoyed this whimsical baking adventure. These cupcakes are a guaranteed hit for birthdays, parties, or simply as a fun afternoon treat. The fluffy strawberry cake paired with the creamy frosting and the charming piggy decorations creates a dessert that’s as pleasing to the eye as it is to the palate.
For serving, these Strawberry Piggy Cupcakes are best enjoyed fresh, perhaps with a glass of cold milk or a cup of tea. They also look fantastic as part of a larger dessert spread, adding a playful element to any celebration. Don’t be afraid to get creative with your decorations! You can add edible glitter for a bit of sparkle or use different colored fondant for the ears and noses.
We encourage you to give these Strawberry Piggy Cupcakes a try. Baking should be fun, and these cupcakes certainly bring that joy. Experiment with different frosting colors, sprinkles, or even add a touch of strawberry extract to the frosting for an extra burst of flavor. We can’t wait to hear about your own delightful creations!
Frequently Asked Questions:
Can I make the strawberry cake batter ahead of time?
Yes, you can prepare the strawberry cake batter up to 24 hours in advance. Store it in an airtight container in the refrigerator. Give it a good stir before pouring it into the cupcake liners, as it may separate slightly.
What if I don’t have strawberry extract for the frosting?
If you don’t have strawberry extract, you can still achieve a lovely strawberry flavor by using strawberry jam or preserves. Simply incorporate 1-2 tablespoons of your favorite strawberry jam into the frosting while mixing. Adjust the amount to your taste preference. You could also use freeze-dried strawberry powder for an intense flavor and vibrant color.
Strawberry Beef Cupcakes – Cute & Delicious Treats
Adorable and tasty strawberry cupcakes with a creamy frosting, decorated to look like cute piggies.
Ingredients
-
1½ cups all-purpose flour
-
1½ teaspoons baking powder
-
¼ teaspoon salt
-
½ cup unsalted butter, softened
-
¾ cup granulated sugar
-
2 large eggs
-
1 teaspoon vanilla extract
-
½ cup milk
-
½ cup fresh strawberries, diced
-
1 cup unsalted butter, softened
-
2 cups powdered sugar
-
2 tablespoons heavy cream or milk
-
1 teaspoon vanilla extract
-
Pink food coloring (preferably gel)
-
Fresh strawberries (sliced into rounds for snouts)
Instructions
-
Step 1
Combine dry ingredients: Whisk together flour, baking powder, and salt in a medium bowl. Set aside. -
Step 2
Cream butter and sugar: In a large bowl, beat ½ cup softened butter and ¾ cup sugar until light and fluffy. Add eggs one at a time, beating well after each, then stir in 1 tsp vanilla extract. -
Step 3
Incorporate wet and dry ingredients: Gradually add flour mixture and ½ cup milk to the butter mixture, alternating and beating on low speed until just combined. Do not overmix. -
Step 4
Fold in strawberries: Gently fold in ½ cup diced fresh strawberries. -
Step 5
Bake cupcakes: Preheat oven to 350°F (175°C). Line a muffin tin with 12 liners. Spoon batter into liners, filling two-thirds full. Bake for 18-22 minutes, or until a toothpick comes out clean. Cool in tin for 5-10 minutes, then transfer to a wire rack to cool completely. -
Step 6
Make frosting: Beat 1 cup softened butter until smooth. Gradually add 2 cups powdered sugar, beating well. Add 2 tbsp heavy cream or milk and 1 tsp vanilla extract. Beat until light and fluffy. -
Step 7
Color frosting pink: Add a small amount of pink food coloring to the frosting and mix until a desired piggy-pink hue is achieved. -
Step 8
Decorate cupcakes: Frost cooled cupcakes generously with pink frosting. Press sliced strawberry rounds onto the top center of each cupcake for snouts. Add fondant triangles or piped frosting for ears.
Important Information
Nutrition Facts (Per Serving)
It is important to consider this information as approximate and not to use it as definitive health advice.
Allergy Information
Please check ingredients for potential allergens and consult a health professional if in doubt.


Leave a Comment