

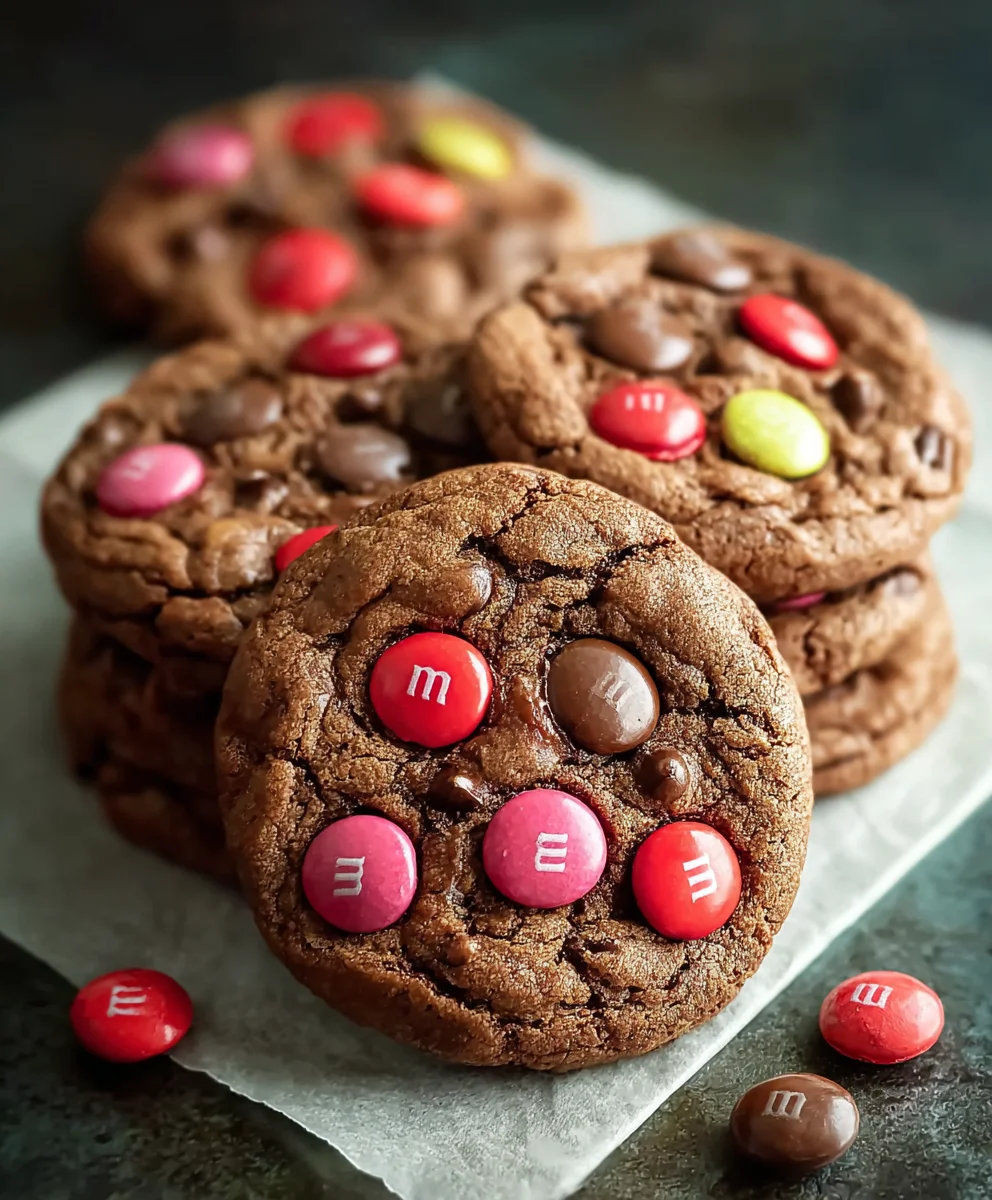
Chocolate M&M Cookies are more than just a delightful dessert; they are a vibrant celebration of flavor and fun! I vividly recall the first time I baked a batch, watching those colorful candies transform into molten jewels within a golden, chewy embrace. There’s an undeniable magic in combining the beloved classic chocolate chip cookie with the satisfying crunch and vibrant hues of M&M’s, creating a confection that truly captivates both the eyes and the palate. It’s an instant mood-lifter, promising a burst of joy with every single bite.
While the classic chocolate chip cookie has a storied past, the addition of M&M’s brings a playful, modern twist that has cemented its place in kitchens worldwide. Invented in 1941, M&M’s quickly became a household favorite, known for their iconic ‘melts in your mouth, not in your hand’ slogan. Integrating these delightful candies into a soft, buttery cookie dough results in a masterpiece loved by all ages. People adore these cookies not just for their incredible taste – that perfect balance of sweet chocolate and rich cookie – but also for their captivating texture: a soft chewiness punctuated by the satisfying, subtle crispness of the candy shell. Their festive appearance, making every plate look like a party, is just an added bonus! I’m so excited to share how you can bake your own batch of these truly unforgettable Chocolate M&M Cookies.
Ingredients:
- 2 ¼ cups (270g) all-purpose flour
- 1 teaspoon baking soda
- ½ teaspoon salt
- 1 cup (2 sticks or 226g) unsalted butter, softened to room temperature
- ¾ cup (150g) granulated sugar
- ¾ cup (160g) packed light brown sugar
- 2 large eggs, at room temperature
- 1 teaspoon pure vanilla extract
- 1 cup (170g) semi-sweet chocolate chips, good quality for melting beautifully
- ½ cup (90g) M&M’s Plain Chocolate Candies, plus an extra ¼ cup for pressing onto the tops of the cookies after baking
- As a specific instruction integral to our recipe, we will be performing the action to “Stir in chocolate chips and 1/2 cup M&Ms.”
Preparation Time:
20 minutes (plus 30 minutes chilling time)
Baking Time:
10-12 minutes per batch
Yields:
Approximately 3 dozen cookies
Equipment You’ll Need:
- Large mixing bowls
- Electric mixer (stand mixer with paddle attachment or hand mixer)
- Whisk
- Rubber spatula
- Measuring cups and spoons
- Baking sheets
- Parchment paper or silicone baking mats
- Cookie scoop (1.5 tablespoon capacity)
- Wire cooling rack
Instructions:
Getting Started and Dry Ingredients
-
Preheat Your Oven and Prepare Your Baking Sheets: Before we dive into the fun, let’s get our baking environment ready for optimal success. I always begin by preheating my oven to a precise 375°F (190°C). Achieving this consistent temperature before your cookies even enter the oven is absolutely critical for promoting even baking and ensuring that desirable golden-brown edge. Next, I meticulously line my baking sheets with either parchment paper or high-quality silicone baking mats. This crucial step is not just about making cleanup a breeze; it’s a true lifesaver for preventing your precious cookies from sticking, allowing them to release cleanly and perfectly formed every single time. Trust me, this small preparation detail makes a monumental difference in the final outcome of your Chocolate M&M Cookies!
-
Whisk Together the Dry Ingredients: In a medium-sized mixing bowl, bring together your 2 ¼ cups of all-purpose flour, 1 teaspoon of baking soda, and ½ teaspoon of salt. I dedicate a good 30 seconds to a minute to give these a thorough whisk. This isn’t merely about mixing; it’s a deliberate action to aerate the flour, making it lighter, and, more importantly, to ensure that the baking soda and salt are uniformly distributed throughout the mixture. This even distribution is fundamental to helping your cookies achieve a beautiful, consistent rise and guarantees that every single bite is perfectly balanced in flavor, with no unexpected pockets of salt or leavening agent.
Creaming the Wet Ingredients
-
Cream the Butter and Sugars: Now, we arrive at what I consider the very heart of many truly great cookie recipes! In a spacious large mixing bowl, employing your electric mixer fitted with the paddle attachment (or a reliable hand mixer), initiate beating your 1 cup (which is equivalent to 2 sticks or 226g) of unsalted butter on a medium speed. Continue this process until the butter transforms into a wonderfully light and creamy consistency, typically taking about 1-2 minutes. The secret here is butter that is truly softened to room temperature – not cold and hard, which prevents proper creaming, nor melted, which would lead to excessively spreading cookies. Once the butter achieves that ideal fluffy texture, introduce the ¾ cup of granulated sugar and the ¾ cup of firmly packed light brown sugar. Elevate the mixer speed to medium-high and continue beating for an additional 2-3 minutes. This critical phase, known as “creaming,” is where you meticulously incorporate air into the mixture. You’ll visibly observe the mixture becoming significantly lighter in both color and texture, evolving into an airy, pale cloud-like substance. Do not be tempted to rush this step; it is paramount to developing that signature chewy and tender texture that we all adore in our Chocolate M&M Cookies.
-
Add the Eggs and Vanilla: With the mixer diligently running on medium speed, carefully crack in one large egg at a time, ensuring you beat thoroughly after each individual addition. It is vitally important to allow each egg ample time to become fully incorporated into the butter and sugar mixture before proceeding to add the next. I personally aim to beat for approximately 30 seconds after each egg, allowing the mixture to emulsify properly. Once both eggs are gracefully integrated and the mixture presents a smooth, cohesive appearance, pour in your 1 teaspoon of pure vanilla extract. Continue to beat for another 30 seconds, just until everything is beautifully combined and that irresistible, warm vanilla fragrance begins to waft through your kitchen. The vanilla, in my opinion, adds such a delightful warmth and profound depth that wonderfully complements the rich chocolate flavors we’re about to introduce.
Combining and Adding Mix-ins
-
Gradually Add Dry Ingredients to Wet: At this juncture, reduce your electric mixer’s speed to a low setting. Systematically add the whisked dry ingredients (our thoughtfully combined flour, baking soda, and salt mixture) to the wet ingredients. It’s best to do this in three distinct additions, mixing just until the ingredients are combined after each increment. The golden rule at this stage is absolutely not to overmix. Excessive mixing of the flour can lead to an overdevelopment of gluten, which unfortunately results in tough, dense cookies – and what we’re striving for are gloriously tender, delightfully chewy ones! The moment you can no longer discern any visible streaks of dry flour, it’s time to cease the mixer. I frequently find it beneficial to complete the final blending of the last traces of dry ingredients by hand with a sturdy rubber spatula; this offers a greater degree of control and helps prevent any inadvertent overmixing.
-
Stir in the Goodies: Now, my friends, for the moment we’ve all been eagerly anticipating – the introduction of our star ingredients! This is precisely the point where we will thoughtfully and deliberately Stir in chocolate chips and 1/2 cup M&Ms. Using your reliable and sturdy rubber spatula, gently fold in the full 1 cup of semi-sweet chocolate chips along with the ½ cup of M&M’s Plain Chocolate Candies. My personal goal here is to ensure they are meticulously and evenly distributed throughout every inch of the cookie dough. This way, each and every single cookie, without exception, will boast a delightful and generous mix of both rich, chocolatey goodness and that vibrant, colorful crunch that only M&M’s can provide. Oh, and don’t forget that extra ¼ cup of M&M’s we prudently reserved for later – those little gems are specifically for making our baked cookies extra visually appealing and irresistibly enticing!
-
Chill the Dough (Optional but Recommended): For those seeking the absolute best texture, and to judiciously prevent your cookies from spreading excessively during baking, I cannot recommend chilling the dough enough. This step, while requiring a bit of patience, truly elevates the final product. Gently cover the bowl with plastic wrap and transfer it to the refrigerator for a minimum of 30 minutes, or if time allows, you can even chill it for up to 24 hours. A longer chilling period isn’t just about firming up the butter; it allows the various flavors to meld and deepen beautifully, resulting in cookies that are notably thicker, chewier, and possess a more concentrated, complex flavor profile. If you find yourself in a bit of a rush, even just 30 minutes of chilling will make a discernible difference, but if you have the luxury of time, letting it chill longer is a decision you won’t regret!
Baking the Cookies
-
Scoop and Arrange the Dough: Once your cookie dough has achieved its perfectly chilled state, it’s time for the truly satisfying part – transforming it into individual cookies! I highly recommend using a 1.5-tablespoon cookie scoop to drop uniformly rounded balls of dough onto your already prepared baking sheets. Consistency in size is key for even baking, and a scoop helps tremendously with this. As you arrange them, make sure to leave a generous distance of about 2 inches of space between each cookie dough ball. Remember, these delightful treats will expand slightly in the oven, and we want to grant them ample room to spread into beautifully round, distinct cookies without the unfortunate incident of merging into one colossal, shapeless cookie mass!
-
Bake to Golden Perfection: Carefully slide one baking sheet at a time into your perfectly preheated 375°F (190°C) oven. Allow them to bake for a precise duration of 10-12 minutes, or until you observe the edges turning a lovely, light golden brown while the centers still maintain a slight softness and a puffy appearance. It’s important to note that the exact baking time can exhibit slight variations depending on the unique characteristics of your particular oven, so I always advise keeping a vigilant eye on them. For that coveted perfect chewy-soft texture that melts in your mouth, I typically retrieve my cookies from the oven when their centers look just barely set. Don’t worry if they seem a little underdone; they will continue their baking journey and firm up beautifully as they cool on the hot baking sheet.
-
Add Extra M&Ms (Optional but Highly Recommended!): This is, without a doubt, my absolute secret weapon for achieving truly bakery-worthy M&M cookies that look as incredible as they taste! Immediately after you carefully remove the baking sheet from the oven, while the cookies are still wonderfully warm and pliable, take a moment to gently press a few of those thoughtfully reserved M&M’s onto the tops of each cookie. The residual heat from the freshly baked cookies will work its magic, helping the M&M’s adhere beautifully and securely, thus creating that iconic, vibrant, and utterly irresistible M&M cookie look. This step isn’t solely for enhancing the aesthetic appeal; it genuinely elevates the overall M&M experience, ensuring a burst of colorful chocolate with every single delightful bite!
Cooling and Enjoying
-
Cool on the Baking Sheet: It’s tempting to want to devour them right away, but patience is a virtue here! Allow your newly baked cookies to cool gracefully on the baking sheet for a crucial period of 5-10 minutes before you even think about transferring them. This initial cooling period directly on the hot sheet is absolutely vital. It grants the cookies the necessary time to finish baking gently from the residual heat and, more importantly, to set up properly, thereby preventing them from crumbling or falling apart when you eventually try to move them. Trust me, resisting the urge for immediate gratification pays off immensely in the structural integrity of your cookies!
-
Transfer to a Wire Rack: After their essential initial rest on the baking sheet, carefully and delicately transfer the now slightly cooled cookies to a wire rack to allow them to cool completely. Cooling completely on a wire rack is crucial because it permits air to circulate freely around all sides of each cookie. This essential airflow prevents any undesirable sogginess and ensures that they maintain their delightfully crisp edges and wonderfully chewy centers. If you possess superhuman willpower, you might even manage to let them cool fully – though I, myself, often succumb to the irresistible temptation and sneak one or two while they’re still delightfully warm. Who could possibly blame us?
-
Serve and Store: Your delectable Chocolate M&M Cookies are now, finally, ready to be enthusiastically enjoyed! They are, in my humble opinion, absolutely perfect when paired with a tall, frosty glass of cold milk, creating a classic and comforting treat. For optimal storage, once your cookies have cooled completely to room temperature, place them in an airtight container. They will maintain their freshness and wonderful texture at room temperature for up to 5 days. Should you wish to preserve their deliciousness for an extended period, you have the excellent option of freezing them for up to 3 months. When freezing, I recommend separating layers with parchment paper to prevent any sticking. They thaw beautifully at room temperature, making them a perfect, convenient option for a quick and satisfying treat whenever a sudden craving for these cheerful cookies strikes!
Conclusion:
And there you have it, my dear fellow bakers! We’ve journeyed through the simple, joyful process of creating what I genuinely believe are some of the most delightful treats you’ll ever pull from your oven. If you’re looking for a dessert that effortlessly combines nostalgia, vibrant color, and an unbeatable chocolatey chew, then this recipe for Chocolate M&M Cookies is not just a suggestion; it’s practically a culinary decree. These aren’t just any cookies; they’re an experience, a little burst of happiness in every bite. They offer that perfect balance of a slightly crisp edge with a wonderfully soft, gooey center, studded generously with those iconic candy-coated chocolates that everyone adores. Whether you’re a seasoned baker or just dipping your toes into the delightful world of home baking, you’ll find this recipe incredibly forgiving and immensely rewarding. It’s a testament to the fact that sometimes, the simplest pleasures are truly the best, especially when they involve chocolate and colorful candies.
What makes these cookies an absolute must-try? Beyond their incredible flavor and texture, it’s their universal appeal. Kids go wild for the bright colors and the satisfying crunch of the M&M shells, while adults appreciate the rich chocolate dough and the sheer comfort these cookies provide. They’re the kind of treat that brings a smile to anyone’s face, making them perfect for literally any occasion. Think about it: a dreary afternoon instantly brightened by a warm cookie, a school bake sale made infinitely more appealing, or a simple weeknight dessert elevated to something truly special. The magic lies in their simplicity and their ability to evoke pure, unadulterated joy. Plus, the aroma that fills your kitchen while these beauties are baking is a treat in itself – a warm, sweet, chocolatey hug that promises deliciousness to come. Trust me, once you experience the joy of biting into a freshly baked one, still warm and slightly melty, you’ll understand exactly why these have become a staple in my kitchen and why I’m so excited for them to become a staple in yours too.
Now, let’s talk about how to truly savor these masterpieces or even give them your own unique spin. While these cookies are utterly phenomenal straight off the cooling rack, still boasting that delightful warmth and irresistible aroma, there are countless ways to enjoy them. Imagine pairing a couple of these warm, chewy delights with a tall, frosty glass of milk – a classic combination that never, ever disappoints. For the coffee lovers among us, a Chocolate M&M Cookie provides the perfect sweet counterpoint to a rich espresso or a creamy latte. And if you’re feeling extra indulgent (which, let’s be honest, you absolutely should be), try sandwiching a scoop of your favorite vanilla bean ice cream between two of them for an epic ice cream cookie sandwich that will make your taste buds sing. These cookies also make fantastic additions to packed lunches, picnic baskets, or as thoughtful homemade gifts for friends and family. Their vibrant colors make them particularly festive for holidays – imagine using red and green M&M’s for Christmas, pastels for Easter, or orange and black for Halloween. The possibilities for enjoyment are truly endless, limited only by your imagination and your appetite!
Feeling adventurous and want to put your own stamp on this already incredible recipe? Go for it! This base cookie dough is incredibly versatile. Instead of classic M&M’s, why not try mini M&M’s for a more uniform candy distribution, or peanut M&M’s if you love that nutty crunch? You could also mix in other types of chocolate chips – white chocolate, dark chocolate, or even a combination – to add extra layers of flavor. For an added textural element, consider throwing in a handful of chopped nuts like pecans or walnuts. A dash of almond extract alongside the vanilla can introduce a subtle yet intriguing flavor profile. Or, if you’re baking for a specific theme or event, use M&M’s in custom colors to match. The beauty of these Chocolate M&M Cookies is their adaptability; they’re a fantastic canvas for your creativity. Don’t be afraid to experiment with different mix-ins or even a sprinkle of sea salt on top before baking to enhance the chocolate flavor. Every variation brings a new dimension to this beloved cookie, ensuring that you can tailor them perfectly to your preferences or to suit any occasion. It’s all about having fun in the kitchen and making them uniquely yours!
So, what are you waiting for? I wholeheartedly encourage you to roll up your sleeves, gather your ingredients, and dive into the wonderful world of baking these fantastic cookies. There’s something truly magical about the process of creating something delicious from scratch, and even more magical when that creation is met with gasps of delight and requests for “just one more.” Once you’ve made a batch (or two, or three!), I would absolutely love to hear about your experience. Did you stick to the original recipe, or did you venture into some exciting variations? What was your favorite part of the baking process? Most importantly, how quickly did they disappear from your cookie jar? Please don’t hesitate to share your thoughts, your successes, and even any questions you might have in the comments section below. Even better, snap a photo of your beautiful creations and share them on social media! Tag me, let me know you tried them, and let’s spread the cookie love far and wide. Baking is meant to be shared, and I can’t wait to see your delightful creations. Happy baking, my friends, and prepare to fall head over heels for these truly irresistible treats!
People Also Ask:
Q: How do I store Chocolate M&M Cookies to keep them fresh?
A: To keep your delicious Chocolate M&M Cookies fresh and chewy, store them in an airtight container at room temperature. A cookie jar with a good seal or a plastic container works perfectly. Placing a slice of bread in the container can also help them stay soft longer by absorbing moisture.
Q: Can I freeze Chocolate M&M Cookies?
A: Absolutely! You can freeze both baked cookies and raw cookie dough. For baked cookies, once they’re completely cooled, place them in a single layer on a baking sheet to flash freeze for about an hour, then transfer them to a freezer-safe bag or container. They’ll stay fresh for up to 3 months. For cookie dough, scoop balls onto a parchment-lined baking sheet, flash freeze, then transfer to a freezer bag. You can bake them directly from frozen, adding a couple of extra minutes to the baking time.
Q: Why did my M&M cookies spread too much and come out flat?
A: There are a few common culprits for flat cookies. Your butter might have been too soft (it should be softened, not melted), or you might have used too much butter. Chilling the dough for at least 30 minutes before baking can also significantly help prevent spreading. Additionally, make sure your baking powder/soda isn’t expired, and avoid over-mixing the dough, which can develop gluten too much. Using a cool baking sheet for each batch is also key.
Q: What kind of M&M’s can I use in these cookies?
A: The beauty of these Chocolate M&M Cookies is their versatility! While classic M&M’s are fantastic, feel free to experiment with different varieties. Peanut M&M’s add a lovely crunch, Mini M&M’s disperse more evenly, and seasonal M&M’s can add a festive touch for holidays. You can also mix in M&M’s with other chocolate chips for an extra chocolatey punch!
Q: How long do these Chocolate M&M Cookies last?
A: When stored properly in an airtight container at room temperature, these cookies typically stay fresh and delicious for about 3-5 days. After that, they might start to dry out a bit, but they’ll still be perfectly edible. If you want them to last longer, freezing is your best bet!
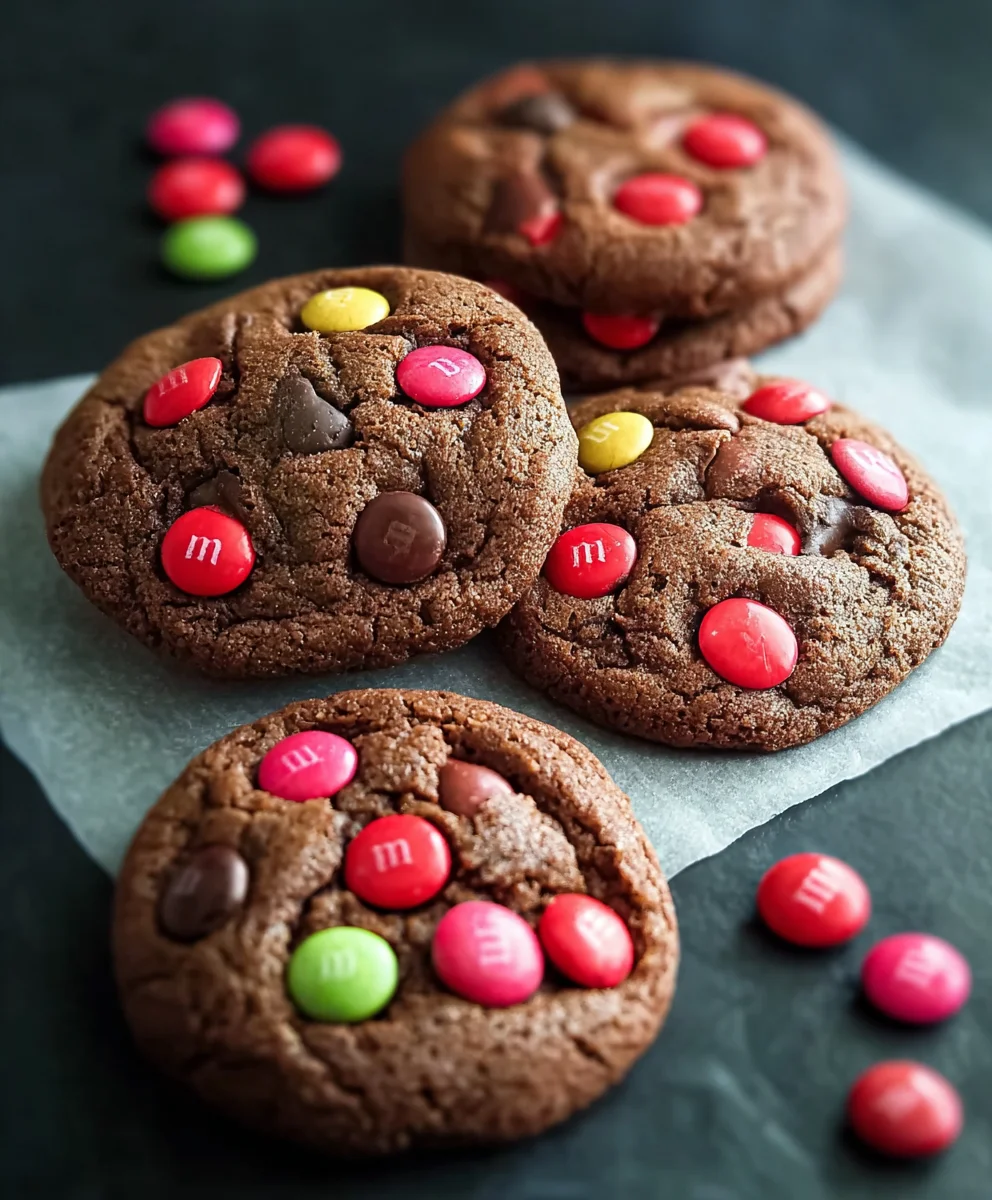
Best Chocolate M&M Cookies – Quick & Colorful Bites!
Bake the best chewy and colorful M&M cookies! This recipe features a perfect blend of chocolate chips and M&M’s candies, quick to prepare, and irresistibly delicious for a vibrant treat.
Ingredients
-
2 ¼ cups (270g) all-purpose flour
-
1 teaspoon baking soda
-
½ teaspoon salt
-
1 cup (226g) unsalted butter, softened
-
¾ cup (150g) granulated sugar
-
¾ cup (160g) packed light brown sugar
-
2 large eggs
-
1 teaspoon pure vanilla extract
-
1 cup (170g) semi-sweet chocolate chips
-
½ cup (90g) M&M’s Plain Chocolate Candies, plus ¼ cup for topping
Instructions
-
Step 1
Preheat oven to 375°F (190°C). Line baking sheets with parchment paper or silicone mats. -
Step 2
In a medium bowl, whisk together flour, baking soda, and salt. -
Step 3
In a large bowl, cream softened butter with granulated and light brown sugars using an electric mixer until light and fluffy, about 2-3 minutes. -
Step 4
Beat in eggs, one at a time, ensuring each is fully incorporated. Then, mix in vanilla extract until combined. -
Step 5
Gradually add the whisked dry ingredients to the wet mixture on low speed, mixing just until no streaks of flour remain. Avoid overmixing. -
Step 6
Using a rubber spatula, gently fold in 1 cup semi-sweet chocolate chips and ½ cup M&M’s Plain Chocolate Candies until evenly distributed. -
Step 7
Cover the bowl with plastic wrap and refrigerate the dough for at least 30 minutes, or up to 24 hours, for best results. -
Step 8
Using a 1.5-tablespoon cookie scoop, drop rounded balls of dough onto the prepared baking sheets, leaving about 2 inches between each cookie. -
Step 9
Bake one sheet at a time for 10-12 minutes, or until the edges are light golden brown and the centers are still slightly soft. -
Step 10
Immediately after removing from the oven, gently press a few of the reserved ¼ cup M&M’s onto the tops of the warm cookies. -
Step 11
Allow cookies to cool on the baking sheet for 5-10 minutes to set up properly. -
Step 12
Carefully transfer the slightly cooled cookies to a wire rack to cool completely. -
Step 13
Serve and enjoy. Store completely cooled cookies in an airtight container at room temperature for up to 5 days, or freeze for up to 3 months, separating layers with parchment paper.
Important Information
Nutrition Facts (Per Serving)
It is important to consider this information as approximate and not to use it as definitive health advice.
Allergy Information
Please check ingredients for potential allergens and consult a health professional if in doubt.


Leave a Comment