

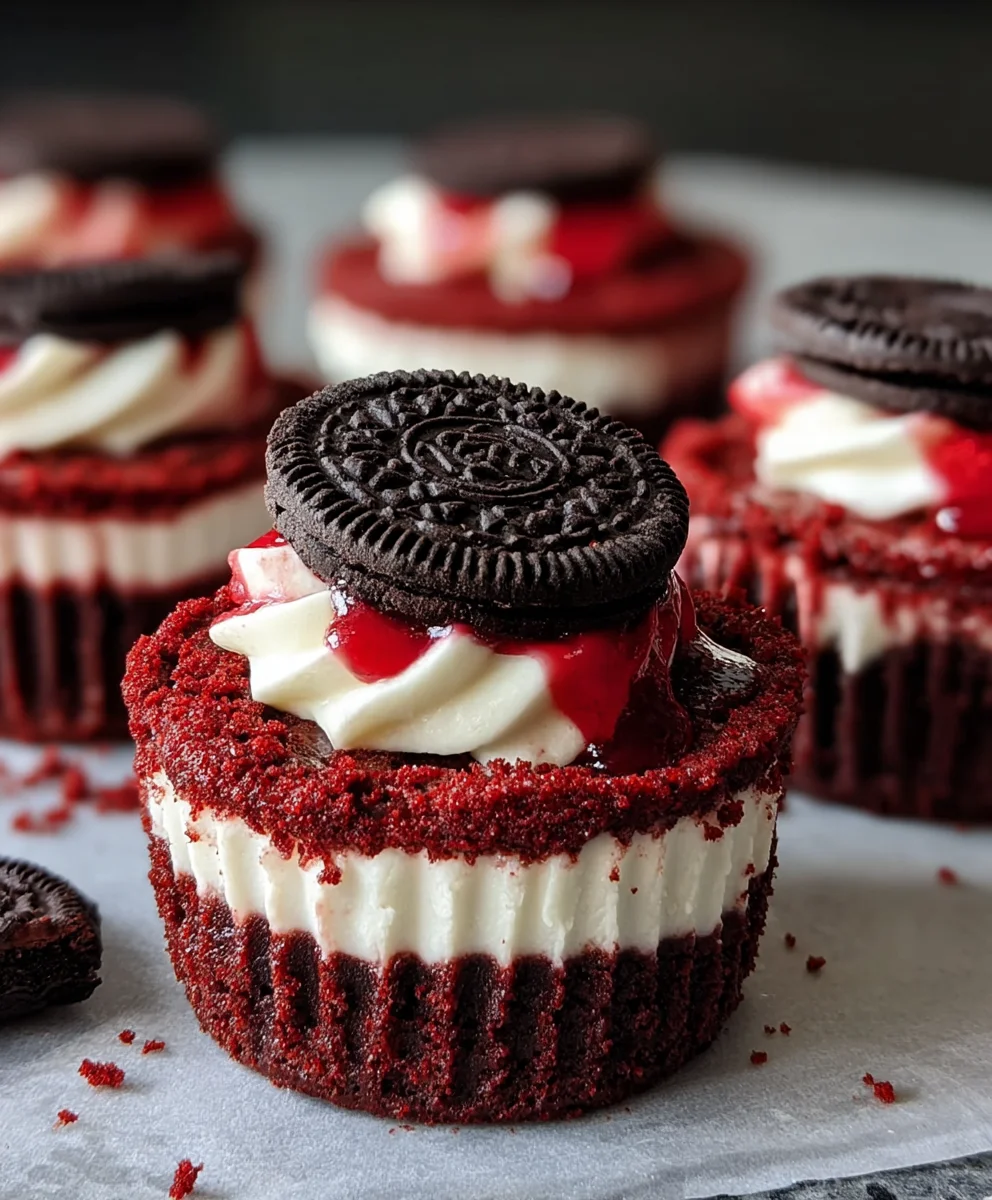
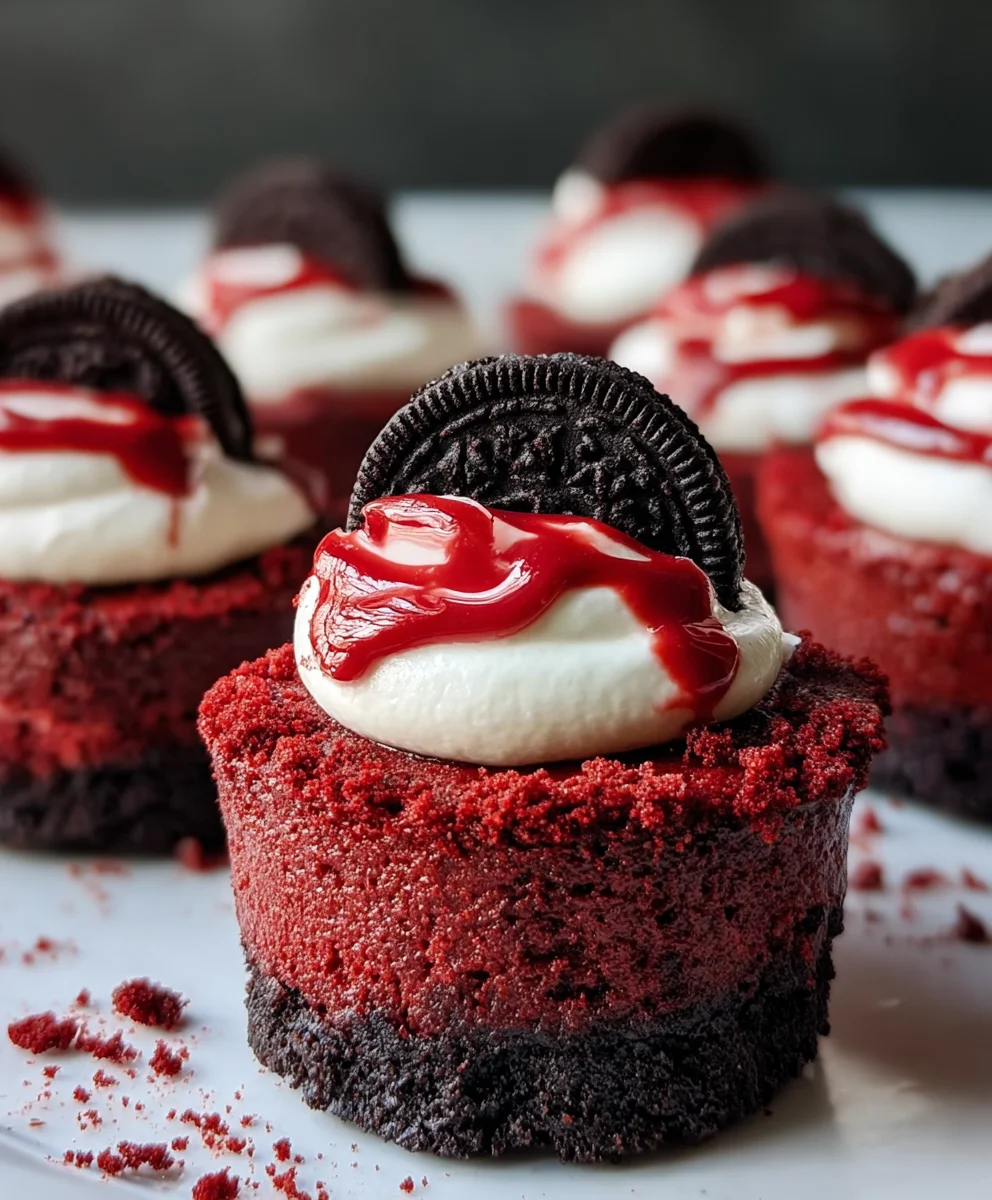
Mini Red Velvet Oreo Cheesecakes are more than just a dessert; they’re a decadent dream in miniature form. Imagin extracte biting into a creamy, velvety cheesecake filling, perfectly swirled with the distinct, rich chocolatey crunch of Oreo cookies, all nestled within a crimson-hued, subtly cocoa-infused crust. It’s no wonder these individual delights have captured so many hearts! People adore them because they deliver all the luxurious flavor and texture of a full-sized cheesecake, but in an utterly charming and perfectly portioned package. What truly sets these Mini Red Velvet Oreo Cheesecakes apart is the harmonious marriage of two iconic treats: the sophisticated elegance of red velvet and the universally loved simplicity of Oreos. This recipe takes that beloved combination and elevates it into bite-sized masterpieces, making them ideal for parties, special occasions, or simply when you crave a truly spectacular treat that’s both visually stunning and impossibly delicious. Get ready to fall in love with this delightful creation.
Ingredients:
- 12 Oreo cookies
- 3 tablespoons all-purpose flour
- 1/2 cup cocoa powder (divided)
- 1/2 cup granulated sugar (divided)
- 1/4 cup unsalted butter, melted
- 2 large eggs, room temperature (divided)
- 1 teaspoon vanilla extract (divided)
- Pinch of salt
- 8 oz cream cheese, room temperature
- 1/4 cup sour cream, room temperature
- Red gel food coloring
Crust Preparation
Step 1: Crushing the Oreos
To begin extract crafting these delightful Mini Red Velvet Oreo Cheesecakes, the first step involves preparing the base. Take your 12 Oreo cookies and place them into a food processor. Pulse them until they are finely crushed into small crum extractbs. If you don’t have a food processor, you can place the Oreos in a sturdy zip-top bag and crush them with a rolling pin. You’re aiming for a texture similar to coarse sand. It’s important that the cookies are broken down well to create a cohesive crust.
Step 2: Making the Oreo Crust Mixture
Once the Oreos are finely crushed, transfer them to a medium bowl. Add the 3 tablespoons of all-purpose flour, 1/4 cup of cocoa powder, and 1/4 cup of granulated sugar to the bowl with thrum extractreo crumbs. Whisk these dry ingredients together thoroughly to ensure they are evenly distributed. Now, pour in the 1/4 cup of melted unsalted butter. Stir everything together with a fork or a spatula until the mixture is well combined and resembles damp sand. This butterrum extractll bind the crumbs together, creating a sturdy crust for your mini cheesecakes.
Cheesecake Filling Preparation
Step 3: Assembling the Crust and Pre-baking
Now it’s time to get your crust into its mini form. You’ll need a muffin tin for this. Line a standard 12-cup muffin tin with paper liners or grease each cup thoroughly to prevent sticking. Divide the Oreo crust mixture evenly among the 12 muffin cups. Using the bottom of a small glass or your fingers, firmly press the mixture down into the base of each cup. This compaction is crucial for arum extractrm crust that won’t crumble when you cut into the cheesecake. Once pressed, place the muffin tin into a preheated oven at 325 degrees Fahrenheit (160 degrees Celsius). Bake the crusts for approximately 8-10 minutes. This pre-baking step helps to set the crust and achieve a slightly crispier texture. After baking, remove the muffin tin from the oven and let the crusts cool completely while you prepare the cheesecake filling. This cooling period is important; adding the filling to hot crusts can affect the texture.
Step 4: Creating the Red Velvet Cheesecake Batter
In a large gin extractl, begin by beating the 8 oz of room-temperature cream cheese until it is completely smooth and creamy. This ensures there are no lumps in your final cheesecake. Next, add the 1/4 cup of granulated sugar and the remaining 1/4 cup of cocoa powder. Beat these in until they are just combined. Scrape down the sides of the bowl frequently to make sure all ingredients are incorporated. Now, add the 1/4 cup of room-temperature sour cream and 1/2 teaspoon of vanilla extract. Mix again until the batter is smooth and uniform. This is where the vibrant color comes in. Add your red gel food coloring, starting with a few drops and mixing well. Continue adding food coloring, a drop at a time, and mixing thoroughly until you achieve your desired deep red velvet hue. Be patient here, as gel food coloring is concentrated and you want a rich color without making the batter too wet.
Step 5: Incorporating the Eggs and Finalizing the Batter
With the red velvet base thoroughly mixed, it’s time to add the eggs. Add one room-temperature egg to the cream cheese mixture and beat on low speed until just combined. Over-mixing at this stage can incorporate too much air, which can lead to cracks in your cheesecakes. Now, add the second room-temperature egg and the pinch of salt, along with the remaining 1/2 teaspoon of vanilla extract. Beat again on low speed until everything is just incorporated. The batter should be smooth and a beautiful, consistent red color. Remember, it’s better to under-mix slightly than to over-mix. The batter will thicken as it bakes.
Baking and Cooling
Step 6: Filling and Baking the Cheesecakes
Carefully ladle or spoon the red velvet cheesecake batter over the cooled Oreo crusts in the muffin tin. Fill each cup about two-thirds to three-quarters full. Try to distribute the batter as evenly as possible. Once filled, gently tap the muffin tin on the counter a couple of times to release any trapped air bubbles. Place the muffin tin back into the preheated 325 degrees Fahrenheit (160 degrees Celsius) oven. Bake for approximately 20-25 minutes, or until the edges of the cheesecakes are set and the centers are still slightly jiggly when you gently shake the tin. Avoid over-baking, as this will result in a dry cheesecake.
Step 7: Cooling and Chilling
After baking, remove the muffin tin from the oven. Let the mini cheesecakes cool in the muffin tin for about 10-15 minutes. This initial cooling period in the tin helps them to firm up gradually. Then, carefully lift each cheesecake out of the muffin tin (using the paper liners if you used them) and place them on a wire rack to cool completely to room temperature. Once they have reached room temperature, cover the cheesecakes loosely with plastic wrap and transfer them to the refrigerator. Chill them for at least 4 hours, but preferably overnight. This chilling process is essential for the cheesecakes to fully set and for the flavors to meld beautifully. The texture will be perfectly creamy and dense after adequate chilling.
Conclusion:
You’ve now got all the tools to create absolutely divine Mini Red Velvet Oreo Cheesecakes! This recipe is a delightful fusion of rich, creamy cheesecake and the irresistible chocolatey crunch of Oreos, all elevated by the decadent charm of red velvet. They’re surprisingly simple to make, making them perfect for both begin extractner bakers and seasoned pros looking for a crowd-pleasing dessert. Don’t be afraid to get a little creative!
These Mini Red Velvet Oreo Cheesecakes are fantastic served chilled, allowing the cheesecake to set perfectly. For an extra touch of elegance, consider topping them with a dollop of whipped cream, a sprinkle of chocolate shavings, or even a few extra crushed Oreos. They are wonderful as individual desserts for parties, potlucks, or simply as a special treat for yourself.
If you’re feeling adventurous, try adding a swirl of cream cheese frosting to the top before baking, or experiment with different colored cake batters for a fun twist. Remember, baking is all about enjoyment and making it your own. So, go ahead, whip up a batch of these delicious Mini Red Velvet Oreo Cheesecakes and watch them disappear!
Frequently Asked Questions about Mini Red Velvet Oreo Cheesecakes:
Q: Can I make these ahead of time?
Absolutely! Mini Red Velvet Oreo Cheesecakes can be made up to two days in advance and stored in an airtight container in the refrigerator. This makes them an excellent choice for entertaining, as you can prepare them well before your guests arrive.
Q: What if I don’t have mini muffin tins?
While mini muffin tins are ideal for creating individual portions, you can adapt this recipe for a larger springform pan. You’ll likely need to adjust the baking time, so keep an eye on it and test for doneness with a toothpick in the center. The baking time will be longer for a full-sized cheesecake.
Mini Red Velvet Oreo Cheesecakes-Decadent Bites
Indulge in these decadent mini red velvet Oreo cheesecakes, featuring a chocolatey Oreo crust and a rich, creamy red velvet cheesecake filling.
Ingredients
-
12 Oreo cookies
-
3 tablespoons all-purpose flour
-
1/2 cup cocoa powder
-
1/2 cup granulated sugar
-
1/4 cup unsalted butter, melted
-
2 large eggs, room temperature
-
1 teaspoon vanilla extract
-
Pinch of salt
-
8 oz cream cheese, room temperature
-
1/4 cup sour cream, room temperature
-
Red gel food coloring
Instructions
-
Step 1
Crush Oreo cookies finely in a food processor or zip-top bag. Combine crumbs with flour, 1/4 cup cocoa powder, and 1/4 cup granulated sugar. Stir in melted butter until mixture resembles damp sand. -
Step 2
Line a muffin tin with paper liners or grease. Divide crust mixture evenly among 12 cups, pressing firmly into the base. Bake at 325°F (160°C) for 8-10 minutes. Let cool completely. -
Step 3
Beat cream cheese until smooth. Add 1/4 cup granulated sugar and 1/4 cup cocoa powder, beat until combined. Mix in sour cream and 1/2 teaspoon vanilla extract. Gradually add red gel food coloring until desired hue is achieved. -
Step 4
Beat in one egg at a time on low speed until just combined, scraping down the sides as needed. Add the pinch of salt and remaining 1/2 teaspoon vanilla extract. Mix until batter is smooth. -
Step 5
Spoon batter evenly over cooled crusts, filling each cup about two-thirds to three-quarters full. Tap the tin gently to release air bubbles. Bake at 325°F (160°C) for 20-25 minutes, until edges are set and centers are slightly jiggly. -
Step 6
Cool cheesecakes in the muffin tin for 10-15 minutes, then transfer to a wire rack to cool completely. Chill in the refrigerator for at least 4 hours, preferably overnight, before serving.
Important Information
Nutrition Facts (Per Serving)
It is important to consider this information as approximate and not to use it as definitive health advice.
Allergy Information
Please check ingredients for potential allergens and consult a health professional if in doubt.


Leave a Comment