

Easy Hanami Dango Recipe is your delightful passport to experiencing the vibrant essence of a Japanese spring right in your own kitchen. Imagine soft, wonderfully chewy mochi balls, each one subtly sweet and vibrantly colored in pink, white, and green, elegantly threaded onto a skewer. This iconic Japanese confection is far more than just a dessert; it’s a profound symbol of renewal, celebration, and the much-anticipated arrival of spring.
Historically, Hanami dango is inextricably linked with the cherished tradition of ‘Hanami,’ the annual cherry blossom viewing. As families and friends gather under the delicate, fleeting beauty of sakura trees across Japan, these charming dango skewers are a quintessential snack, perfectly embodying the lighthearted spirit of the season. The distinct tri-color palette holds deep cultural significance: pink often represents the blossoming cherry flowers themselves, white frequently symbolizes the lingering snows of winter or the purity of spring, and green signifies the lush new growth of leaves.
People absolutely adore this dish for its unique, satisfyingly chewy texture and its gentle, comforting sweetness that never overwhelms the palate. It’s a light, refreshing treat that appeals to all ages and makes any gathering feel incredibly special and visually appealing. And the most wonderful news? Crafting this beautiful and traditional delicacy is far more straightforward than you might anticipate. I am so excited to guide you through an Easy Hanami Dango Recipe that will allow you to recreate this enchanting taste of spring with confidence and pure joy!
Ingredients:
- 150 grams Shiratamako (Japanese sweet rice flour)
- 30 grams Joshinko (Japanese non-glutinous rice flour)
- 120-150 ml warm water (adjust as needed)
- 2-3 drops red food coloring (for pink dango)
- 1/4 teaspoon matcha green tea powder (for green dango)
- 1-2 tablespoons hot water (for matcha paste)
- Bamboo skewers (8-10 skewers, or more depending on preferred dango size)
- Pinch of salt (optional, for enhancing flavor)
Preparing the Dango Dough
Making the dough for this Easy Hanami Dango Recipe is a process of getting the right texture, and it’s surprisingly forgiving once you get the hang of it. We’ll be making three separate batches of dough for our beautiful pink, white, and green dango.
- Prepare the Dry Ingredients: In a large mixing bowl, combine the 150 grams of Shiratamako and 30 grams of Joshinko. I like to add a tiny pinch of salt here, about 1/8 teaspoon, as it really helps to bring out the subtle sweetness of the rice flour. Use a whisk or a fork to thoroughly combine the flours, making sure there are no lumps. This initial mix is important for an even texture in your final dango.
- Divide the Flour Mixture: Once your flours are well combined, divide this mixture equally into three separate bowls. Each bowl should contain approximately 60 grams of the flour blend. This careful division ensures that each color of dango will have a consistent texture and yield.
- First Batch: White Dango Dough: To the first bowl of flour mixture, gradually add about 40-50 ml of warm water, starting with less and adding more as needed. Use your hands to mix and knead the dough within the bowl. You’re aiming for a consistency similar to an earlobe – soft, pliable, and smooth, but not sticky. If it’s too dry and crumbly, add a tiny bit more water, perhaps a teaspoon at a time. If it feels too wet, you can add a small pinch of Shiratamako. This step is crucial for the texture of your Easy Hanami Dango. Knead for about 3-5 minutes until you have a smooth, elastic ball. Cover this dough ball with plastic wrap to prevent it from drying out while you work on the others.
- Second Batch: Pink Dango Dough: Take the second bowl of flour mixture. Begin by adding about 40-50 ml of warm water, just like with the white dough. Mix and knead it until it starts to come together. Once it’s a rough dough ball, add 2-3 drops of red food coloring. I prefer gel food coloring as it gives a more vibrant color without adding too much liquid. Knead the dough thoroughly until the color is evenly distributed and no streaks remain. If you want a more pastel pink, use less; for a brighter pink, add another drop. Continue kneading for 3-5 minutes until it reaches that perfect earlobe consistency. Cover this pink dough ball with plastic wrap.
- Third Batch: Green Dango Dough (Matcha): For the third and final batch, we’ll introduce the lovely green hue from matcha. First, in a small separate bowl, make a thin matcha paste by whisking 1/4 teaspoon of matcha powder with 1-2 tablespoons of hot water. Make sure there are no lumps in your matcha paste – a bamboo whisk (chasen) works wonderfully here if you have one, but a small regular whisk or fork is fine too. Let it cool slightly. To the third bowl of flour mixture, add about 30-40 ml of warm water and your cooled matcha paste. Mix and knead the dough. The matcha will provide a beautiful, subtle green color and a delicate earthy flavor that complements this Easy Hanami Dango Recipe beautifully. If the color isn’t vibrant enough for your liking, you can add a tiny drop of green food coloring, but I usually find the matcha alone sufficient and more natural. Knead for 3-5 minutes until the color is consistent and the dough is smooth and pliable. Cover this green dough ball with plastic wrap.
- Rest the Doughs: Let all three covered dough balls rest at room temperature for about 10-15 minutes. This brief resting period helps the flours hydrate fully and makes the dough even more pliable and easier to work with. It’s a small step that makes a big difference in the final texture of your dango.
Shaping the Dango
Now comes the fun part where our colorful doughs start to take shape! Aim for uniform sizes for an aesthetically pleasing skewer of Hanami Dango.
- Prepare Your Workspace: Lightly dust your clean work surface or a cutting board with a small amount of Shiratamako to prevent sticking. Have a plate or tray ready, lined with parchment paper, to place your shaped dango.
- Roll the White Dango: Take your white dough ball. Pinch off small pieces of dough, about 8-10 grams each (roughly the size of a large marble or a small cherry). Roll each piece between your palms to form a smooth, round ball. Try to make them as uniform in size as possible. As you roll them, place them on your prepared tray. You should get about 10-12 white dango balls from this batch.
- Roll the Pink Dango: Repeat the process with your pink dough ball. Pinch off 8-10 gram pieces and roll them into smooth, round balls. Place these on the tray with the white dango, or on a separate section if you prefer to keep them organized by color. Aim for the same number of pink dango balls as white.
- Roll the Green Dango: Finally, repeat the process with your green dough ball, shaping them into equally sized spheres. By now, you should be a pro at rolling dango! Make sure all your dango balls are relatively consistent in size; this helps them cook evenly and look beautiful on the skewers.
- Check for Cracks: As you roll, if you notice any cracks forming in the dango balls, it means your dough might be a little dry. You can add a tiny drop of water to your hands and gently knead that particular piece of dough again until it’s smooth before re-rolling. Smooth dango balls are key for that perfect chewy texture.
Cooking the Dango
Boiling the dango is a quick process, but it requires attention to ensure they are perfectly cooked – tender yet delightfully chewy.
- Prepare the Boiling Water: Fill a large pot with water and bring it to a rolling boil over high heat. While you’re waiting for it to boil, prepare a large bowl of ice water next to your stovetop. This ice bath is essential for stopping the cooking process and keeping the dango chewy.
- Cook the Dango in Batches: Carefully drop the dango balls into the boiling water, one color at a time, or mix colors if you prefer to save time. Do not overcrowd the pot; cook them in batches if necessary. Overcrowding can lower the water temperature and lead to uneven cooking.
- Wait for Them to Float: The dango will sink to the bottom of the pot initially. After a few minutes, you’ll see them float to the surface. Once they float, let them cook for an additional 1-2 minutes. This ensures they are cooked through and not just floating due to air pockets.
- Transfer to Ice Bath: Using a slotted spoon or a fine-mesh skimmer, carefully scoop the cooked dango balls out of the boiling water. Immediately transfer them into the prepared bowl of ice water. This sudden temperature change helps to set their shape and gives them that characteristic springy, chewy texture that we all love in an Easy Hanami Dango Recipe. Let them chill in the ice bath for about 5 minutes.
- Drain and Pat Dry: After chilling, remove the dango from the ice bath using your slotted spoon. Place them on a plate lined with a clean kitchen towel or paper towels. Gently pat them dry to remove any excess water. This step is important for them to adhere well to the skewers and for a better mouthfeel.
Assembling the Hanami Dango
Now for the grand finale – assembling your beautifully cooked dango onto skewers, creating that iconic Hanami Dango look!
- Prepare Your Skewers: Take your bamboo skewers. If you’re using fresh bamboo skewers, it’s a good idea to soak them in water for about 10-15 minutes before use. This helps prevent them from splintering and makes it easier to slide the dango on.
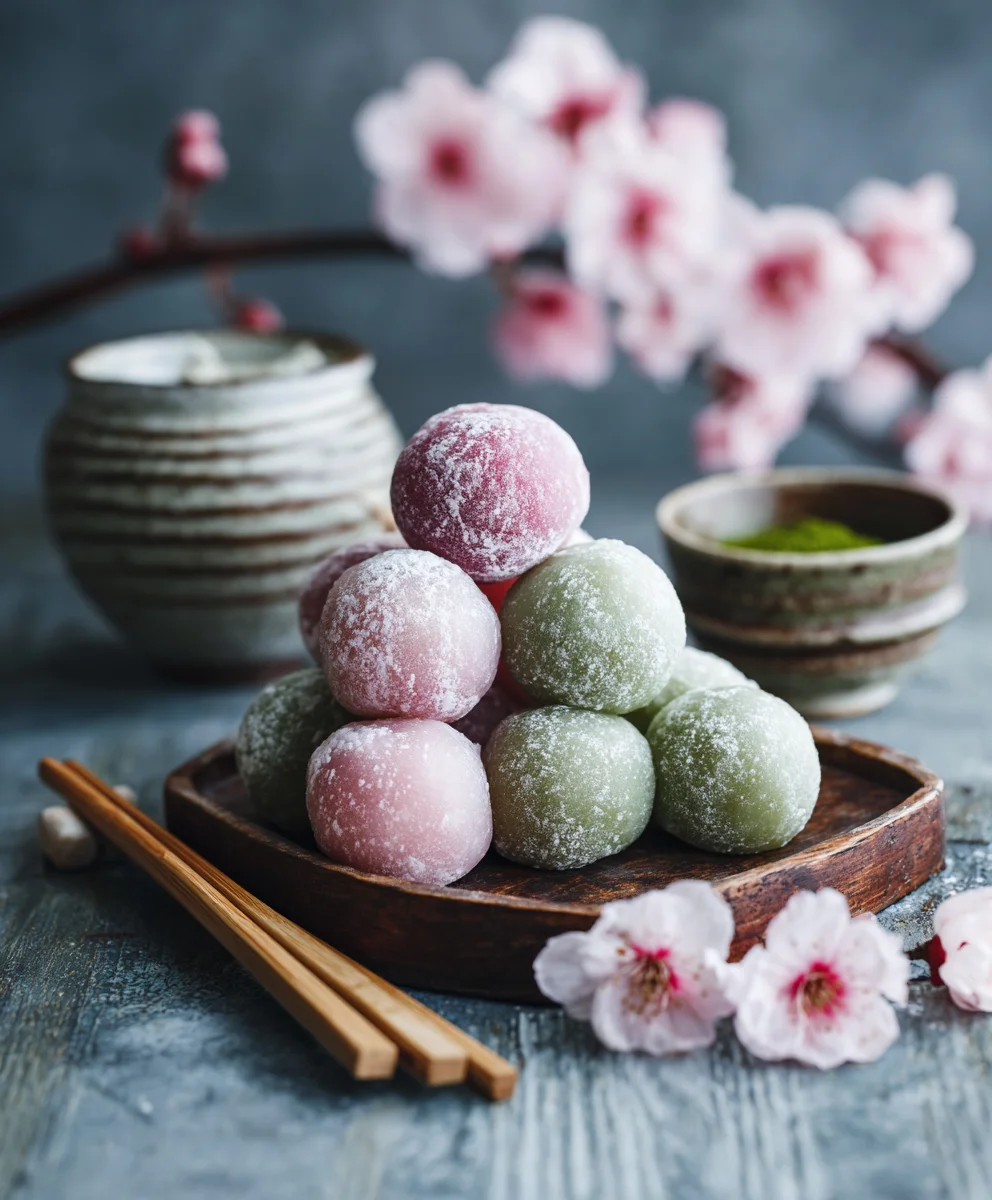
- Skewer the Dango: Traditionally, Hanami Dango are skewered in a specific color order: pink, white, and then green. Pick up one pink dango ball, thread it onto a skewer, pushing it about halfway down. Then, thread a white dango ball, followed by a green dango ball. Repeat this pattern for all your skewers.
- Adjust for Presentation: Gently push the dango balls together so they are snug on the skewer but not squashed. You want them to look plump and inviting. The contrasting colors of pink, white, and green are what make this Easy Hanami Dango Recipe so visually appealing and perfect for spring celebrations.
- Serving Suggestions: Your Hanami Dango are now ready to be enjoyed! They are best served fresh, ideally on the same day they are made. They make a wonderful treat for picnics, especially during cherry blossom season, or simply as a delightful snack at home.
Tips for the Perfect Easy Hanami Dango
- Flour Quality Matters: Using good quality Shiratamako and Joshinko makes a significant difference. Shiratamako gives the dango its characteristic chewiness, while Joshinko provides a slightly firmer texture that helps the dango hold its shape. Don’t substitute these flours with regular rice flour or mochiko if you want authentic dango texture.
- Water Temperature: Using warm water for the dough helps the flour absorb better and results in a smoother, more pliable dough. Avoid using cold water, as it can make the dough stiff and difficult to work with.
- Storage: If you have any leftover dango, store them in an airtight container at room temperature for a few hours, or in the refrigerator for up to one day. However, dango tend to harden when refrigerated. To soften them up again, you can gently microwave them for 10-20 seconds or steam them briefly until soft.
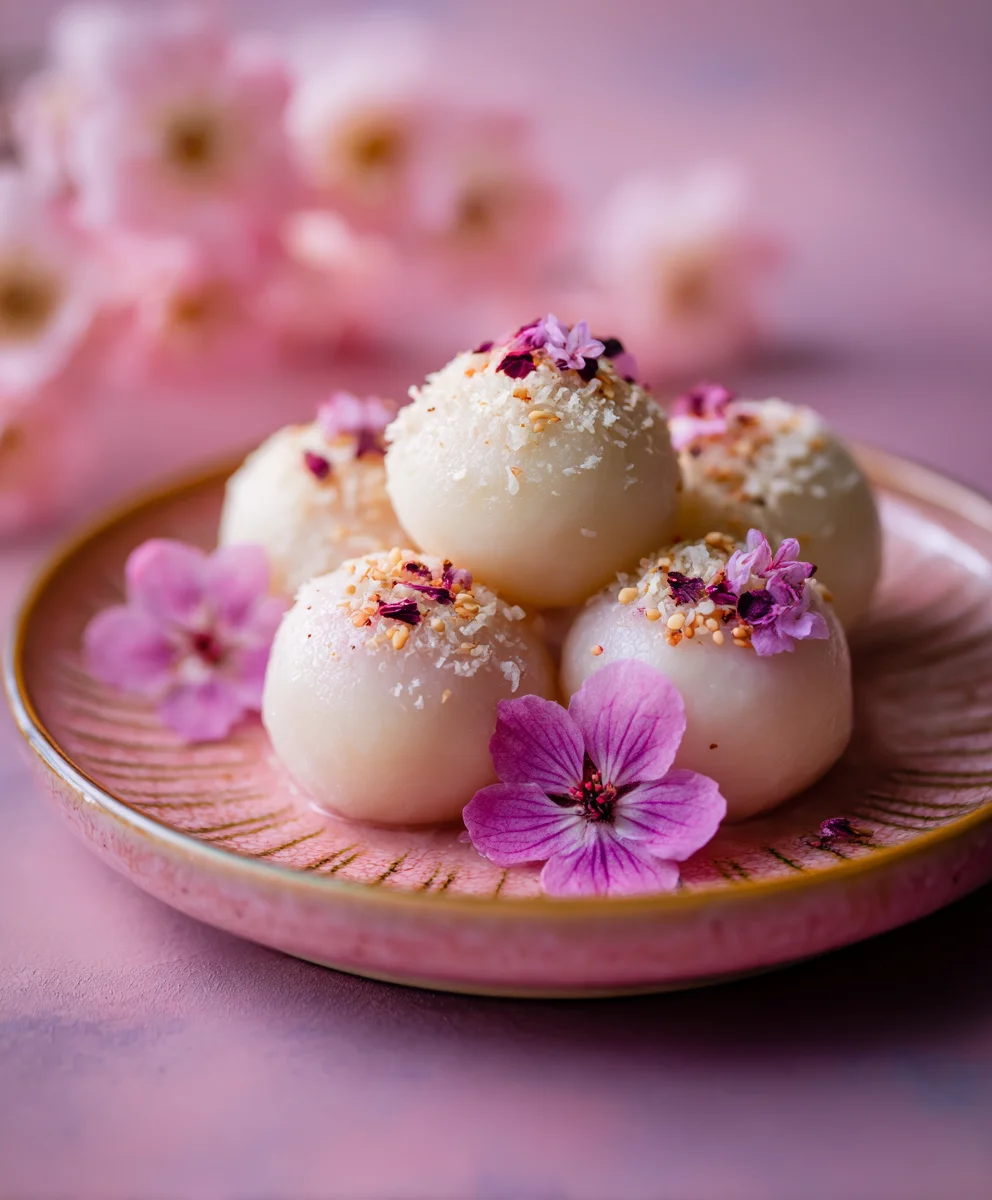
- Get Creative with Colors: While pink, white, and green are traditional for Hanami Dango, feel free to experiment with other natural food colorings or flavors! A little cocoa powder for brown, or a touch of purple yam powder, could add an interesting twist to your easy Hanami Dango recipe.
- Serve with a Side: Hanami Dango are often enjoyed plain, letting their subtle flavor shine. However, you can also serve them with a drizzle of mitarashi sauce (a sweet soy glaze), kinako (roasted soybean flour), or a touch of anko (sweet red bean paste) for an extra layer of flavor. These additions can elevate your homemade dango experience even further.
Conclusion:
Well, there you have it! I truly hope you’ve enjoyed this culinary journey with me, discovering the simple magic behind one of Japan’s most cherished springtime treats. Ultimately, what makes this recipe a true gem isn’t just its delightful taste or its stunning visual appeal, but the incredible ease with which you can bring such a special piece of culture right into your own kitchen. This isn’t just another sweet snack; it’s an experience, a moment of edible art, and a fantastic way to celebrate the fleeting beauty of spring, no matter the season. I’ve poured my heart into ensuring that every step is as straightforward and enjoyable as possible, aiming to demystify traditional Japanese confections for the home cook. The unique, chewy texture, often described as wonderfully “mochi-like,” combined with the subtle, comforting sweetness, creates an absolutely irresistible bite. When you finally hold those perfectly spherical, pastel-colored dango skewers, you’ll feel a sense of accomplishment that few other recipes can provide. It’s a testament to how humble ingredients can be transformed into something truly extraordinary with just a little bit of care and attention. I particularly love how the three distinct colors, reminiscent of cherry blossoms, green leaves, and the earth, come together to form such a harmonious and inviting presentation. It’s a feast for both the eyes and the palate, promising a moment of serene enjoyment with every delicate piece.
But the fun doesn’t stop once your beautiful dango are made! While they are absolutely perfect enjoyed just as they are, perhaps with a warm cup of freshly brewed green tea to cleanse the palate and enhance their delicate flavor, don’t be afraid to get creative with your serving. Imagine pairing these lovely skewers with a small scoop of vanilla bean ice cream or a drizzle of your favorite fruit compote for a more modern dessert twist. For those who love a bit of extra flavor and texture, a light dusting of kinako (roasted soybean flour) or a sprinkle of matcha powder can add an earthy depth that beautifully complements the dango’s sweetness. Alternatively, if you’re feeling a little adventurous, you could even try a thin, sweet soy glaze (mitarashi style) brushed lightly over the finished dango for a savory-sweet counterpoint. Consider arranging them artfully on a platter with some fresh seasonal berries or thinly sliced melon for an elegant presentation that’s perfect for any gathering. And why stick to just pink, white, and green? You could experiment with natural food colorings to create festive dango for other holidays – perhaps orange and black for Halloween, or red and white for the winter season. The possibilities for customization are genuinely endless, allowing you to make this treat uniquely yours. Whether you choose to keep it traditional or put your own spin on it, the essence of the dango’s simple charm shines through.
So, please, don’t hesitate any longer. Gather your ingredients, put on your apron, and dive into the delightful process of making your very own batch. I am genuinely excited for you to experience the satisfaction that comes with creating something so delicious and beautiful from scratch. This Easy Hanami Dango Recipe is truly designed for success, regardless of your baking or cooking expertise. It’s a wonderful project for a quiet afternoon, a fun activity to share with family and friends, or simply a sweet reward for yourself. Once you’ve made these lovely dango, I would absolutely adore hearing about your experience! Did you stick to the classic colors, or did you get creative with variations? What were your favorite serving suggestions? Please feel free to share your culinary triumphs, your photos, and any unique twists you added. Your stories and successes are what truly bring these recipes to life for me, and I can’t wait to see the beautiful dango you create. Happy cooking, and happy tasting!
Easy Hanami Dango: Sweet Japanese Cherry Blossom Mochi!
Easy Hanami Dango Recipe is your delightful passport to experiencing the vibrant essence of a Japanese spring right in your own kitchen. Imagine soft, wonderfully chewy mochi balls, each one subtly sweet and vibrantly colored in pink, white, and green, elegantly threaded onto a skewer. This iconic Japanese confection is far more than just a dessert; it’s a profound symbol of renewal, celebration, and the much-anticipated arrival of spring.
Ingredients
-
150g Shiratamako
-
30g Joshinko
-
120-150ml warm water
-
2-3 drops red food coloring
-
1/4 tsp matcha green tea powder
-
1-2 tbsp hot water
-
Bamboo skewers (12)
-
Pinch of salt (optional)
Instructions
-
Step 1
Combine 150g Shiratamako, 30g Joshinko, and a pinch of salt. Divide into 3 equal portions (~60g each). -
Step 2
For White Dough: To one portion, gradually add 40-50ml warm water and knead until smooth and pliable. Cover. -
Step 3
For Pink Dough: To the second portion, gradually add 40-50ml warm water. Knead, then add 2-3 drops red food coloring and knead until color is even and dough is smooth. Cover. -
Step 4
For Green Dough: Prepare a matcha paste with 1/4 tsp matcha powder and 1-2 tbsp hot water. To the third portion of flour, add 30-40ml warm water and the cooled matcha paste. Knead until smooth and green. Cover. -
Step 5
Rest all three dough balls for 10-15 minutes at room temperature. -
Step 6
Lightly dust your workspace. From each colored dough ball, pinch off 12 pieces (approx. 20g each) and roll into smooth, uniform spheres (Total 36 balls). -
Step 7
Bring a large pot of water to a rolling boil. Prepare an ice bath. -
Step 8
Carefully drop dango balls into boiling water in batches. Cook until they float to the surface, then continue boiling for 1-2 minutes more. -
Step 9
Using a slotted spoon, transfer cooked dango immediately to the ice bath. Let chill for 5 minutes. -
Step 10
Remove dango from ice bath and pat dry with a towel. -
Step 11
(Optional) Soak bamboo skewers in water for 10-15 minutes. -
Step 12
Thread dango onto skewers in the traditional order: pink, white, green. Gently push them snug. -
Step 13
Serve fresh.
Important Information
Nutrition Facts (Per Serving)
It is important to consider this information as approximate and not to use it as definitive health advice.
Allergy Information
Please check ingredients for potential allergens and consult a health professional if in doubt.


Leave a Comment